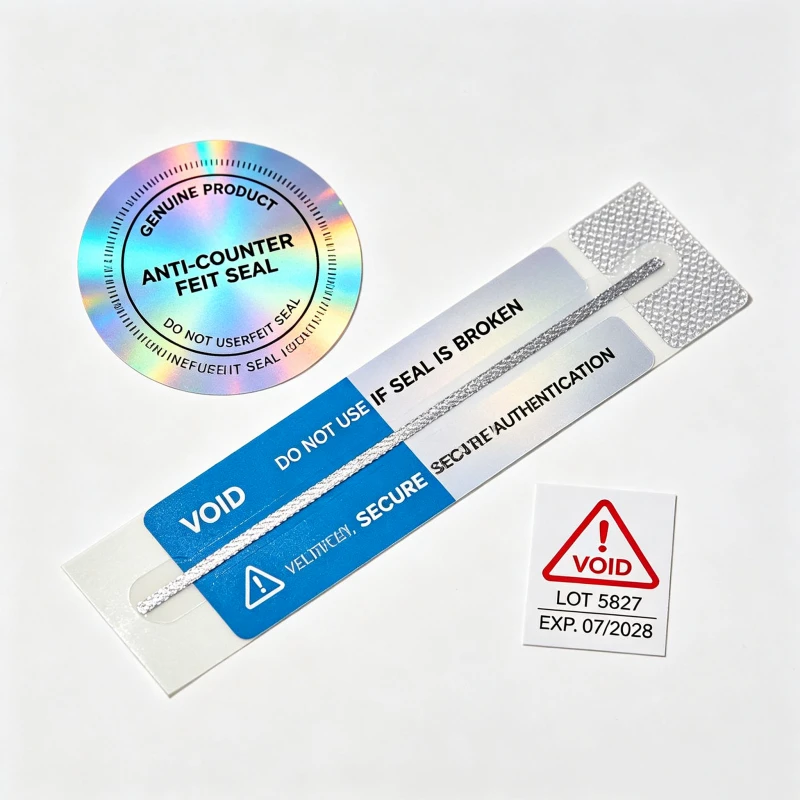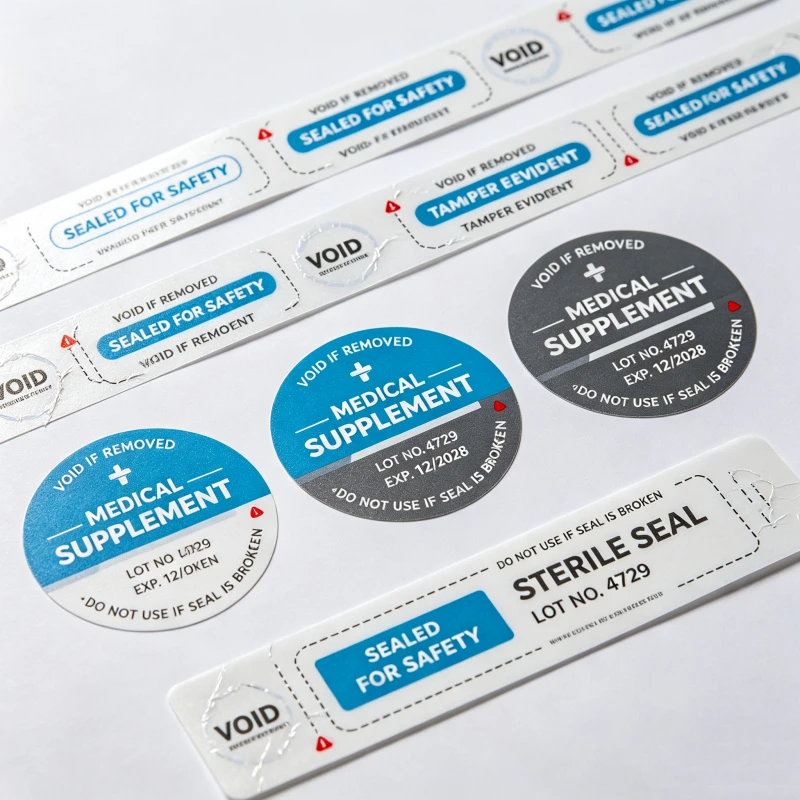
Double Layer Stickers: Types, Materials, Applications, and Custom

Double layer stickers are a practical labeling solution for businesses that need to display more information without increasing the size of the product label. By combining two label layers in one construction, manufacturers can create additional space for instructions, multilingual content, promotional messages, variable data, or product information that would otherwise overcrowd the packaging.

For importers, brand owners, packaging distributors, and industrial buyers, choosing the right double layer sticker involves more than selecting a shape and printing a design. Material compatibility, adhesive performance, opening structure, printing quality, and application conditions all influence the final result.

As a custom label manufacturer, we recommend evaluating double layer stickers based on their actual use environment and production requirements, not appearance alone.

What Are Double Layer Stickers?

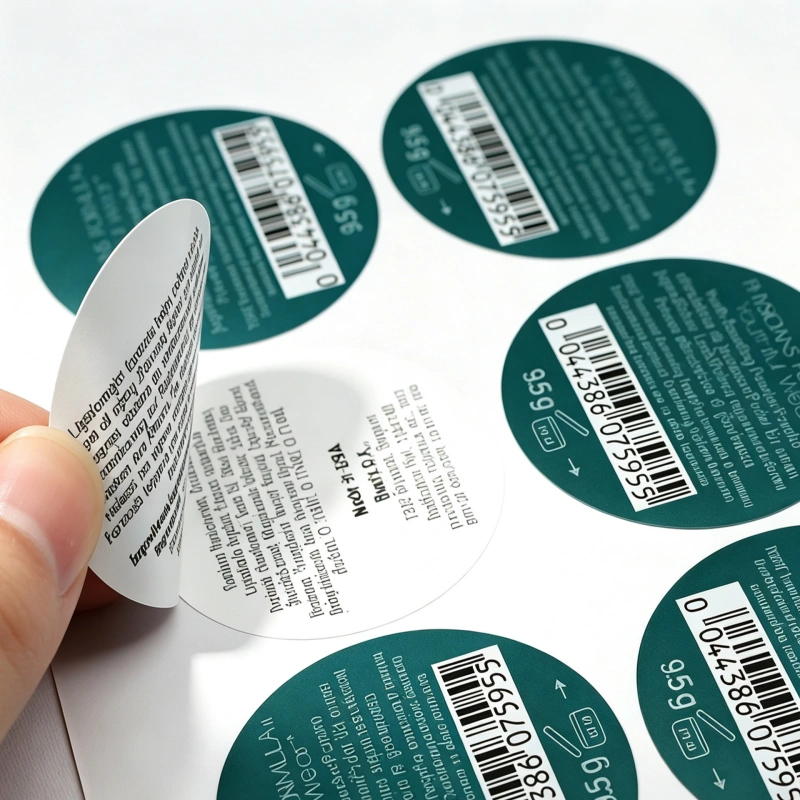
Double-layer stickers are a type of multi-layer label andself-adhesive labels constructed with two functional label layers. Depending on the design, you can peel back, lift, or separate the upper layer to reveal additional information underneath. Some designs use a resealable structure, while others use two adhesive labels arranged in a piggyback configuration.

Unlike a conventional single-layer sticker, which provides one main printable surface, a double-layer sticker offers additional usable space within approximately the same external label footprint.

The exact construction varies by application. In the label industry, related products may be described as double layer labels, peel-and-reveal labels, sandwich labels, piggyback labels, or multi-layer labels. These terms are related but are not always interchangeable.

For procurement purposes, buyers should confirm the opening mechanism, layer arrangement, adhesive positions, and whether the top layer must be resealable.

How Does a Double Layer Sticker Work?

A typical peel-and-reveal sticker consists of the following components:

  • Top layer: Displays the main branding, product name, or essential information.
  • Release or opening structure: Allows the user to lift or peel the upper layer.
  • Lower printable layer: Contains additional instructions, translations, promotional content, or technical details.
  • Adhesive system: Keeps the label attached to the package and may also control how the layers separate.
  • Release liner: Protects the application adhesive before you apply the sticker.

The precise arrangement depends on whether the label is intended for a bottle, carton, flexible package, product housing, or another surface.

For comparison, Avery Dennison explains that conventional pressure-sensitive labels generally consist of a facestock, adhesive, and liner. Double-layer constructions add further design considerations because the interaction between layers and adhesives must be controlled.
 

Why Do B2B Buyers Choose Double Layer Stickers?

The main purchasing motivation is usually to solve an information or packaging problem without changing the entire package design.

Buyer requirementHow double layer stickers help
Limited packaging spaceAdd a second printable surface without substantially increasing the label footprint
Multiple languagesSeparate the primary language from translations and supplementary information
Detailed instructionsPlace short instructions on top and longer guidance underneath
Promotional campaignsReveal coupons, offers, or additional product messages
Product variationsOrganize model-specific, batch-specific, or market-specific information
Packaging consistencyRetain a common outer design while adding application-specific content

The value is not simply having two layers. It’s about organizing information so the package is easier to understand and more practical to manufacture.

For example, a cosmetic brand selling the same product in several export markets may use the upper layer for its consistent brand design and the lower layer for translated usage instructions. This can help reduce visual clutter while supporting different market requirements. The final content and layout must still comply with the applicable labeling regulations.

Types of Double Layer Stickers

Before requesting a quotation, buyers should identify the construction that matches their application.

1. Peel-and-Reveal Stickers

Peel-and-reveal stickers feature an upper layer that lifts to expose the information underneath. Depending on the construction, the top layer may be resealable or designed to open only once.

Typical applications include:

  • Cosmetics and personal care products
  • Food and beverage packaging
  • Household chemical products
  • Promotional packaging
  • Products requiring additional instructions

Best for: Brands that need additional information while keeping the front-facing package design compact.

The key specification is the opening experience. If the top layer is difficult to lift, tears during opening, or fails to close as expected, customers may find the label frustrating to use.

2. Piggyback Double Layer Stickers

Piggyback labels generally consist of a top label attached to a second label, with a construction that allows the upper label to be removed and transferred to another surface.

They are often used for:

  • Shipping and logistics
  • Warehouse identification
  • Return labels
  • Inventory management
  • Forms and administrative workflows

Best for: Applications where a removable label needs to be transferred from one surface to another.

Buyers should confirm whether the removed label must adhere permanently, remain repositionable, or be removed cleanly from the original label.

3. Sandwich or Laminated Double Layer Labels

Sandwich constructions combine multiple materials into a layered label structure. Depending on the design, they can support additional printing space, protective layers, or specialized functional requirements.

Potential applications include industrial identification, product instructions, technical labels, and packaging that needs additional information capacity.

Best for: Projects that require a defined combination of printed layers, protective materials, and specific adhesive behavior.

A laminated structure is not automatically peelable. If the user must open the top layer, the manufacturer needs to design an appropriate opening and release mechanism.

4. Promotional Double Layer Stickers

Promotional versions may place a coupon, campaign message, QR code, or reward information under the main printed surface.

Applications include:

  • Retail promotions
  • Product sampling campaigns
  • Loyalty programs
  • Consumer engagement
  • Limited-edition packaging

For large campaigns, buyers should test opening performance and printing consistency across production batches. Also verify any QR code or variable data before shipment.
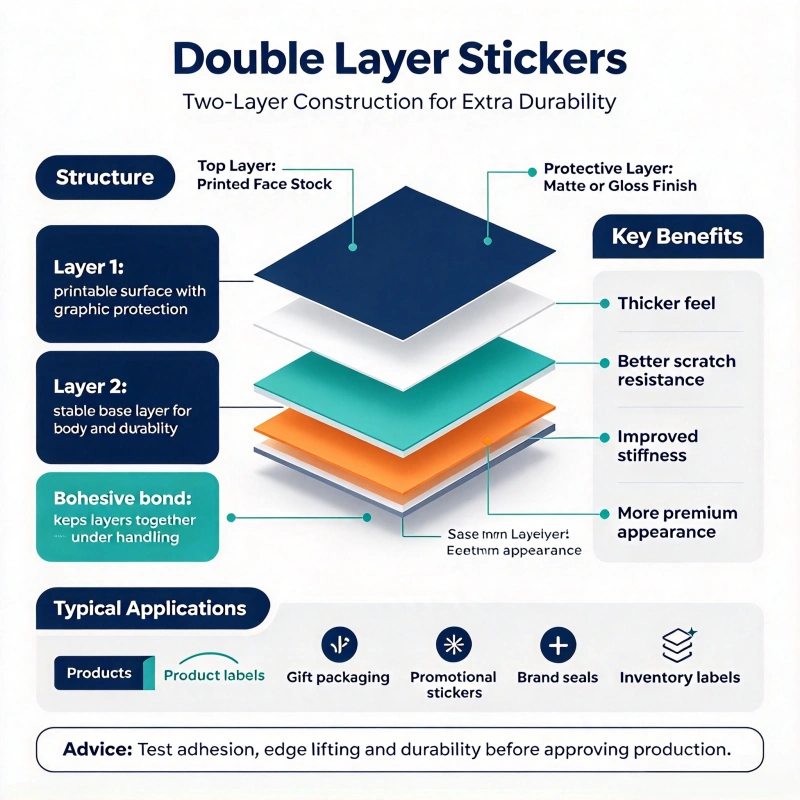
Which Materials Are Suitable for Double Layer Stickers?

Material selection affects print quality, durability, flexibility, cost, and how the label performs on the final package.

The correct combination depends on the substrate, exposure conditions, printing method, and required opening behavior.

MaterialMain advantagesCommon applicationsImportant considerations
Coated paperGood print quality and economical for many applicationsConsumer packaging, promotions, general product labelsMoisture and abrasion resistance depend on the paper, coating, and protective finish
Synthetic paperBetter resistance to tearing and moisture than many ordinary paper stocksHousehold products, industrial packaging, frequently handled labelsConfirm compatibility with the printing and converting process
PP filmLightweight, flexible, and suitable for many packaging labelsCosmetics, personal care, food packaging, household productsAdhesive selection and label stiffness must suit the package surface
PE filmFlexible and suitable for some squeezable containersBottles, tubes, flexible plastic packagingStretching and dimensional stability need to be considered
PET filmUseful where dimensional stability and durability are prioritiesIndustrial products, technical labels, selected premium packagingMay increase material cost and affect the feel and flexibility of the label
Protective laminate or coatingCan improve resistance to handling, moisture, or abrasion when properly selectedLabels requiring additional surface protectionMust not interfere with peeling, resealing, or printing

Avery Dennison’s published material portfolio includes examples of transparent PP film at approximately 50 microns and PE film around 80–85 microns. These are examples of available facestock specifications, not universal requirements for double layer stickers. Actual material thickness should be selected according to the label construction and end use.
Source: Avery Dennison Japan — Pressure-Sensitive Label Material Listings.

How to Select the Right Adhesive

The adhesive system deserves special attention because a double layer sticker may need to perform two different jobs: remain securely attached to the product and allow the upper layer to open as intended.

Consider these questions before approving a material specification:

  1. Is the label applied to paperboard, glass, metal, PET, PP, PE, or another substrate?
  2. Is the application surface flat, curved, textured, oily, or low in surface energy?
  3. Will the product be exposed to moisture, refrigeration, heat, chemicals, or outdoor conditions?
  4. Must the top layer be resealable, removable, or transferable?
  5. Will the labels be applied by hand or on an automatic labeling line?

Avery Dennison’s technical information explains that adhesive selection depends on application requirements and the properties of the receiving surface. Its guidance also emphasizes that pressure-sensitive materials should be evaluated under the intended conditions.
Source: Avery Dennison — Adhesion Characteristics.

Our manufacturing recommendation: Do not approve an adhesive based only on a general description such as “strong adhesive.” Define the required behavior and test the complete label on the actual packaging material.

What Information Can Be Printed on Double Layer Stickers?

A double layer sticker can separate the information that customers need immediately from details they may need to consult later.

Common content includes:

  • Product names, branding, and key benefits
  • Usage instructions and warnings
  • Ingredients or technical information
  • Multilingual product information
  • Batch numbers and variable data
  • QR codes, barcodes, and traceability information
  • Promotional offers and campaign messages
  • Storage guidance and product-specific instructions

However, extra label space does not automatically make a product compliant with local regulations.

For pharmaceutical products, for example, the U.S. Food and Drug Administration provides specific resources on carton and container labeling, including applicable requirements for product information and barcodes. Buyers must verify which requirements apply to their particular product and market before finalizing the artwork.
Source: FDA — Carton and Container Labeling Resources.

For regulated products, we recommend that the buyer’s regulatory or compliance team approve all mandatory text, warning statements, and layout requirements before mass production.
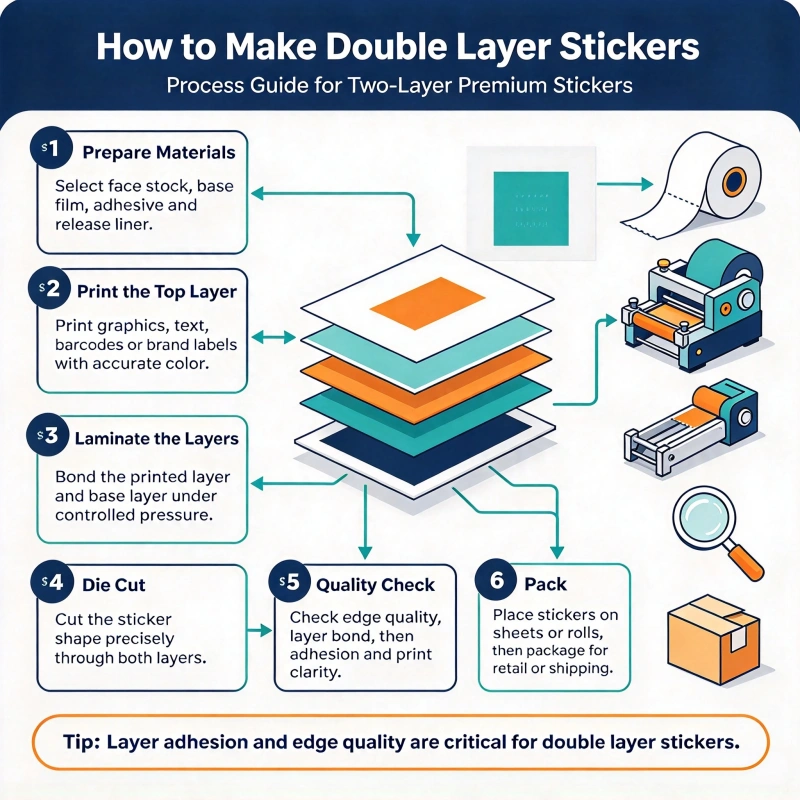
How Are Custom Double Layer Stickers Manufactured?

A reliable production process starts with the intended use, not the printing machine. The structure must be designed around the information, packaging material, opening mechanism, and production volume.

Step 1: Confirm the Application Requirements

The buyer and manufacturer should establish:

  • Final label dimensions and shape
  • Package material and surface geometry
  • Number of printable layers
  • Required opening and closing behavior
  • Environmental exposure
  • Printing and variable-data requirements
  • Application method and order quantity

This information reduces the risk of selecting a structure that looks correct in the artwork but fails during actual use.

Step 2: Design the Layer Structure

The manufacturer determines the face materials, adhesive positions, release characteristics, and any protective coatings or laminations.

For peel-and-reveal labels, the design must balance the force needed to open the label with the need to keep the top layer stable during storage, transportation, and application.

For piggyback labels, the structure must support the intended transfer and adhesion behavior.

Step 3: Prepare Artwork and Printing

Arrange artwork according to the printable area of each layer. Important information must not fall within die-cutting tolerances, opening areas, or sections that hide when the top layer closes.

Depending on the design and production requirements, printing may include flexographic, digital, offset, or other suitable processes.

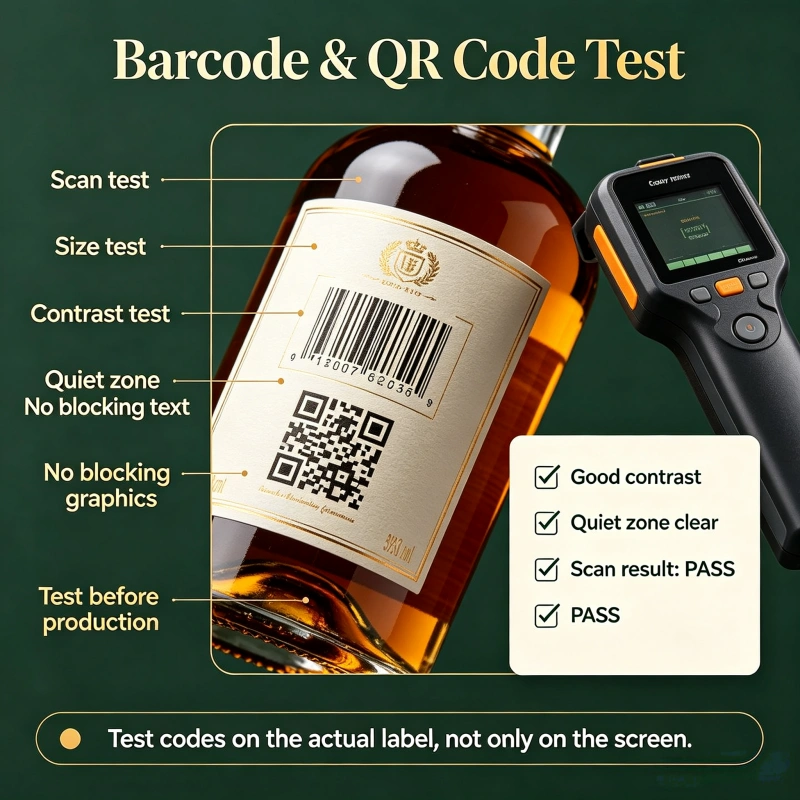
For projects involving barcodes or QR codes, verify readability after printing and converting, rather than relying only on the digital artwork file.

Step 4: Laminate, Convert, and Die-Cut

The printed materials are combined according to the approved construction. The manufacturer then performs the required converting operations, such as lamination, adhesive application, die-cutting, and slitting.

For complex double layer structures, registration between the printed layers and die-cut lines is particularly important. Misalignment may hide text, affect opening performance, or make the finished label look inconsistent.

Step 5: Inspect and Test the Finished Labels

A suitable quality plan may include:

  • Print clarity and color consistency
  • Layer alignment and die-cut accuracy
  • Adhesion to the intended package
  • Ease of opening and, where applicable, resealing
  • Resistance to handling and transportation
  • Barcode or QR-code readability
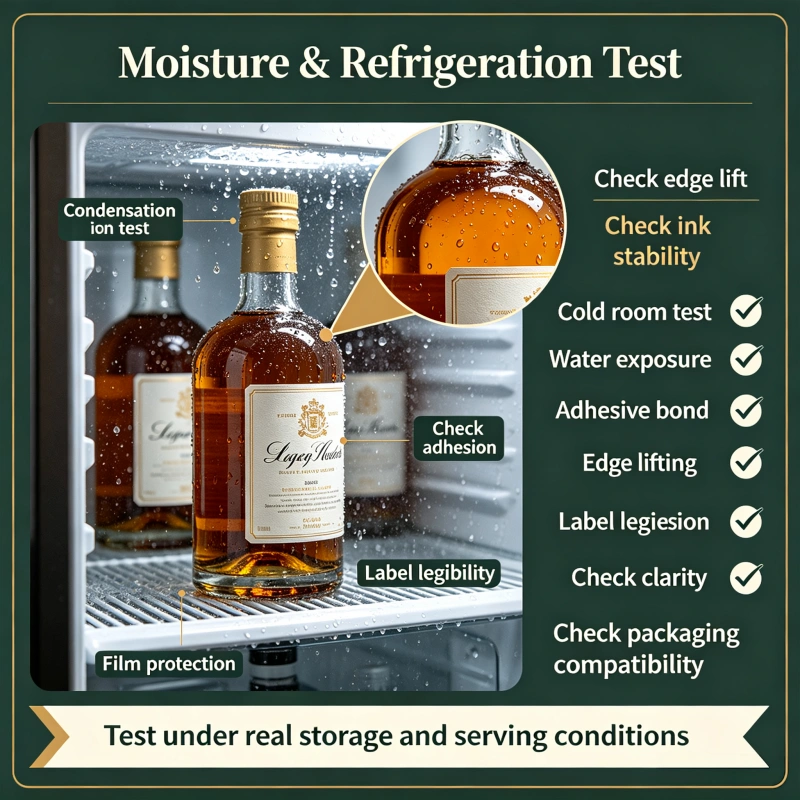
  • Performance under relevant temperature and moisture conditions

The exact tests and acceptance limits should be agreed upon before mass production. There is no single universal test specification for every double layer sticker.

Step 6: Approve Samples Before Mass Production

We recommend testing production-representative samples on the customer’s actual packaging.

A sample should be checked under realistic conditions, including the intended application method, storage environment, handling process, and opening behavior.

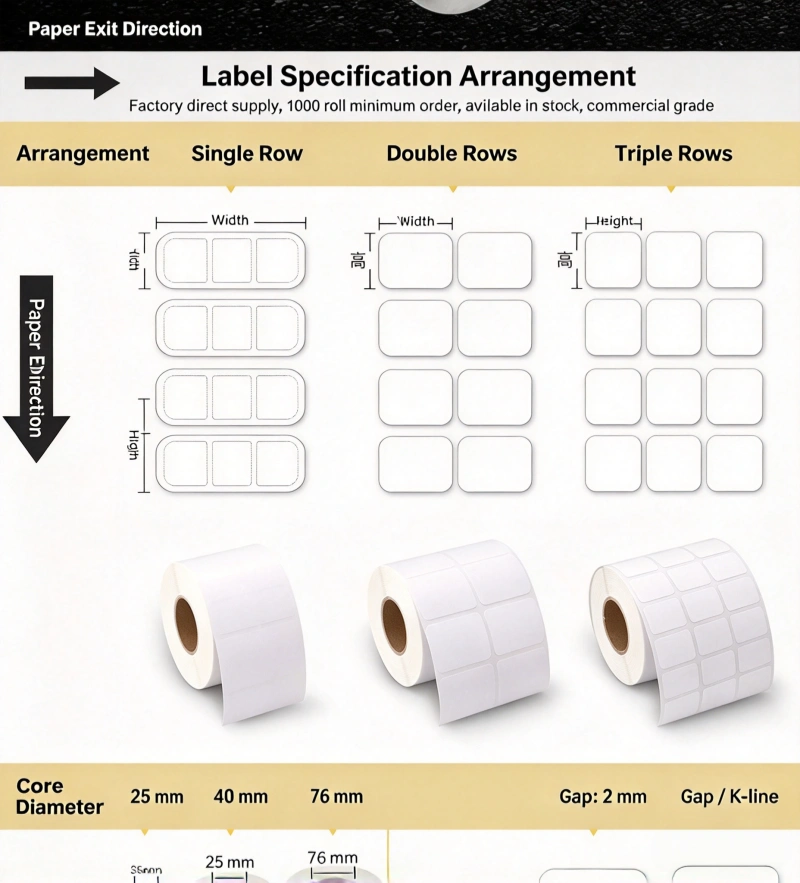
For automatic application, the buyer should also confirm roll direction, core size, roll diameter, label gap, and other machine-specific requirements with the label manufacturer.

Common Double Layer Sticker Problems and Practical Solutions

Common problemLikely causeRecommended solution
Top layer is difficult to peelOpening design or release characteristics are unsuitableAdjust the opening feature and layer-release behavior; test with intended users
Top layer lifts during transportationInsufficient layer stability or unsuitable adhesive combinationReview adhesive compatibility, construction, and packaging conditions
Label edges curlMaterial stiffness, adhesive, package curvature, or application conditions are unsuitableTest alternative materials and adhesives on the actual container
Printed layers are misalignedRegistration or converting tolerances are not adequately controlledDefine alignment tolerances and inspect samples during production
Text is too small to readToo much information is placed in a limited areaReorganize content across the layers and confirm legibility before printing
QR codes or barcodes fail to scanArtwork, print quality, contrast, size, or converting affects readabilityVerify the code size and contrast, then test the finished label with suitable scanners
Labels do not adhere reliablyThe adhesive is incompatible with the substrate or application environmentTest the intended adhesive on the actual surface under end-use conditions
The top layer cannot be resealed reliablyThe structure was designed for opening rather than repeated closureSpecify resealability as a functional requirement from the beginning

The most cost-effective solution is usually to identify the failure mode during sampling rather than after the full order has been printed and converted.

How Much Do Double Layer Stickers Cost?

There is no single factory price for double layer stickers. The cost depends on the construction, materials, printing coverage, dimensions, order quantity, and quality requirements.

For B2B buyers, the main cost factors are:

Cost factorHow it affects the quotation
Label sizeLarger labels typically require more material
Number and type of layersAdditional layers and specialized constructions can increase converting costs
Face materialPaper and film options differ in price and performance
Adhesive systemSpecialized adhesion, removability, or resealability may require a different construction
Printing colors and coverageArtwork complexity and printing method affect production costs
Die-cutting and finishingCustom shapes, perforations, laminations, and special opening features may add cost
Order quantitySetup costs are distributed differently across small and large orders
Inspection and testingSpecial performance requirements may add sampling or quality-control costs
Packaging and deliveryRoll specifications, packing requirements, freight, and destination affect total landed cost

When comparing suppliers, buyers should request quotations based on the same specifications. A low unit price is not a meaningful comparison if one supplier quotes a basic two-layer structure while another includes protective finishing, specialized adhesive, or additional quality testing.

To obtain an accurate quote, provide the target dimensions, material preference, number of layers, artwork, order quantity, package substrate, opening requirements, and delivery destination.

How to Choose a Reliable Double Layer Sticker Manufacturer

For importers, wholesalers, and brand owners, a capable supplier should do more than print the submitted artwork.

Evaluate potential manufacturers using the following checklist:

1. Construction design capability

Ask whether the supplier can recommend an appropriate structure for your packaging and information requirements, including the opening mechanism and adhesive system.

2. Material selection

Confirm that the supplier can explain the differences between paper, PP, PE, PET, and relevant adhesive options in relation to your actual use case.

3. Printing and converting consistency

Request production samples and confirm the supplier’s controls for print quality, layer alignment, die-cutting, and roll specifications.

4. Quality testing

Ask which tests are available for adhesion, opening performance, barcode readability, and environmental exposure. Ensure that the proposed test conditions match your requirements.

5. Artwork and sampling support

A reliable supplier should identify potential layout and production problems before approving the final artwork.

6. Export and packaging experience

If you are purchasing for multiple markets, discuss packaging protection, carton labeling, shipment requirements, and any documentation your procurement process needs.

7. Transparent quotations

Require the supplier to specify the material construction, dimensions, printing, finishing, quantity, packaging, and delivery terms. This makes supplier comparisons more meaningful.

Custom Double Layer Stickers for Wholesale and OEM Projects

As a custom label manufacturer, we can help B2B buyers evaluate double-layer sticker structures based on the intended application, required information, package material, and order volume.

For OEM and private-label projects, start with clear specifications rather than a generic request for “two-layer stickers.” We recommend confirming the following details before production:

  • Product type and application
  • Label dimensions and shape
  • Number of printable layers
  • Face material and adhesive requirements
  • Opening or resealing mechanism
  • Artwork and language requirements
  • Printing method and finishing preferences
  • Estimated order quantity
  • Application method and delivery requirements

With these details, the manufacturer can recommend a suitable construction, prepare samples, and provide a quotation based on the actual requirements.

Planning a double layer sticker project? Send your label dimensions, artwork, intended use, and estimated quantity to your supplier. A properly specified sample is the best starting point for evaluating print quality, adhesion, opening performance, and production suitability before placing a bulk order.
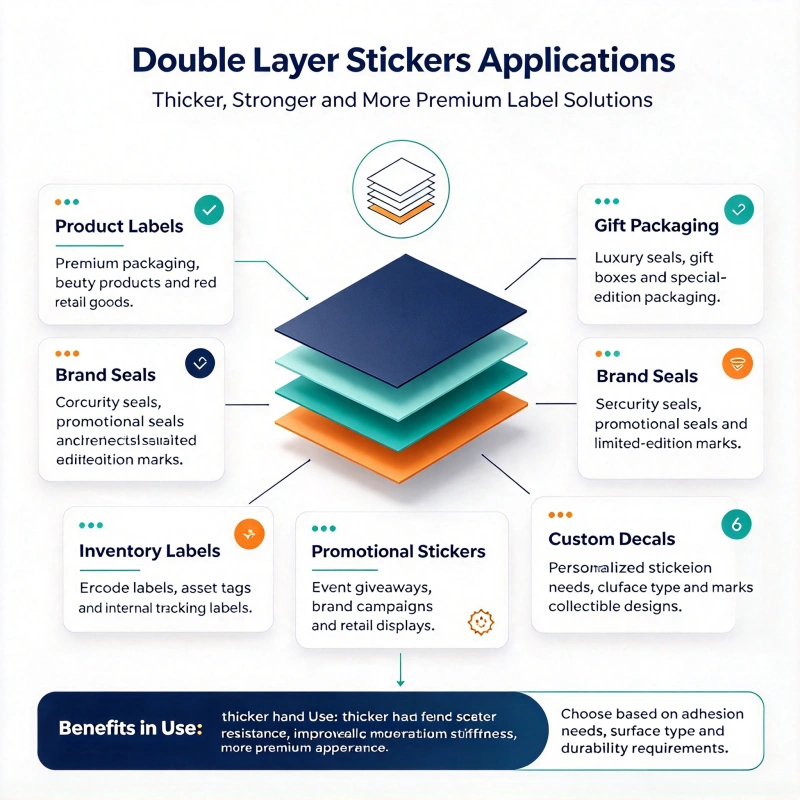
Frequently Asked Questions About Double Layer Stickers

1. What is the difference between double layer stickers and regular stickers?

A regular sticker typically has one primary printable face, while a double layer sticker combines two functional label layers. The second layer adds space for information, promotions, or a removable label.

2. Are double-layer stickers waterproof?

They can be designed for moisture-resistant applications, but waterproof performance depends on the face materials, inks, adhesives, edges, and overall construction. Buyers should test the complete label under their actual exposure conditions rather than assuming all double-layer stickers are waterproof.

3. Can double layer stickers be customized in size and shape?

Yes. We can generally develop custom dimensions, shapes, printing, and finishing based on the selected construction and manufacturing capabilities. The design should be checked against die-cutting tolerances and the available printable area of each layer.

4. Can double layer stickers include multiple languages?

Yes. Multilingual content is a common reason to choose a layered label. The manufacturer can help arrange the information across the layers, but the buyer should approve the translations and confirm the applicable labeling requirements for each market.

5. Can the top layer be peeled off and reused?

Some designs support removal, transfer, or resealing, but these are different functions. The buyer should state whether the top layer must be removable, transferable, or repeatedly resealable so the manufacturer can design and test the appropriate construction.

6. Are double layer stickers suitable for automatic labeling machines?

They may be suitable, depending on the construction, roll format, label dimensions, and equipment. Buyers should provide the machine specifications and confirm roll direction, core size, maximum roll diameter, and other relevant requirements before production.

7. What information is needed to request a quotation?

At minimum, provide the label size, material preference, number of layers, artwork, order quantity, application surface, and required opening behavior. Also mention any exposure to moisture, chemicals, temperature changes, or repeated handling.

8. How can I ensure consistent quality in bulk orders?

Approve a production-representative sample, define measurable acceptance criteria, and agree on the inspection process before mass production. For specialized applications, include relevant adhesion, opening, environmental, and barcode tests in the quality plan.

9. Are double layer stickers suitable for pharmaceutical products?

They may provide additional space for product information, but suitability depends on the specific product, label design, and applicable regulations. For pharmaceutical applications, confirm the requirements with the responsible regulatory team and consult the relevant authority’s official guidance before approving the artwork.

10. What is the best way to reduce double layer sticker costs?

Start by choosing the simplest construction that meets the functional requirements. Optimize label dimensions, material selection, printing coverage, and order quantity without compromising readability, adhesion, or required performance. Comparing quotations against the same technical specification helps identify genuine cost differences.

References and Authoritative Sources

  1. Avery Dennison — Pressure-Sensitive Labels
    Explains the three main components of conventional pressure-sensitive labels: facestock, adhesive, and liner, along with their functions in label construction and application.
    Read the official source
  2. Avery Dennison Japan — Pressure-Sensitive Label Material Listings
    Provides product and material specifications for pressure-sensitive label stocks, including paper and film options. These specifications can serve as a reference when evaluating materials for custom double-layer stickers.
    Explore the material listings
  3. Avery Dennison — Adhesion Characteristics
    Provides technical guidance on adhesive performance and application requirements, supporting the recommendation to select adhesives according to the actual substrate and end-use conditions.
    Read the technical guidance
  4. U.S. Food and Drug Administration (FDA) — Carton and Container Labeling Resources
    Provides official guidance and regulatory resources related to carton and container labeling for human prescription drugs. It is a useful reference when evaluating labeling requirements for regulated pharmaceutical products in the United States.
    Visit the FDA resource page

How to Use Sticker Paper: A Complete Guide

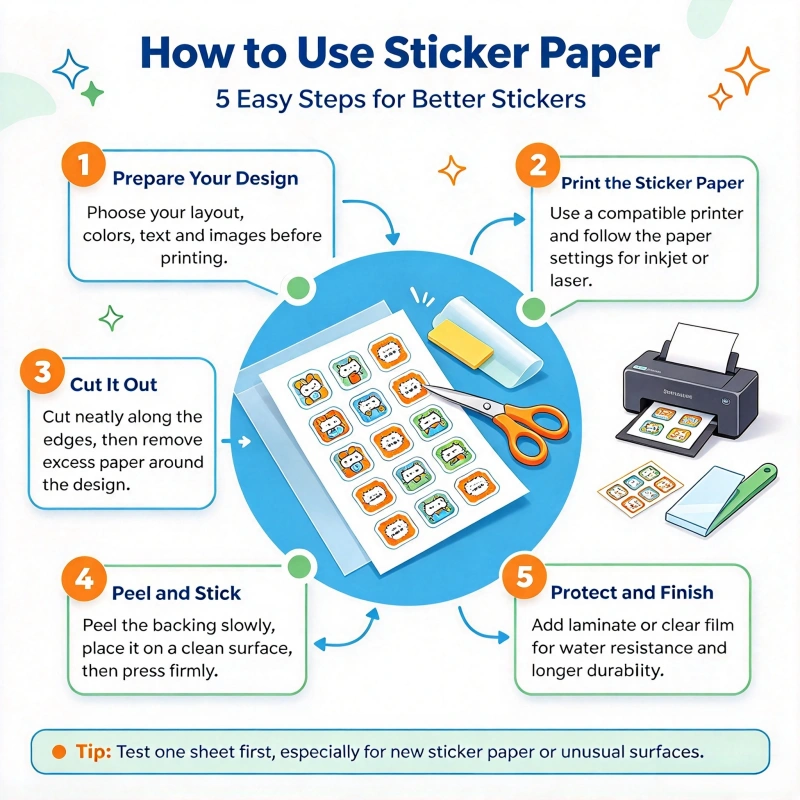
Sticker paper is easy to use once you understand how to select the right material, print on the correct side, set up your design, cut the stickers, and apply them to a suitable surface. Whether you are making stickers at home, creating product labels for a small business, or sourcing custom stickers for a retail brand, the most important rule is to match the sticker paper to your printer, application surface, and intended environment.

As a custom label manufacturer, we work with different self-adhesive materials for product packaging, retail stickers, promotional labels, bottle labels, and industrial applications. We have found that many sticker problems do not originate in the artwork itself. They happen because the paper is incompatible with the printer, the adhesive does not match the surface, or the finished sticker is exposed to water before it is ready.

In this guide, we explain how to use sticker paper step by step, how to avoid common printing and application problems, and how to choose the right material when you need custom stickers in bulk.

What Is Sticker Paper?

Sticker paper is a printable or preprinted material with an adhesive layer on the back and a release liner that protects the adhesive before use.

A typical pressure-sensitive sticker consists of three main layers:

  • Face material: The printable surface, which may be paper, synthetic paper, vinyl, PET, or another film.
  • Adhesive: The layer that bonds the sticker to the target surface.
  • Release liner: The backing paper or film that protects the adhesive and allows the sticker to be peeled off.

Some sticker constructions also include a protective coating or laminate to improve resistance to moisture, scratches, and handling.

The type of face material determines how the sticker looks and prints. The adhesive determines how it sticks. The protective finish affects how well it withstands the conditions where it will be used.

For example, ordinary paper sticker sheets often suit planners, packaging seals, and indoor crafts. Synthetic films such as vinyl or PET are generally more appropriate when water resistance, tear resistance, or longer service life is required. The correct choice depends on the complete construction, not just the material name.

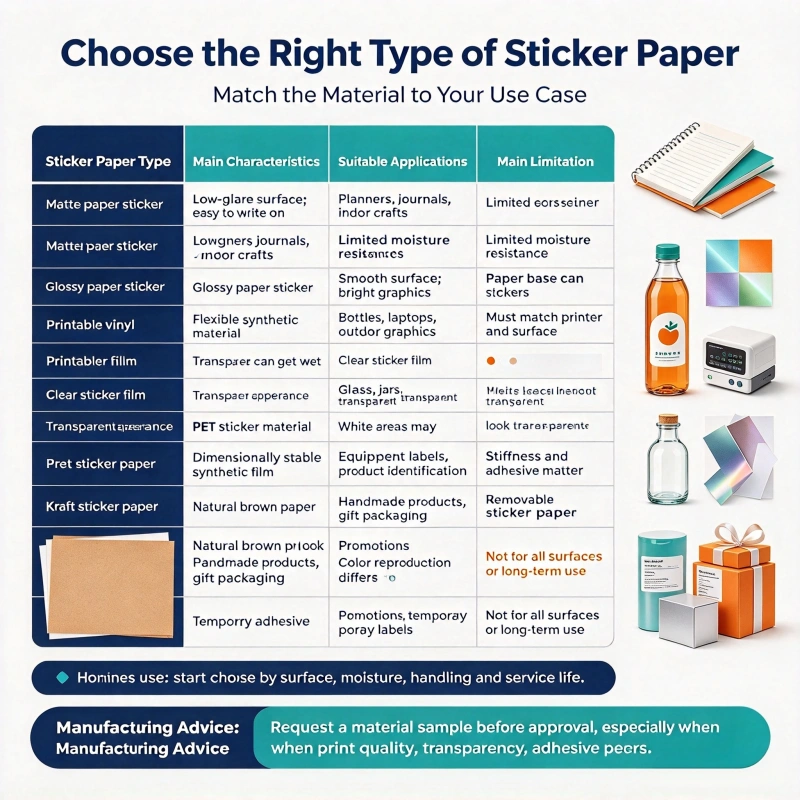
Step 1: Choose the Right Type of Sticker Paper

Before printing anything, decide what the sticker needs to do. A decorative sticker for a notebook has different requirements from a waterproof label for a beverage bottle.

Sticker paper typeMain characteristicsSuitable applicationsMain limitation
Matte paper stickerLow-glare surface; often easy to write onPlanners, journals, indoor craftsLimited moisture resistance
Glossy paper stickerSmooth surface and bright-looking graphicsPackaging seals, retail stickers, promotional labelsPaper base can deteriorate when wet
Printable vinylFlexible synthetic face materialBottles, laptops, outdoor graphics, promotional stickersMust match printer and application requirements
Clear sticker filmTransparent appearanceGlass, jars, transparent packagingWhite areas may appear transparent without white ink
PET sticker materialDimensionally stable synthetic filmEquipment labels, product identificationStiffness and adhesive must suit the surface
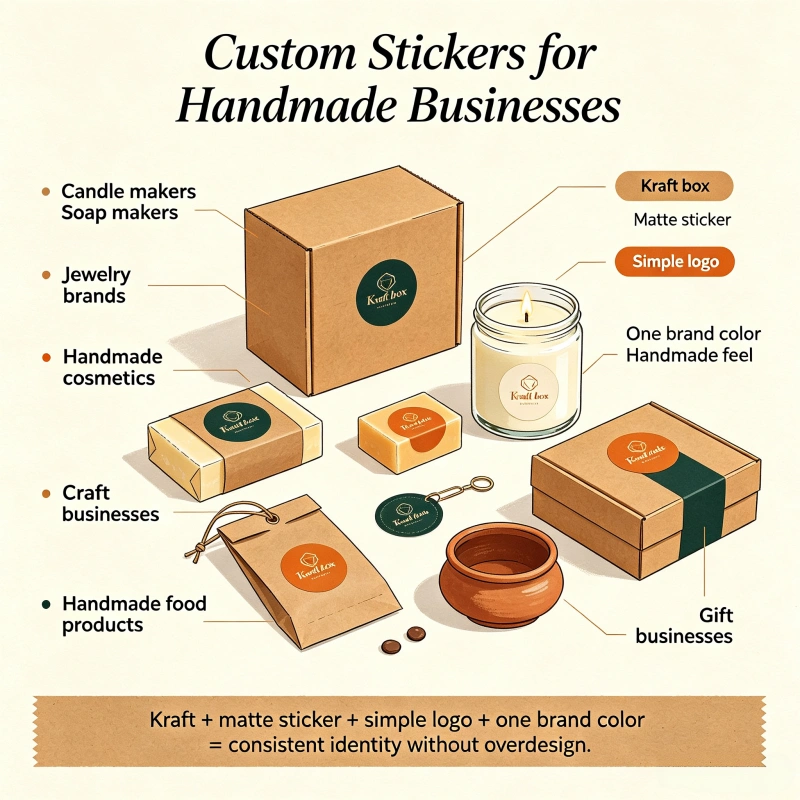
Kraft sticker paperNatural brown paper appearanceHandmade products, gift packaging, kraft boxesColor reproduction differs from white materials
Removable sticker paperAdhesive designed for temporary usePromotions, temporary labels, selected retail applicationsNot intended for every surface or long-term exposure
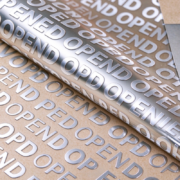
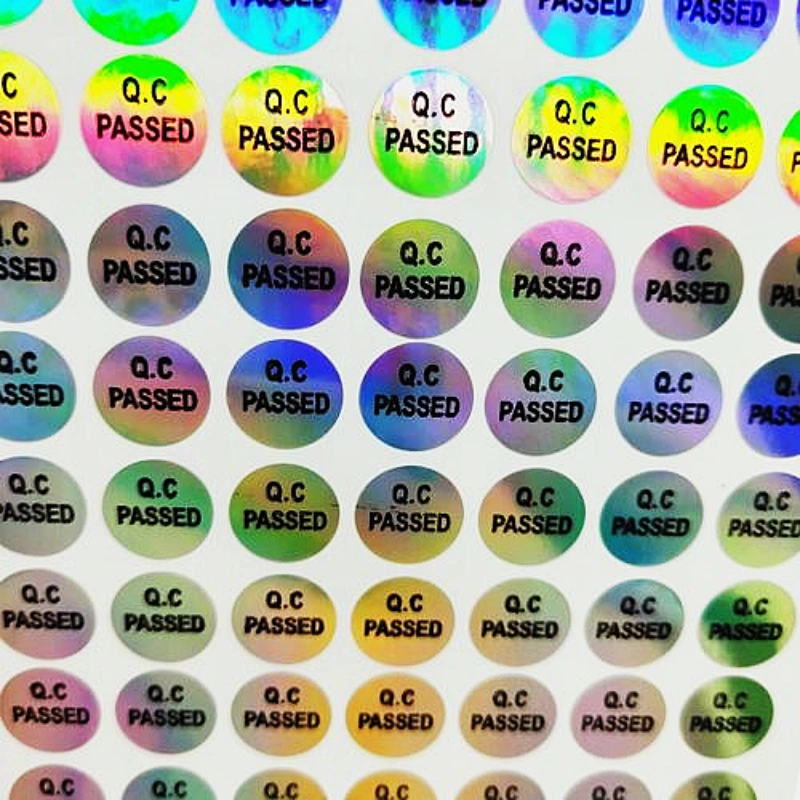
Metallic or holographic materialDecorative reflective effectsBranding, gift packaging, premium product labelsArtwork and color appearance require careful testing

For home use, matte and glossy printable sticker sheets are convenient starting points. For business use, we recommend selecting the material based on the product’s surface, expected handling, moisture exposure, and required service life.

Our manufacturing advice: Never approve a sticker material based only on a product photograph. Request a material sample when print quality, transparency, adhesive performance, or durability is important.

Step 2: Check Whether Your Sticker Paper Is Compatible With Your Printer

We recommend checking this first before you load a sheet.

Inkjet and laser printers use different printing technologies. Inkjet printers deposit liquid ink onto a compatible coating, while laser printers use toner and heat. Sticker paper must be designed for the intended printing technology.

How to identify compatible sticker paper

Check the package or technical data sheet for wording such as:

  • Inkjet printable
  • Laser printable
  • Inkjet and laser compatible
  • Printable vinyl for inkjet printers
  • Laser-compatible synthetic label material

Do not assume that all sticker paper works in every printer. Some films or coatings may not tolerate laser-printer heat, while some surfaces may not absorb inkjet ink properly. Manufacturers of printable sticker products explicitly specify printer compatibility, and some waterproof sticker materials are designed for inkjet use only.

Inkjet vs. laser sticker paper

FeatureInkjet sticker paperLaser sticker paper
Printing methodLiquid inkToner fused using heat
Common useColorful graphics, photos, craftsText, graphics, office and label printing
Material requirementInk-receptive surfaceHeat-compatible construction
Common problemSmudging or ink spreadingCurling, heat damage, or poor toner adhesion if incompatible
Best practiceUse the recommended media settingConfirm the material is rated for laser printing

If you are unsure which side is printable, check the manufacturer’s instructions. You can also mark a corner of a regular test sheet to confirm how your printer feeds paper before using the sticker sheet.

Step 3: Prepare Your Sticker Design

A good design helps prevent waste and improves the finished sticker’s appearance.

You can create sticker artwork in design software such as Adobe Illustrator, Photoshop, Canva, or other applications that support your printer or cutting machine’s required dimensions and file format.

Set the correct sticker dimensions

Before designing, decide:

  • Finished sticker width and height
  • Shape: circle, rectangle, oval, or custom contour
  • Spacing between stickers
  • Distance from the sheet edges
  • Bleed and safe area
  • Whether the sticker needs a border or cutting outline

For example, define the finished dimensions of a 50 × 30 mm sticker before arranging multiple copies on an A4 sheet.

A4 paper measures 210 × 297 mm. However, you may not be able to fit stickers across the entire sheet because printers have non-printable margins, and cutting requires extra spacing.

For a simple rectangular layout, you can estimate the number of stickers per row using:

[
N=\left\lfloor\frac{W-2M+G}{S+G}\right\rfloor
]

Where:

  • (W) = sheet width
  • (M) = side margin
  • (G) = gap between stickers
  • (S) = sticker width

For example, with a 210 mm-wide sheet, 5 mm side margins, 3 mm gaps, and 50 mm-wide stickers:

[
N=\left\lfloor\frac{210-10+3}{50+3}\right\rfloor=3
]

This layout fits three stickers across the sheet. The actual layout must also account for the printer’s printable area and the stickers’ height.

Use adequate image resolution

For many printed sticker designs, 300 pixels per inch (PPI) at final size is a practical starting point for raster artwork.

For example, a 2 × 2 inch sticker designed at 300 PPI requires a raster image of approximately 600 × 600 pixels.

Small text, barcodes, and fine line work may need additional attention. Vector artwork is often preferable for logos and sharp text because it can scale without the same pixelation limitations as raster images.

Leave enough space around the artwork

Do not place critical text too close to the cutting line. A small cutting variation can make the design appear off-center or cut into the lettering.

For custom die-cut stickers, confirm the bleed, cut path, and safe area with the printer or manufacturer before approving the artwork.

Step 4: Set Up Your Printer Correctly

Once your artwork is ready, configure your printer according to the sticker material.

1. Load the sheet in the correct direction

Identify which side receives the ink or toner. Follow the printer’s paper-loading instructions, particularly if the machine prints on only one side of the sheet.

2. Select the appropriate media setting

Depending on the sticker paper and printer, the recommended setting may be matte paper, glossy paper, photo paper, labels, or another compatible media type.

Use the setting specified by the sticker-paper manufacturer whenever possible.

3. Choose the print quality

For stickers with detailed logos or small text, start with a high-quality setting and check the results. Higher-quality printing can improve detail, but it may also increase ink use and drying time.

4. Print a test page

Before using your adhesive sheet, print the design on ordinary paper.

Check:

  • Sticker dimensions
  • Alignment
  • Spacing
  • Text readability
  • Color balance
  • Cutting-line position

This simple step can save material, especially when a sheet contains many stickers.

5. Print one sticker sheet first

Use one sheet to verify the media feed, color, ink adhesion, and cutting alignment. If the result is correct, continue with the remaining sheets.

Step 5: Let the Printed Sticker Paper Dry

After printing, let the sheet dry before touching, stacking, cutting, or laminating it.

Drying time depends on the printer, ink, coating, humidity, and print coverage. Some printable sticker instructions recommend waiting about 10–15 minutes for inkjet prints, but this isn’t a universal rule. citeturn644947search6

We recommend checking the media manufacturer’s instructions and testing the actual printed material.

How to avoid smudging

  • Do not touch printed areas immediately.
  • Avoid stacking fresh prints face-to-face.
  • Keep sheets flat in a clean, dry location.
  • Avoid excessive ink coverage when it is not necessary.
  • Confirm that the selected print setting matches the coating.

If the ink smears after the recommended drying period, the problem may be incompatible sticker paper, an incorrect media setting, or excessive ink deposition. Waiting longer will not always fix it.

Step 6: Add Lamination if Your Stickers Need More Protection

Lamination applies a protective film over the printed sticker surface.

It can improve resistance to scuffing and handling and, when materials are matched correctly, help protect the print from moisture.

However, lamination does not automatically make every sticker waterproof. The face material, ink, laminate, adhesive, edges, and application surface all affect the result.

When should you laminate sticker paper?

Lamination may be useful for:

  • Stickers exposed to frequent handling
  • Product labels that need additional surface protection
  • Promotional stickers used on frequently touched items
  • Selected bottle or packaging labels
  • Decorative stickers that need a particular gloss or matte finish

For ordinary paper stickers used in planners or indoor crafts, lamination may be unnecessary.

For outdoor or frequently wet applications, consider a compatible synthetic face material and protective finish instead of assuming that laminated paper will withstand every condition.

Manufacturer’s tip: Test the complete sticker construction. A film that bonds well to the ink surface may still fail if its adhesive isn’t suited to the application surface.

Step 7: Cut Your Sticker Paper

You can cut sticker paper in several ways. The best method depends on the quantity, shape, and level of precision required.

Hand cutting

Scissors or a craft knife are suitable for small quantities and simple shapes.

This method is inexpensive but can be slow for complex designs or large production runs.

Cutting machine

A compatible cutting machine can cut circles, decorative contours, and other custom shapes. For print-and-cut workflows, the machine needs to align its cutting path with the printed artwork.

Before cutting a full batch, verify the cut alignment on a sample sheet.

Kiss-cut vs. die-cut

These two terms describe different finishing methods.

Cutting methodWhat is cutTypical use
Kiss-cutThe sticker face and adhesive, while the release liner remains intactSticker sheets, multiple designs on one backing
Die-cutThe complete sticker construction, including its backingIndividual stickers supplied separately

For small businesses selling sticker sheets, kiss-cutting can make it easier for customers to peel individual designs. Individual die-cut stickers may suit giveaways, retail packs, or promotional distribution.

For custom manufacturing, agree on the cutting method before production because it affects tooling, layout, packing, and final presentation.

Step 8: Prepare the Surface Before Applying Your Sticker

Even high-quality sticker paper can peel if it is applied to an unsuitable or contaminated surface.

Before applying the sticker:

  1. Remove dust and loose particles.
  2. Clean the surface using a method compatible with the material.
  3. Allow the surface to dry completely.
  4. Check for oil, wax, or other contamination.
  5. Confirm that the surface is suitable for the adhesive.
  6. Avoid applying the sticker over loose coatings or peeling paint.

For glass or other nonporous surfaces, use a suitable cleaning method and let any residue evaporate. Avoid aggressive solvents on plastics or coated surfaces unless you confirm compatibility.

Why does a sticker peel off?

Common reasons include:

  • Applying the sticker to a dirty or oily surface
  • Choosing the wrong adhesive
  • Applying it to a textured or low-energy plastic surface
  • Working outside the recommended application temperature
  • Applying it to a wet or condensed surface
  • Handling the sticker before the adhesive has developed sufficient contact

Adhesive performance depends on the combination of adhesive chemistry, surface energy, surface condition, pressure, and time. A sticker that adheres well to clean glass may not behave the same way on untreated polyethylene or polypropylene.

Step 9: Apply Sticker Paper Without Bubbles or Wrinkles

For a small, flat sticker, the application process is straightforward.

Step-by-step application

Step 1: Position the sticker. Before removing the backing, check the intended placement and orientation.

Step 2: Peel back part of the liner. Avoid touching the adhesive more than necessary.

Step 3: Align the exposed edge. Place the sticker gently onto the surface.

Step 4: Apply gradual pressure. Use your fingers or a suitable squeegee to work from the center outward.

Step 5: Remove the remaining liner. Continue applying the sticker gradually instead of dropping the entire adhesive surface at once.

Step 6: Press the edges. Make sure the edges have full contact with the surface.

Step 7: Inspect the result. Check for bubbles, creases, contamination, and lifting corners.

For larger stickers, gradual application is especially useful because it reduces the chance of trapping air beneath the material.

What about curved bottles?

A flat sticker can behave differently on a cylindrical or tapered bottle.

For bottle labels, check:

  • Bottle diameter at the application point
  • Taper and curvature
  • Label dimensions
  • Material flexibility
  • Adhesive suitability
  • Condensation and moisture exposure

A small label may conform well to a curved bottle, while a large, stiff label can develop wrinkles or lifted edges.

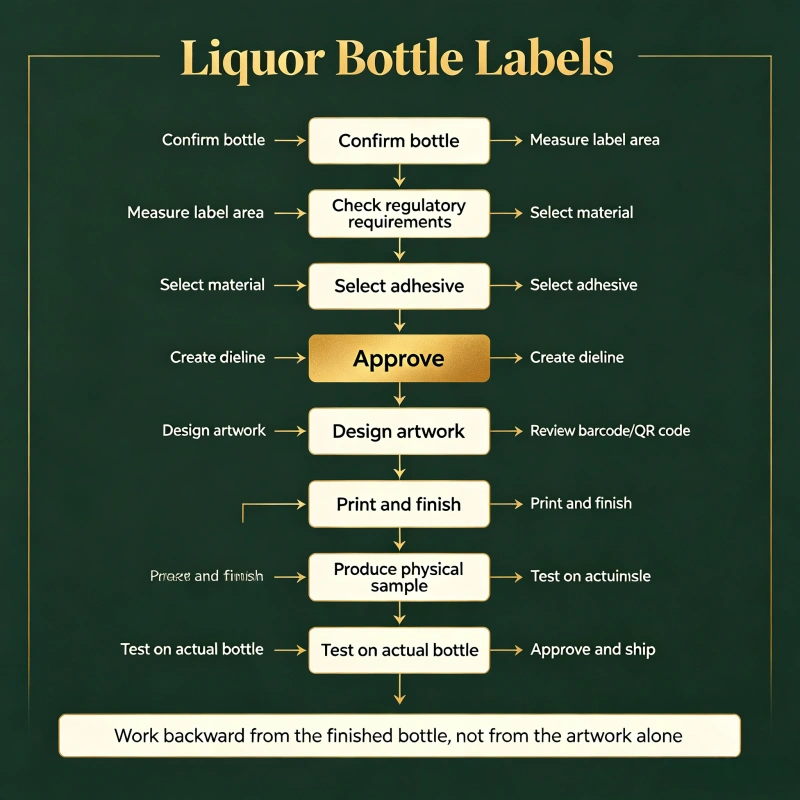
For commercial bottle decoration, we recommend applying a prototype to the actual bottle and checking the result before approving mass production.

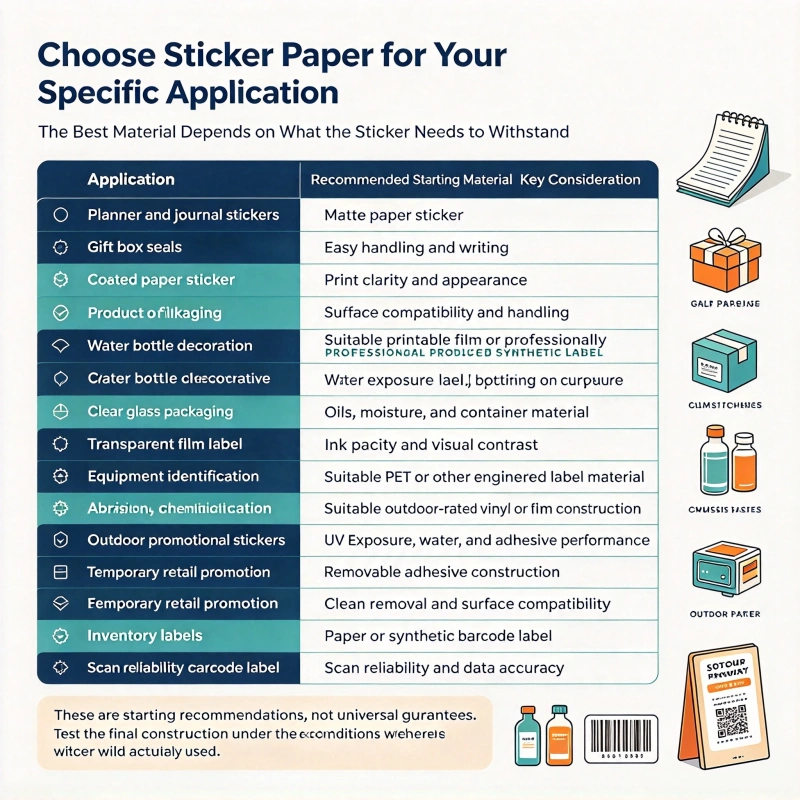
Step 10: Choose Sticker Paper for Your Specific Application

The best sticker paper depends on what the finished sticker needs to withstand.

ApplicationRecommended starting materialKey consideration
Planner and journal stickersMatte paper stickerEasy handling and writing
Gift box sealsCoated paper stickerPrint clarity and appearance
Product packagingPaper or film labelSurface compatibility and handling
Water bottle decorationSuitable printable film or professionally produced synthetic labelWater exposure and bottle curvature
Cosmetic jarsFilm or paper label, depending on exposureOils, moisture, and container material
Clear glass packagingTransparent film labelInk opacity and visual contrast
Equipment identificationSuitable PET or other engineered label materialAbrasion, chemicals, and temperature
Outdoor promotional stickersSuitable outdoor-rated vinyl or film constructionUV exposure, water, and adhesive performance
Temporary retail promotionRemovable adhesive constructionClean removal and surface compatibility
Inventory labelsPaper or synthetic barcode labelScan reliability and data accuracy

These are starting recommendations, not universal guarantees. Test the final construction under the conditions where the sticker will actually be used.

How to Use Sticker Paper for a Small Business

For a small business, sticker paper can create branded packaging, seal shipping boxes, identify products, decorate retail packaging, and support promotional campaigns.

However, home printing and commercial sticker production serve different purposes.

When home printing makes sense

Home printing is useful when you need:

  • Small quantities
  • Rapid design changes
  • Prototype labels
  • Seasonal artwork
  • Personalization
  • Samples for customer approval

It allows you to test an idea before committing to a larger order.

When to work with a custom sticker manufacturer

Professional manufacturing becomes worth considering when you need:

  • Consistent color across repeated orders
  • Large quantities
  • Multiple material choices
  • Custom shapes and precise die-cutting
  • Specialized adhesives
  • Waterproof or chemical-resistant constructions
  • Roll labels for automated application
  • Specialty finishes such as foil, embossing, or holographic effects
  • Controlled production and inspection

In our experience, the key question is not simply whether a factory can print the artwork. It is whether the factory can reproduce the same material, color, cutting accuracy, adhesive performance, and packing format across the required quantity.

Our Custom Sticker Paper and Label Manufacturing Solutions

As a custom label manufacturer, we help B2B buyers select the appropriate construction for product stickers, packaging labels, promotional stickers, and other self-adhesive applications.

We assess each project based on its intended use rather than offering one material for every application.

What can we customize?

Depending on the selected product and production route, customization can include:

  • Paper, synthetic paper, PET, PP, and other suitable face materials
  • Matte, gloss, transparent, metallic, and specialty finishes
  • Custom sizes, shapes, and die-cutting
  • Brand colors, logos, and variable artwork
  • Permanent, removable, and application-specific adhesives
  • Sheet or roll formats
  • Barcode and QR-code printing
  • Specialty effects such as foil stamping or other decorative finishes
  • OEM production based on approved customer artwork
  • ODM assistance with material selection and label construction
  • Customized packing for different SKUs or distribution requirements

Not every material, finish, and adhesive can be combined with every printing process. We confirm compatibility during specification review and sampling.

What production equipment is involved?

The production route depends on the product type, order volume, and required finish. A custom sticker order may involve:

  • Digital or conventional printing equipment
  • Die-cutting and slitting equipment
  • Finishing and laminating processes
  • Inspection and quality-control equipment
  • Sheet or roll converting and packing processes

For specialized products, buyers should confirm which processes are performed in-house and which are handled by qualified manufacturing partners.

Our aim is to recommend a production method that meets the specification, quantity, and cost target without adding unnecessary processing steps.

MOQ and Custom Sticker Price: What Should Buyers Expect?

There is no universal MOQ or unit price for sticker paper because material, size, printing, adhesive, finish, order quantity, and packing all influence the quotation.

The following figures are illustrative budgeting ranges in USD, not verified quotations for a specific factory order.

Product typeIndicative MOQIndicative unit price
Basic paper stickers500–1,000 pcs$0.01–$0.05
Custom paper product labels1,000–5,000 pcs$0.005–$0.04
Custom film or vinyl stickers500–2,000 pcs$0.02–$0.12
Clear film stickers1,000–5,000 pcs$0.02–$0.10
Specialty metallic or holographic stickers1,000–5,000 pcs$0.03–$0.15
Custom die-cut promotional stickers500–2,000 pcs$0.02–$0.15

These ranges are intended for initial budgeting only. Small orders, unusually large labels, complex shapes, specialty materials, and premium finishing can cost more. Large repeat orders may have lower unit prices, depending on the production method and specification.

What determines the price?

1. Material selection

Paper, film, vinyl, metallic substrates, and specialty stocks have different material costs.

2. Sticker size

Larger stickers generally consume more material and may reduce the number of units produced from each sheet or roll.

3. Order quantity

Setup and preparation costs can be distributed across more units in larger orders. However, multiple designs may require separate setup or processing.

4. Printing and finishing

Complex colors, special inks, lamination, foil stamping, and custom die-cutting can affect the total cost.

5. Adhesive requirements

Standard and specialized adhesives for difficult surfaces or demanding environments are not necessarily interchangeable.

6. Packing format

Sheets, rolls, individual packs, and SKU-separated cartons can require different converting and packing processes.

How to request an accurate quotation

Send us the sticker dimensions, material preference, artwork, quantity per design, application surface, expected environment, finish, and required packing format.

For bottle labels or industrial applications, also specify exposure to moisture, chemicals, temperature, sunlight, and handling. These details help us assess the appropriate construction before quoting.

Our OEM and ODM Process for Custom Stickers

For B2B projects, we recommend a clear development process.

Step 1: Understand the application

We confirm what the sticker will be used for, where it will be applied, and what performance requirements it must meet.

Step 2: Review the artwork and dimensions

We check the file format, finished size, cutting line, text, color references, and layout.

Step 3: Recommend the material and adhesive

We propose a suitable construction based on the surface, environment, appearance, and budget.

Step 4: Confirm MOQ and quotation

We establish the quantity per design, production method, finishing requirements, packing, and commercial terms.

Step 5: Produce a sample

For new materials or demanding applications, we recommend approving a physical sample before mass production.

Step 6: Manufacture and inspect

Depending on the specification, quality checks may cover print clarity, color, dimensions, die-cutting, adhesive condition, and surface finish.

Step 7: Pack and ship

We pack the order according to the agreed format and separate designs or SKUs where required.

This process reduces the risk of discovering a material or application problem after the full order has been produced.

Common Sticker Paper Problems and How to Solve Them

Problem 1: The ink smears

Likely cause: The sticker paper is incompatible with the printer, the media setting is incorrect, or the ink has not dried sufficiently.

Solution: Confirm printer compatibility, follow the recommended media setting, and test the drying time before handling the sheet.

Problem 2: The sticker curls

Likely cause: Moisture, heat, tension, or unsuitable storage conditions affect the material.

Solution: Store the sheets flat in the recommended environment and use a material suitable for the printer and application.

Problem 3: The sticker peels at the edges

Likely cause: The surface is contaminated, the adhesive is unsuitable, or the label is under excessive stress on a curved surface.

Solution: Clean the surface, verify the adhesive, and test the label on the actual product.

Problem 4: The sticker is not waterproof

Likely cause: The face material is paper-based, the ink is not water-resistant, the protective finish is unsuitable, or water reaches the edges.

Solution: Select a compatible synthetic material and protective finish, then test the completed construction under realistic conditions.

Problem 5: The cutting line is misaligned

Likely cause: Incorrect page scaling, inaccurate registration, or a mismatch between the artwork and cutting file.

Solution: Print a test sheet, confirm that scaling is set correctly, and calibrate the cutting machine before running the full batch.

Problem 6: The sticker will not stick to plastic

Likely cause: The plastic has low surface energy or the surface contains mold-release residue or other contamination.

Solution: Identify the plastic type and request an adhesive designed for that surface. Test before ordering in bulk.

Frequently Asked Questions About How to Use Sticker Paper

Which side of sticker paper should I print on?

Print on the designated printable surface, usually the coated side. Check the manufacturer’s instructions because different materials and printers may feed sheets differently.

Can I use sticker paper in a normal printer?

Yes, provided the sticker paper is compatible with the printer’s technology and paper-feed requirements. Use inkjet-compatible media in inkjet printers and laser-rated media in laser printers.

How long should I wait for sticker paper to dry?

It depends on the ink, coating, print coverage, humidity, and printer settings. Some inkjet sticker products recommend around 10–15 minutes, but you should follow the material manufacturer’s instructions and verify that the print is dry before handling.

Is sticker paper waterproof?

Ordinary paper sticker sheets are generally not suitable for prolonged water exposure. Synthetic materials such as suitable vinyl or PET can offer better water resistance, but the ink, adhesive, laminate, and application surface must also be appropriate.

Can I make waterproof stickers at home?

Yes, for suitable applications you can use compatible printable synthetic sticker material and a matching protective laminate. However, the finished result should be tested because water resistance depends on the complete construction.

Can sticker paper be used on water bottles?

It can be used for decoration, but ordinary paper sticker sheets may deteriorate when wet. For bottles exposed to condensation or washing, select an appropriate synthetic label material and adhesive, then test it on the actual bottle.

What is the difference between sticker paper and printable vinyl?

Sticker paper usually has a paper face, while printable vinyl uses a synthetic film face. Paper is often suitable for indoor crafts and packaging seals; printable vinyl is generally better suited to applications requiring flexibility and moisture resistance.

Can I order custom sticker paper in bulk?

Yes. Custom sticker orders can be produced in different sizes, shapes, materials, finishes, and packing formats. MOQ and pricing depend on the selected construction, production method, and quantity per design.

What files should I provide for a custom sticker order?

Vector files such as AI, EPS, or print-ready PDF are useful for logos and cutting paths. High-resolution raster artwork may also be suitable. Confirm the required bleed, safe area, dimensions, and color specification with your supplier.

What should I send a manufacturer to get a quote?

Provide the sticker size, artwork, material, quantity, shape, finish, adhesive requirements, application surface, environment, and packing format. For specialized labels, include any required durability or compliance tests.

Final Recommendation: Choose Sticker Paper Based on the Job

Learning how to use sticker paper is not just about printing and peeling. The best results come from choosing a compatible material, preparing the artwork correctly, setting up the printer, allowing the print to dry, cutting accurately, and applying the sticker to a clean and suitable surface.

For home crafts and short-term indoor use, basic paper sticker sheets are often sufficient. For product packaging, bottle labels, outdoor stickers, and demanding industrial applications, the material and adhesive need more careful consideration.

As a custom label manufacturer, we help B2B buyers evaluate these factors before production. Whether you need paper stickers for packaging, film labels for bottles, custom die-cut stickers, or an OEM/ODM label solution, our recommendation is the same: define the application first, test the complete construction, and approve the specification before committing to bulk production.

To discuss your project, send us your artwork, dimensions, quantity, preferred material, application surface, and destination market. We can review the requirements and help you identify a practical customization and quotation route.

Types of Tags on Clothing: A Complete Guide

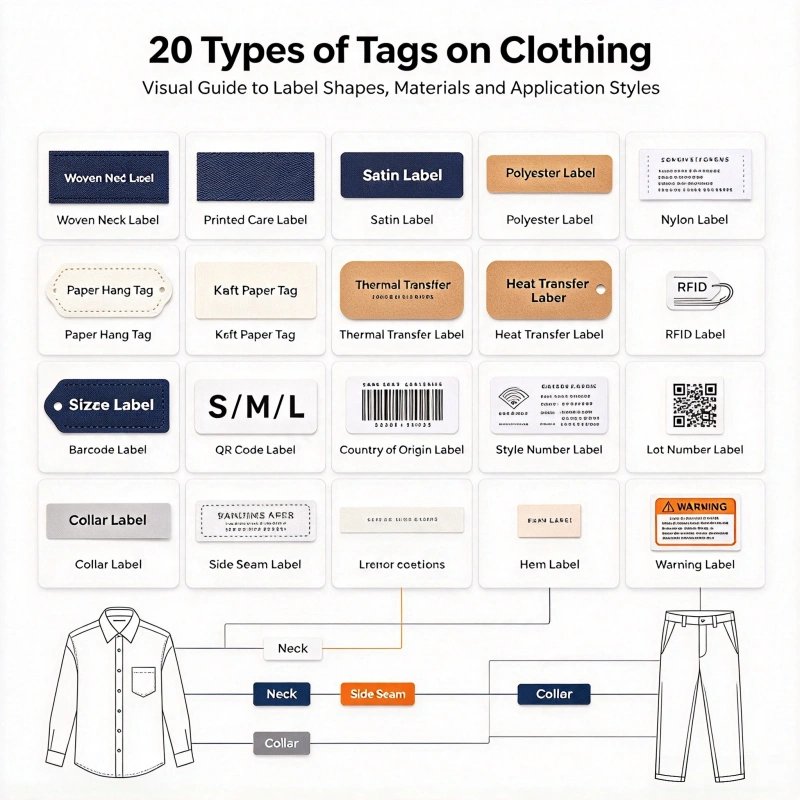
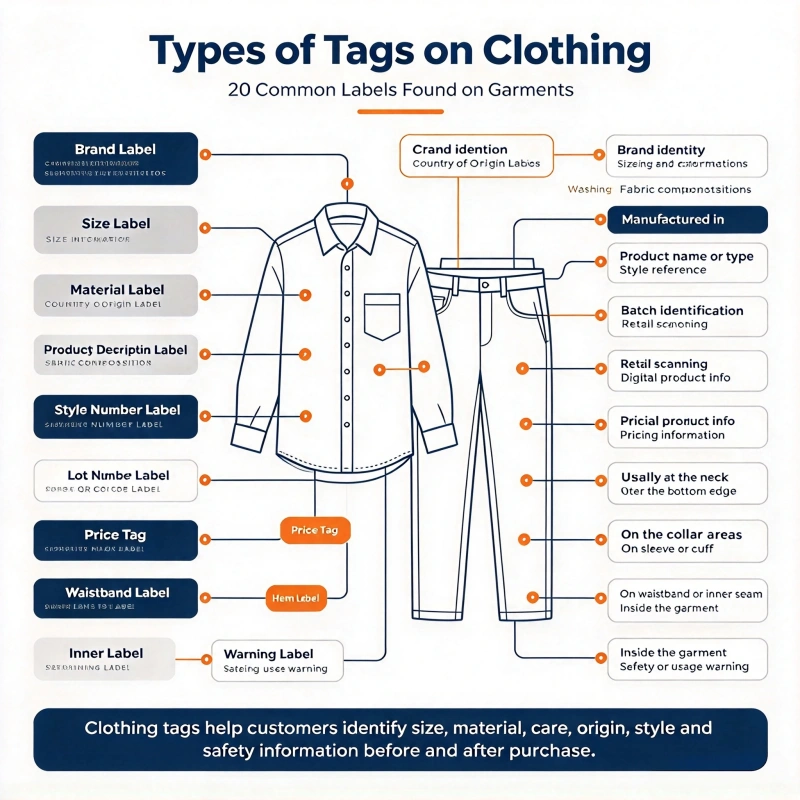
Clothing tags do much more than display a brand name or price. They help apparel brands communicate product information, improve garment presentation, support inventory management, and create a consistent customer experience. The main types of clothing tags include woven labels, printed labels, care labels, hang tags, heat-transfer labels, size labels, leather and silicone patches, barcode tags, and RFID tags.

As a custom label and packaging manufacturer, we help B2B buyers select and customize clothing labels based on garment materials, branding requirements, retail channels, order quantities, and budgets. A fashion brand may need a soft woven neck label, a printed washing instruction label, a premium paper hang tag, or an RFID-enabled tag for item-level tracking. Each serves a different purpose, and choosing the right combination works better than using one tag type for every function.

In this guide, we explain the major types of clothing tags, compare their materials and applications, provide indicative wholesale pricing and minimum order quantities, and show how we approach OEM and ODM customization for apparel brands, garment factories, wholesalers, and retailers.

What Are the Different Types of Clothing Tags?

Clothing tags fall into four functional groups: brand identity, garment information, retail presentation, and digital identification.

Clothing tag typeMain purposeCommon materialsBest applications
Woven labelDisplay brand identityPolyester yarn, satin-style woven fabricT-shirts, hoodies, denim, premium apparel
Printed labelDisplay detailed informationSatin, polyester, nylon, cotton tapeEveryday clothing and fashion basics
Care and content labelProvide washing and fiber informationPrinted satin, nylon, polyesterMost apparel categories
Size labelIdentify garment sizeWoven or printed fabricShirts, trousers, jackets, underwear
Hang tagBranding and retail informationArt paper, kraft paper, specialty cardRetail clothing and private-label products
Heat-transfer labelProvide a tagless branding or information solutionTPU, PU-based transfer films and inksSportswear, activewear, children’s clothing
Leather or imitation-leather patchCreate a premium decorative featureGenuine leather, synthetic leatherDenim, jackets, workwear
Silicone or TPU labelAdd a raised, modern brand markSilicone, TPUSportswear, outdoor clothing, streetwear
Barcode or QR-code tagSupport product identificationPaper, synthetic label stock, printed cardWarehouses, retail, e-commerce
RFID clothing tagEnable wireless item identificationPaper inlay, textile label, RFID chip and antennaApparel inventory, distribution, retail

A complete garment does not necessarily need all ten types. In our experience, a practical private-label clothing program often combines two to four label or tag types, depending on the product, destination market, retail channel, and brand positioning.

For example, a branded hoodie may use a woven neck label, a printed care label, and a paper hang tag. A premium denim brand may add a leather patch, while an apparel retailer with item-level inventory requirements may incorporate RFID.

1. Woven Clothing Labels

Woven labels are produced by weaving colored yarns into a fabric label that carries the brand name, logo, or other information. Because the yarn structure forms the design rather than printing it only on the surface, woven labels are widely used for long-term brand identification.

Common woven label types

  • Damask woven labels: Suitable for detailed logos and a refined appearance.
  • Satin-style woven labels: Designed for a smooth, soft-looking finish.
  • Taffeta woven labels: Often used for simpler designs and cost-conscious applications.
  • Cotton woven labels: Suitable for brands seeking a natural textile appearance, subject to the required construction and sourcing options.

Where are woven labels used?

Woven labels are commonly sewn into:

  • Necklines
  • Waistbands
  • Side seams
  • Pockets
  • Garment hems
  • Bags and textile accessories

For a premium fashion brand, a woven label can look more integrated than a separate paper tag.

What should buyers consider?

Woven labels work best when the artwork is designed for weaving. Extremely small text, very fine lines, and complicated gradients may not reproduce as intended.

We recommend preparing the logo at its actual finished size and checking the readability of small lettering before approving production. Buyers should also specify the fold type, finished dimensions, background color, thread colors, and sewing position.

Important sourcing note: Woven labels require specialized weaving equipment. If you need a fully woven product, confirm whether the supplier manufactures it in-house or works with a qualified weaving partner.

2. Printed Clothing Labels

Printed labels use ink on a suitable fabric or film substrate. They are particularly useful when a label needs small text, detailed care instructions, multiple languages, or more complex graphics.

Common materials include satin, polyester, nylon, cotton tape, and selected synthetic films.

Advantages of printed labels

  • Clear text and care symbols
  • Flexible layout and dimensions
  • Suitable for multilingual information
  • Practical for variable information and different product SKUs
  • Multiple printing options depending on artwork and order size

People often choose printed labels for T-shirts, dresses, uniforms, children’s apparel, sportswear, and everyday garments.

Printed vs. woven labels

ComparisonPrinted labelWoven label
How the design is madeInk is applied to the substrateColored yarns form the design
Fine textGenerally well suitedDepends on weave density and artwork
Brand appearanceClean and versatileTextile-based, often premium
Care instructionsVery suitablePossible, depending on construction
Main cost factorsMaterial, printing, quantity, colorsYarn colors, weave complexity, dimensions
Key quality testPrint durability and legibilityWeave clarity, edge comfort, and construction

Neither type is automatically better. We recommend choosing according to the information content, desired appearance, garment construction, and target cost.

3. Care Labels and Content Labels

Care labels provide information about how to wash, dry, iron, and maintain a garment. Content labels identify the textile fiber composition, while origin and business identification information may also be required depending on the market and product.

For many apparel brands, this is the most important label for compliance.

What information may be required?

Depending on the destination market and garment category, the label set may need to include:

  • Fiber composition
  • Country of origin
  • Business or responsible-party identification
  • Permanent care instructions
  • Size information
  • Additional information required for specific products

Requirements vary by jurisdiction. For example, the US Federal Trade Commission regulates textile fiber labeling and care labeling, while EU textile rules cover fiber-composition disclosure. Children’s products can also have separate tracking requirements.

We advise buyers to confirm the applicable rules before finalizing artwork. A visually attractive label is not sufficient if required information is missing or unreadable.

How to select a care-label material

MaterialPotential advantageConsideration
Satin polyesterSmooth surface and clear printingConfirm softness and print durability
NylonFlexible and suitable for detailed informationTest the ink and finish
Polyester tapePractical for many garment applicationsChoose the appropriate weave or surface
Cotton tapeNatural textile appearanceCheck shrinkage and wash performance
Heat-transfer filmNo separate sewn-in labelTest adhesion, hand feel, and wash durability

For care labels, we recommend testing the finished garment rather than approving the label in isolation. Repeated washing, heat, detergent, friction, and fabric stretch can affect readability and attachment.

4. Clothing Hang Tags

Hang tags, also called swing tags, are removable tags attached to clothing with string, cord, a plastic fastener, or another attachment method.

They matter for retail presentation because shoppers can read them before buying the garment.

What should a clothing hang tag include?

A custom hang tag may contain:

  • Brand logo and product name
  • Product description
  • Size or style number
  • Retail price
  • Barcode or QR code
  • Website or brand story
  • Material or sustainability claims, when properly substantiated
  • Product collection or seasonal information

Not every hang tag needs all these elements. We recommend prioritizing the brand identity on the front and putting secondary information on the reverse.

Common hang-tag materials

Coated art paper: Suitable for full-color printing and polished retail presentation.

Uncoated paper: Offers a natural, understated appearance.

Kraft paper: Commonly used by casual, outdoor, denim, and eco-positioned brands.

Recycled or certified paper: Can support specific sourcing goals when the relevant material and chain-of-custody claims are verified.

Specialty card: Used for premium designs with embossing, debossing, foil stamping, or other finishing effects.

Popular finishing options

  • Matte or gloss lamination
  • Gold or silver foil stamping
  • Embossing and debossing
  • Spot UV
  • Rounded corners
  • Custom die-cut shapes
  • Cotton string, cord, or customized fasteners

For a premium clothing brand, the combination of paper weight, finishing, hole position, and attachment method matters as much as the artwork.

We recommend ordering a physical proof when foil, embossing, specialty paper, or an unusual shape is involved. A digital file cannot fully represent the texture, rigidity, or reflectivity of the finished tag.

5. Size Labels

Size labels help customers and retail staff identify the correct garment size.

They may be woven, printed, or incorporated into another label. Common formats include standalone size tabs and size information integrated into a neck or waistband label.

Typical size information includes XS, S, M, L, XL, numerical sizing, or region-specific sizing systems.

What buyers should specify

  • Size range
  • Garment category
  • Finished label dimensions
  • Size notation
  • Label placement
  • Color and typography
  • Whether size labels must be separated by SKU

For large size runs, we recommend using a size matrix to prevent errors. For example, a garment collection with six sizes and three colors may require 18 SKU combinations even if the basic label design remains the same.

Before bulk production, confirm the exact quantities for every size. This helps prevent overstock of slow-moving sizes and shortages of high-demand sizes.

6. Heat-Transfer and Tagless Labels

Heat-transfer labels place branding or information directly onto the garment using a transfer material and a controlled heat-and-pressure process.

They are popular for sportswear, activewear, underwear, performance clothing, and garments where a sewn label may cause irritation.

Key advantages

  • No traditional sewn-in label edge
  • Clean internal appearance
  • Suitable for logos, sizes, and selected care information
  • Flexible graphic and color options
  • Can be designed for specific fabric types

What can go wrong?

The main risks include peeling, cracking, color migration, and poor bonding.

The result depends on the transfer construction, garment fabric, surface treatment, temperature, pressure, dwell time, and washing conditions.

We recommend testing the transfer on the actual garment fabric, especially when working with stretch fabrics, moisture-management finishes, nylon, or heat-sensitive materials.

A heat-transfer label should not be considered wash-durable merely because it looks good immediately after application. Approve it only after the agreed wash and stretch tests.

7. Leather and Imitation-Leather Clothing Patches

Leather patches are often used on denim jeans, jackets, workwear, bags, and heritage-style garments. They can display a brand logo through embossing, debossing, printing, engraving, or a combination of processes.

Buyers can choose from genuine leather, synthetic leather, and other leather-look materials.

What makes a good leather patch?

A well-designed patch should match the garment’s overall style and intended use. The material, thickness, edge treatment, logo depth, color, and sewing method all affect the final appearance.

For washable garments, buyers should verify whether the selected patch and decoration method can tolerate the required washing conditions. Not all leather-look materials resist water, heat, or detergent equally.

If sustainability claims are important, clearly identify the actual material rather than using vague terms such as “eco leather” without supporting details.

8. Silicone and TPU Clothing Labels

Silicone and TPU labels offer a modern, raised, rubber-like look. They are frequently used for sportswear, outdoor clothing, streetwear, uniforms, and performance apparel.

They can be manufactured in different colors, thicknesses, shapes, and surface finishes, depending on the material and production method.

Typical applications

  • Chest logos
  • Sleeve badges
  • Hem labels
  • Waistband branding
  • Sportswear logos
  • Decorative patches
  • Waterproof-oriented product branding, when the complete construction supports it

These labels work well when a brand wants a distinctive three-dimensional look.

However, evaluate the label’s flexibility, adhesion or sewing construction, surface finish, and durability against the garment’s intended use. A decorative label for casual apparel may not need the same performance as a label on frequently stretched outdoor equipment.

9. Barcode and QR-Code Clothing Tags

Barcode and QR-code tags connect a physical garment with a product record.

A barcode can support point-of-sale scanning and inventory operations. A QR code can link to product information, product registration, size guidance, digital care information, or brand content.

You can print these codes on hang tags, adhesive labels, packaging, or other suitable surfaces.

What information can a tag connect to?

Depending on the system, a tag may identify:

  • SKU or style number
  • Size and color
  • Product identifier
  • Retail price
  • Batch information
  • Product page
  • Warranty or registration information
  • Traceability records

The most important consideration is data accuracy. A code is useful only when it resolves to the correct product or record.

For barcode labels, check print contrast, code dimensions, quiet zones, and scanning performance. For QR codes, test the printed code at the final size with common mobile devices and under realistic lighting conditions.

10. RFID Clothing Tags

RFID tags use a chip and antenna to communicate with compatible readers through radio waves. Unlike a conventional barcode, RFID can identify a tagged item without requiring a direct optical view of the code.

In apparel supply chains, RFID can support item-level inventory, stocktaking, distribution, and retail operations. Actual performance depends on the tag design, reader system, placement, garment construction, and operating environment.

Common RFID clothing tag formats

RFID hang tags: Paper or card tags with an RFID inlay, often used for retail inventory and source tagging.

RFID textile labels: RFID components integrated into textile-label constructions for selected applications.

RFID adhesive labels: Used on packaging or other suitable surfaces when a removable label is more appropriate.

Specialized washable textile RFID tags: Designed for selected textile tracking or industrial laundry applications. These require construction-specific durability validation.

What should buyers specify?

  • RFID frequency and protocol
  • Chip model
  • Antenna design
  • Tag dimensions
  • Required read performance
  • Encoding and data format
  • Printing and barcode requirements
  • Attachment location
  • Whether the tag must withstand washing
  • Compatibility with the customer’s reader system

Do not assume that all RFID tags are interchangeable. A retail hang tag, a washable textile tag, and a label attached to a polybag are different products with different performance requirements.

For standard apparel inventory applications, UHF/RAIN RFID is often considered. NFC or other RFID technologies may be more appropriate for different consumer-interaction or identification scenarios.

How to Choose the Right Clothing Tags for Your Brand

The right combination depends on your target market, garment type, branding strategy, and supply-chain requirements.

Buyer requirementRecommended starting pointAdditional consideration
Premium brand identityWoven label + premium hang tagLogo clarity, texture, finishing
Low-cost everyday apparelPrinted label + standard hang tagUnit cost and production volume
Soft sportswearHeat-transfer label + printed care labelStretch and wash testing
Denim and workwearWoven label + leather-look patch + hang tagAbrasion and attachment strength
Children’s clothingSoft label construction + appropriate care/content labelingComfort and destination-market requirements
Eco-positioned clothingVerified recycled or responsibly sourced materialsSubstantiate environmental claims
E-commerce apparelBarcode or QR hang tag + care labelSKU accuracy and fulfillment
Retail inventory automationRFID hang tag or suitable RFID labelReader compatibility and encoding

Our recommendation is to start with the function of each tag, not the material. First decide what information or experience the tag must deliver, then choose the construction that meets the requirement.

Custom Clothing Tags: Materials, Sizes, and Specifications

As a custom label supplier, we recommend confirming the following details before requesting a quotation.

SpecificationInformation to provide
Label typeWoven, printed, care, hang tag, heat transfer, RFID, or a combination
Finished dimensionsWidth × height, diameter, or custom shape
MaterialSatin, polyester, nylon, paper, kraft, synthetic film, or specified alternative
ArtworkAI, PDF, EPS, SVG, or high-resolution artwork
ColorsCMYK, Pantone references, or approved physical samples
FinishingMatte, gloss, foil, embossing, debossing, die cutting
AttachmentSew-in, fold-in, heat-applied, string, cord, adhesive, or other method
DataSize, SKU, barcode, QR code, RFID encoding requirements
QuantityTotal quantity and quantity per design or SKU
PackingBulk packed, counted bundles, sheets, rolls, or customized packaging
Quality requirementsColor tolerance, print durability, wash testing, scan or read testing
Destination marketCountry or region where the garments will be sold

The more complete the specification, the less likely the project will face delays from artwork revisions, material substitutions, or unclear packing requirements.

Our Customization Capabilities for B2B Buyers

We support custom label and packaging projects for apparel brands, garment manufacturers, private-label sellers, wholesalers, and retailers. We match product construction to the buyer’s use case instead of offering the same specifications to every customer.

Depending on the selected product and production route, customization can include:

  • Custom dimensions and die-cut shapes
  • Brand logos and artwork
  • Material selection
  • Printed colors and variable information
  • Paper and specialty finishing options
  • Barcode and QR-code printing
  • RFID label configuration and encoding requirements
  • Different designs for separate product lines
  • Customized packing and labeling for bulk shipments
  • OEM production based on customer artwork and specifications
  • ODM support for buyers who need help developing a suitable label construction

Equipment and production route: The appropriate production equipment depends on the product. Printed labels and tags may require digital or conventional printing, cutting or die-cutting, finishing, inspection, and packing. RFID projects may additionally require inlay integration, encoding, and verification. Woven labels require weaving equipment, while heat-transfer products require suitable transfer-production and application processes.

We confirm the production route based on the actual order, rather than assuming every label type can be made on the same line. For specialized products, buyers should clarify which processes we complete in-house and which qualified manufacturing partners handle.

MOQ and Wholesale Price Guide for Custom Clothing Tags

MOQ and unit prices vary by material, size, color, printing method, finishing, order quantity, and number of designs. The following ranges are indicative budgeting estimates in USD, not fixed quotations or guarantees of availability from every production line.

Product typeIndicative MOQ per designIndicative unit price (USD)
Basic printed clothing label1,000–5,000 pcs$0.005–$0.03
Custom woven brand label1,000–5,000 pcs$0.01–$0.05
Printed care label1,000–5,000 pcs$0.004–$0.025
Standard paper hang tag500–1,000 pcs$0.03–$0.10
Premium foil or embossed hang tag500–1,000 pcs$0.06–$0.20
Heat-transfer label500–3,000 pcs$0.01–$0.06
Silicone or TPU label500–1,000 pcs$0.05–$0.30
Leather or imitation-leather patch500–1,000 pcs$0.08–$0.50
RFID apparel hang tag1,000–5,000 pcs$0.03–$0.15
Specialized RFID textile label500–3,000 pcs$0.10–$0.50+

These are broad planning ranges assembled from common product configurations and publicly listed supplier benchmarks; they should not be treated as verified prices for a specific order. Actual quotes can fall outside them, especially for premium materials, complex finishing, specialized RFID chips, or small customized batches.

What affects the final price?

1. Order quantity

Higher quantities can spread setup, tooling, and preparation costs across more pieces. However, increasing quantity is not always economical if you have many designs or sizes with uneven demand.

2. Material

Specialty paper, metallic substrates, premium woven constructions, leather, silicone, and RFID components vary in cost.

3. Printing and finishing

Foil stamping, embossing, multiple colors, unusual shapes, and special coatings may increase setup or processing costs.

4. RFID requirements

RFID chip selection, antenna construction, encoding, verification, and testing can materially affect the price.

5. Number of designs

A 10,000-piece order with one design is not necessarily priced like an order of 10 designs with 1,000 pieces each. Artwork setup, tooling, color changes, and packing may be repeated for every design.

6. Packing and shipping

Individual packing, SKU separation, export cartons, and freight terms can change the landed cost.

How to request an accurate quotation

Send us the product type, finished size, material, artwork, quantity per design, finishing requirements, destination country, and any testing or compliance requirements. For RFID products, include the intended reader system and encoding specifications.

We can then assess the suitable construction, identify any technical questions, and quote the project based on a defined specification.

Our OEM and ODM Customization Process

We use a specification-led workflow to reduce uncertainty before bulk production.

Step 1: Understand your project

We confirm the garment category, target market, label function, estimated annual volume, and budget.

Step 2: Review the artwork

We check the logo, dimensions, small text, color references, cutting lines, and any variable data.

Step 3: Recommend materials and construction

We propose suitable materials, printing or manufacturing methods, finishing, attachment options, and packing formats.

For OEM orders, we follow the customer’s approved specifications. For ODM projects, we help develop the construction based on the buyer’s requirements.

Step 4: Confirm MOQ and quotation

We confirm the quantity per design, setup requirements, unit price, lead time, sample arrangements, and shipping terms.

Step 5: Produce and approve samples

When the construction is new or the requirements are demanding, we recommend a physical sample or prototype before bulk production.

Step 6: Complete bulk production and quality inspection

Inspection criteria are agreed according to the product. They may include dimensions, color consistency, print quality, fold accuracy, die-cutting, attachment strength, wash performance, barcode readability, or RFID encoding verification.

Step 7: Pack and ship

We pack according to the agreed SKU structure and shipping requirements, helping buyers maintain clear inventory and avoid mixing different label designs.

Lead time depends on the product, quantity, artwork approval, sampling, and material availability. We confirm the schedule after the specification is agreed rather than promising one universal production time for every label type.

Quality Control: What We Recommend Testing Before Bulk Orders

A clothing tag may look good when it leaves the factory but fail after sewing, washing, handling, or retail scanning. We recommend a quality plan based on the tag’s actual purpose.

Quality checkSuitable product typesWhat to verify
Dimensional inspectionAll typesWidth, height, shape, fold and cutting accuracy
Color and artwork checkPrinted, woven and hang tagsApproved artwork and color consistency
Rub or print durability testPrinted labels and hang tagsSmudging, fading, and surface damage
Wash testCare labels and garment-applied labelsReadability, attachment, peeling, shrinkage
Heat and stretch testHeat-transfer labelsCracking, peeling, and fabric compatibility
Attachment-strength checkSew-in labels and patchesSeam strength and edge comfort
Barcode or QR scan testPrinted identification tagsReadability using the intended scanners or devices
RFID verificationRFID productsEncoding accuracy and performance in the intended system

For wash durability, we recommend defining the washing temperature, detergent, number of cycles, and acceptance criteria before testing. A test performed under one set of conditions does not automatically prove durability under all laundering conditions.

For RFID, test the tag on the intended garment or packaging. Body proximity, folds, liquids, metallic components, tag orientation, and reader settings can affect read performance.

Common Mistakes When Ordering Clothing Tags

Mistake 1: Using the same label for every garment

A label that works for a cotton T-shirt may not work for stretch sportswear, denim, or children’s clothing.

Our recommendation: Match the label to the fabric, wear comfort, and care conditions.

Mistake 2: Putting too much information on the hang tag

Small text can be hard to read, especially on a narrow tag.

Our recommendation: Keep the front focused on brand identity and organize secondary information on the reverse or a separate label.

Mistake 3: Ordering by total quantity without separating SKUs

If a garment collection has multiple sizes and colors, a single total quantity can hide the actual requirements for each label variation.

Our recommendation: Provide a clear SKU matrix with quantities per design, size, and color.

Mistake 4: Skipping the physical sample

A digital proof cannot fully demonstrate paper stiffness, woven texture, foil appearance, or the feel of a heat-transfer label.

Our recommendation: Approve a sample for new materials, specialty finishes, and critical applications.

Mistake 5: Treating RFID as a printed barcode

RFID requires compatible hardware and correctly configured data. Printing a product number on an RFID label does not automatically encode that number into its chip.

Our recommendation: Confirm chip selection, encoding format, data ownership, reader compatibility, and verification procedures before production.

Frequently Asked Questions About Types of Tags on Clothing

What are the most common types of clothing tags?

Common types include woven labels, printed labels, care labels, size labels, hang tags, heat-transfer labels, leather patches, silicone labels, barcode tags, and RFID tags. Most brands choose only the types they need for their garments and sales channels.

What is the difference between a clothing label and a hang tag?

A clothing label is usually sewn, bonded, or otherwise attached to the garment for branding or product information. A hang tag is normally removable and is used for retail presentation, pricing, product identification, and marketing.

Which clothing tag is best for a premium brand?

Common options include woven labels, premium paper hang tags, foil-stamped tags, and selected leather or silicone patches. The best choice depends on the brand identity, garment type, target price, and desired tactile effect.

What is the most economical clothing tag?

A simple printed label or standard paper hang tag can be economical at suitable production quantities. The lowest unit price depends on material, size, setup, quantity per design, and finishing.

Can you customize clothing tags with our logo?

Yes. Customization can include artwork, dimensions, material, colors, printing, finishing, shape, attachment method, and packing. The available production route depends on the tag type you select.

What is the MOQ for custom clothing tags?

MOQ depends on the product and manufacturing process. As a starting budget guide, many standard printed labels and hang tags are quoted from hundreds to several thousand pieces per design. Specialized woven, silicone, or RFID constructions may have different minimums. We confirm the applicable MOQ after reviewing the specification.

Can clothing tags include barcodes or QR codes?

Yes. You can print barcodes and QR codes on suitable labels or hang tags. Buyers should provide the data structure and confirm that the finished codes can be scanned reliably at their intended size.

What is the difference between barcode and RFID clothing tags?

A barcode is read optically, generally requiring the scanner to see the code. RFID communicates wirelessly with a compatible reader and may identify tags without direct line of sight. RFID requires a compatible system and appropriate data configuration.

Can you produce OEM and ODM clothing tags?

Yes. For OEM projects, buyers provide the approved artwork and specifications. For ODM projects, we help develop a suitable label construction based on the garment, brand style, performance requirements, and budget.

What information should I send to get a quotation?

Please provide the label type, dimensions, material, artwork, quantity per design, colors, finishing, attachment method, destination market, and required tests. For RFID, also provide the intended use, reader requirements, chip or protocol preference, and encoding specifications.

Request a Custom Clothing Tag Quotation

As a custom label and packaging supplier, we help apparel brands and B2B buyers develop label solutions that balance brand presentation, product information, production feasibility, and budget.

Whether you need printed care labels, custom paper hang tags, barcode labels, RFID apparel tags, or a coordinated set of branding components, we recommend defining the specifications before committing to bulk production.

To receive a project-specific quotation, please send us:

  • Product type: woven label, printed label, hang tag, heat transfer, RFID, or other
  • Dimensions and material: finished size and preferred substrate
  • Artwork: logo, design file, or reference image
  • Quantity: total order and quantity per design or SKU
  • Customization: colors, foil, embossing, folds, codes, or other finishes
  • Application: garment type, attachment method, and intended use
  • Destination: country and preferred shipping terms
  • Testing requirements: wash durability, barcode scanning, RFID encoding, or other criteria

We will review the information, confirm the feasible production route, and provide a quotation based on the agreed specifications.

Contact our team to discuss your custom clothing tag project, request a sample, and develop an OEM or ODM solution for your apparel business.

Company Address:

No. 1, Xiguozhuang Industrial Park, Chengyang Subdistrict, Chengyang District, Qingdao City, Shandong Province

Email: info@perfectlabel.net

Tel: +86 532 83388181

WhatsApp: +86 19011585175


tamper-evident-tape

What Is Tamper Evident Tape? Types, Uses, and How to Choose

Tamper evident tape is a specialized security sealing tape designed to reveal visible signs of opening, removal, or interference. Depending on its construction, it may display a hidden “VOID” or “OPENED” message, leave a security pattern on the package surface, or show other signs when removal is attempted. Unlike regular packing tape, which primarily seals packages, tamper evident tape helps recipients identify whether a package may have been disturbed during storage, handling, or transit.

Tamper evident tape is widely used in shipping, logistics, warehousing, electronics packaging, and other applications where package integrity matters. Choosing the right type requires more than comparing tape widths or adhesive strength. The packaging material, required security effect, application environment, and acceptable surface residue all influence the final choice.

In this guide, we explain how tamper evident tape works, explore its main types and applications, compare it with regular packing tape and tamper evident labels, and outline the key factors to consider when selecting a suitable security solution.

What Is Tamper Evident Tape?

Tamper evident tape is a security tape that provides visible evidence of attempted opening, removal, or interference. It is designed to make unauthorized access easier to identify by creating a noticeable change when someone attempts to remove or manipulate the tape.

Depending on the product design, this change may include a concealed message becoming visible, a pattern transferring onto the applied surface, or the tape breaking apart during removal. These features help users inspect sealed packages and identify potential signs of interference.

Tamper evident tape is different from ordinary adhesive tape because its purpose extends beyond sealing. Regular packing tape helps keep a carton closed, while tamper evident tape incorporates a security feature intended to reveal signs of removal or opening.

Common features of tamper evident tape include:

  • Visible tamper indication: A hidden message, pattern, or other visual change appears when removal is attempted.
  • Security sealing: The tape helps seal a package while providing an additional indication of possible interference.
  • Application flexibility: Depending on the construction, it may be suitable for cartons, envelopes, bags, or other packaging surfaces.
  • Customization options: Certain products can incorporate custom messages, printed designs, logos, or other identifying features.

It is important to distinguish tamper evidence from tamper prevention. Tamper evident tape does not necessarily stop someone from opening a package. Instead, it helps make certain types of interference more noticeable.

How Does Tamper Evident Tape Work?

Tamper evident tape works by combining an adhesive system with materials or structures designed to change visibly when removal is attempted. The exact mechanism depends on the product construction and the surface to which it is applied.

1. Hidden VOID or OPENED Messages

Some security tapes contain a concealed message or security pattern. When someone attempts to remove the tape, the message becomes visible on the tape, the underlying surface, or both, depending on the design.

For example, a tape may reveal a repeated “VOID” message after removal from a compatible packaging surface. This visible change alerts the recipient that the seal may have been disturbed.

The appearance and transfer behavior of the message vary by product. Therefore, the expected result should be confirmed using the actual tape and intended packaging material.

2. Partial-Transfer and Full-Transfer Mechanisms

Some tamper evident tapes are designed to transfer security material or a message onto the applied surface when removal is attempted.

With a full-transfer construction, the intended security pattern may transfer predominantly to the surface. With a partial-transfer construction, parts of the security pattern may remain on the tape while other parts appear on the applied surface.

These mechanisms can help make removal more apparent, but their performance depends on the adhesive, substrate, surface condition, and application process.

3. Non-Transfer Security Mechanisms

Certain tamper evident tapes are designed to reveal a message primarily on the tape itself, with little or no intended transfer to the underlying surface.

This type may be worth considering when preserving the appearance of the packaging or minimizing surface residue is important. However, “non-transfer” does not automatically mean that the tape will leave no adhesive residue under every condition.

4. Destructible Materials

Some security sealing products use materials that tear, fragment, or otherwise become visibly damaged when removal is attempted.

This behavior can make it difficult to remove the product intact and reapply it without leaving evidence. Destructible materials are also used in security labels, particularly for product identification, warranty seals, and selected equipment applications.

The key principle: Tamper evident tape provides a visible indication of interference rather than an absolute guarantee against unauthorized access. For reliable results, the security mechanism must be compatible with the intended packaging surface and application conditions.

What Are the Different Types of Tamper Evident Tape?

Tamper evident tape is available in different constructions to meet different packaging and security requirements. Understanding these differences helps buyers choose a product that matches their application rather than selecting tape based on appearance alone.

1. Full-Transfer VOID Tape

Full-transfer VOID tape is designed to leave a security message or pattern on the applied surface when removal is attempted. Depending on the product, the tape may also show a corresponding visual change.

This type can be useful when visible evidence on the package itself is a priority.

Potential applications:

  • Shipping cartons and selected packaging surfaces
  • Security-sensitive package closures
  • Applications where a visible removal pattern is desirable

Before selecting full-transfer tape, confirm that the substrate supports the intended transfer effect and that permanent marking is acceptable.

2. Partial-Transfer VOID Tape

Partial-transfer VOID tape is designed so that portions of the security message or pattern may remain on the tape while other portions transfer to the applied surface.

The resulting visual change can provide evidence of attempted removal in more than one location.

Potential applications:

  • Security sealing on compatible packaging
  • Selected storage and distribution applications
  • Packages that benefit from a visible transfer pattern

Its suitability depends on the required security effect, substrate compatibility, and inspection process.

3. Non-Transfer VOID Tape

Non-transfer VOID tape is designed to reveal a security message primarily on the tape itself rather than intentionally transferring the full message to the applied surface.

It may be suitable for applications where visible evidence is required but extensive surface marking is undesirable.

Potential applications:

  • Selected cartons and packaging materials
  • Security sealing where surface appearance matters
  • Applications requiring a visible indication without a deliberately transferred pattern

Actual residue and removal behavior should be verified through testing. Product descriptions alone cannot guarantee identical performance across different substrates.

Non-Transfer VOID Tape

4. Destructible Security Tape

Destructible security tape uses a material construction intended to break apart or become visibly damaged when removal is attempted.

Instead of relying exclusively on a transferred VOID message, the material itself may provide the tamper indication.

This type can be considered when intact removal and reapplication would be undesirable. However, destructible security tape should not be confused with every type of destructible security label; the formats and application methods may differ.

5. Custom-Printed Security Tape

Some security tape products can incorporate printed text, logos, colors, sequential identifiers, or other design elements, depending on the manufacturer’s capabilities.

Custom printing can support brand identification, package handling instructions, or internal security procedures. It may also make unauthorized substitution easier to notice when the printed design is part of a broader inspection process.

Printed graphics alone do not make ordinary tape tamper evident. If a security effect is required, the underlying tape construction must provide the intended tamper indication.

What Is Tamper Evident Tape Used For?

Tamper evident tape is used in applications where package integrity needs to be checked during storage, handling, distribution, or delivery. The most suitable product depends on the packaging design, the type of interference being considered, and the level of visible evidence required.

1. Shipping and Logistics

During transportation, packages may pass through multiple facilities, vehicles, and handling stages. Tamper evident tape can provide a visible indication if a sealed closure has been disturbed.

Common applications include shipping cartons, distribution packaging, and selected warehouse operations.

For logistics applications, buyers should consider carton material, surface coatings, storage conditions, and the way packages are sealed. A sample test on the actual carton can help determine whether the security message appears as intended.

2. E-Commerce Packaging

Online retailers and fulfillment operations need packaging that remains identifiable and easy to inspect throughout delivery.

Tamper evident tape may help reveal signs of attempted opening on compatible packages. Custom printing may also support brand recognition or package identification.

However, the tape should be considered part of a broader packaging strategy. It does not independently guarantee that a shipment has not been opened or that its contents have remained unchanged.

3. Electronics and Equipment Packaging

Electronic products, accessories, and equipment may require security seals on packaging or selected components.

Depending on the product design, tamper evident tape or a smaller security label may be suitable for indicating attempted access.

When selecting a solution, consider the surface material, enclosure geometry, product value, inspection requirements, and whether residue could affect the product’s appearance or subsequent use.

4. Documents, Envelopes, and Security Bags

Certain documents, envelopes, and security bags require a closure that provides visible evidence of opening.

A suitable security sealing tape can help recipients identify possible interference at the closure point. The tape must be compatible with the envelope or bag material and the intended sealing process.

For applications involving confidential information or regulated materials, the packaging design and inspection procedure should be evaluated together rather than relying on tape alone.

5. Warehousing and Asset Protection

In some warehouse and industrial settings, tamper evident tape can support inspection procedures for sealed containers, stored components, and selected equipment packaging.

It may help staff identify packages that need further inspection, especially when combined with documented sealing and receiving procedures.

For high-risk applications, buyers should evaluate whether additional controls, such as unique identifiers, serialized labels, or access-control measures, are necessary.

Tamper Evident Tape vs. Regular Packing Tape

The main difference between tamper evident tape and regular packing tape is their intended function. Regular packing tape primarily seals packages, while tamper evident tape is designed to reveal visible signs of attempted removal or interference.

FeatureTamper Evident TapeRegular Packing Tape
Primary purposeSealing with a visible tamper indicationGeneral package sealing
Removal evidenceMay reveal a message, transfer pattern, or material damageUsually has no dedicated tamper-indicating mechanism
Security functionalityDesigned to support inspection for possible interferencePrimarily provides closure and handling support
CustomizationMay include security messages and specialized constructionsOften available with standard or custom printing
Surface behaviorDepends on the specific tamper-evident mechanismDepends on the adhesive and tape material
Typical selection factorsSecurity effect, substrate, residue, and application conditionsSealing strength, dimensions, cost, and packaging requirements

For example, a carton sealed with ordinary packing tape may be reopened and resealed without a dedicated security message appearing. Tamper evident tape is designed to make certain removal attempts more apparent.

However, neither the presence nor absence of visible damage provides absolute proof that a package has or has not been tampered with. Product design, application conditions, and inspection procedures all influence the evidence available.

Tamper Evident Tape vs. Tamper Evident Labels

Tamper evident tape and tamper evident labels serve related purposes, but they are not interchangeable in every application.

Tape is often considered for sealing a longer opening or closure. Labels are often used on smaller areas, product housings, access points, or specific sealing locations.

Comparison FactorTamper Evident TapeTamper Evident Labels
FormatUsually supplied in tape rollsOften supplied as individual labels or rolls of die-cut labels
Application areaLonger package seams and closure areasDefined areas, product surfaces, and selected openings
Size and shapeTypically available in specified tape widths and lengthsCan often be customized into different shapes and sizes
Printing and brandingDepends on the tape supplier and product constructionMay support custom graphics, logos, text, and specialized label finishes
Typical usePackage sealing and selected security closuresProduct protection, warranty seals, equipment identification, and other localized applications
Key selection concernClosure geometry, substrate, and sealing processApplication area, surface compatibility, label construction, and required tamper indication

When Should You Choose Tamper Evident Tape?

Consider tamper evident tape when you need to seal a package closure or a longer seam and want a visible indication of attempted removal.

It may be appropriate for cartons, envelopes, and selected packaging formats, provided the tape is compatible with the surface and sealing process.

When Should You Choose Tamper Evident Labels?

Consider tamper evident labels when the security feature needs to be positioned on a defined area, such as a product housing, access point, warranty location, or component package.

Depending on the construction, options may include VOID labels, destructible labels, and other specialized security labels. Custom sizes, shapes, printed information, and selected finishing techniques may also be available.

For manufacturers, brand owners, and packaging companies, the right choice depends on the product design and the required security effect. In some projects, a combination of security tape and labels may provide a more suitable approach than either product alone.

How to Choose the Right Tamper Evident Tape

Selecting tamper evident tape requires evaluating the application as a whole. A tape that works well on one carton or surface may behave differently on another.

The following factors can help buyers define their requirements before requesting samples or quotations.

1. Identify the Application Surface

Start by identifying the exact surface to which the tape will be applied.

Common substrates include corrugated cardboard, coated paperboard, plastic, metal, and glass. Their surface energy, texture, coatings, and cleanliness can influence adhesion and tamper indication.

For example, a coated carton may behave differently from an uncoated corrugated carton. A smooth metal surface may also require a different adhesive approach from a textured packaging material.

Whenever possible, provide the supplier with the actual packaging material or a representative sample.

2. Define the Required Tamper Indication

Determine where the tamper evidence should appear and what the recipient needs to observe.

Questions to consider include:

  • Should a VOID message appear on the package surface?
  • Should the message appear mainly on the tape?
  • Is visible material damage an acceptable indication?
  • Is permanent marking acceptable?
  • Does the package require custom text or a recognizable security pattern?

These requirements help narrow the choice between transfer, non-transfer, and destructible constructions.

3. Evaluate Adhesive Performance

The adhesive must work with the intended substrate and application process.

Important considerations include initial adhesion, the time allowed for the adhesive to bond, storage conditions, and performance under the expected operating environment.

Temperature, humidity, dust, surface coatings, and application pressure can all influence results. The adhesive should be evaluated under conditions representative of actual use.

Do not assume that stronger adhesion always means better tamper evidence. The complete security mechanism, rather than adhesive strength alone, determines the intended removal behavior.

4. Consider Environmental Conditions

Packages may experience temperature changes, humidity, long storage periods, or demanding transportation conditions.

If the tape will be used in a cold warehouse, hot distribution environment, or humid location, confirm the manufacturer’s applicable performance specifications.

Where conditions are demanding, test samples under representative storage and application conditions before committing to a large production order.

5. Confirm Dimensions and Application Method

Tape width, roll length, core dimensions, and dispensing method may influence production efficiency and ease of application.

For manual sealing, operators may have different handling requirements from automated packaging lines. The selected format should match the available equipment and packaging workflow.

For customized products, confirm the dimensions, winding direction, roll specifications, and other relevant production details with the supplier.

6. Evaluate Custom Printing Requirements

Custom printing can help identify packages, display handling instructions, or support brand consistency.

Depending on the product, customization may include logos, colors, warning messages, or other printed information. Specialized security features should be assessed separately from decorative printing.

If custom printing is required, confirm that the design is compatible with the tape construction and that the final product remains suitable for its intended application.

7. Test Before Bulk Production

Sample testing is an important step when introducing a new security sealing material.

A practical evaluation should include:

  1. Apply the tape to the intended packaging surface using the expected procedure.
  2. Allow the adhesive to bond according to the manufacturer’s instructions.
  3. Evaluate the appearance and adhesion under representative conditions.
  4. Attempt removal and inspect the resulting tamper indication.
  5. Check for unacceptable residue, surface damage, or other unintended effects.
  6. Confirm that operators can apply and inspect the tape consistently.

Record the results and agree on acceptance criteria before moving to bulk production.

This process helps reduce the risk of selecting a product that performs differently from what the application requires.

Can Tamper Evident Tape Prevent All Tampering?

No. Tamper evident tape is designed to reveal certain signs of opening or removal, but it cannot guarantee that every attempt at interference will be detected.

Its effectiveness depends on the security construction, packaging material, application quality, environmental conditions, and the way the package is inspected.

Some products provide a clear visible message when removed correctly, while others may show different results depending on the substrate or removal conditions. Deliberate manipulation, unsuitable surfaces, or incorrect application may affect the evidence produced.

For this reason, tamper evident tape should be viewed as one part of a security process rather than a complete anti-theft or anti-counterfeiting solution.

Depending on the application, additional measures may include:

  • Unique serial numbers or identification codes
  • Specialized tamper evident labels
  • Documented package sealing and receiving procedures
  • Access controls and inspection records
  • Suitable packaging structures and other security features

The appropriate combination depends on the product’s value, distribution process, risk level, and inspection requirements.

Custom Tamper Evident Labels and Security Solutions from Perfect Label

For projects that require localized tamper indication, specialized materials, or customized label designs, tamper evident labels may be an appropriate alternative or complement to security tape.

Qingdao Perfect Printing and Packaging Co., Ltd. (Perfect Label) is a custom label manufacturer based in Qingdao, China, serving brands, packaging companies, and industrial manufacturers across international markets.

With 16 years of experience in the label printing industry, Perfect Label provides customized label solutions supported by an in-house technical team and advanced printing and converting equipment.

Our product portfolio includes security and anti-counterfeit labels, special-material labels, RFID/NFC smart labels, functional labels, and decorative labels. Depending on the application and product specifications, we help customers evaluate suitable label materials, printing requirements, shapes, and finishing options.

Customized Labels for Different Applications

Security and anti-counterfeit labels

For applications requiring product identification or visible signs of interference, an appropriate security label construction can help support inspection and product protection procedures.

Special-material labels

Different surfaces and operating environments may require specialized label materials. Material selection should consider the substrate, adhesive compatibility, application method, and intended service conditions.

Custom printing and finishing

Depending on the selected product, customization may include brand graphics, text, colors, die-cut shapes, and compatible finishing techniques. The available options should be confirmed for each label construction.

Manufacturing and Quality Management

Perfect Label operates a 5,000-square-meter intelligent manufacturing workshop equipped with printing, die-cutting, hot-stamping, embossing, and other converting equipment. Our in-house technical team supports customized label projects, while our ISO 9001:2015 quality management system provides a framework for production quality control.

We offer a 24-hour rapid sample-making service for applicable projects, with mass-production orders potentially completed within 3–7 working days depending on product specifications and order requirements.

For customers evaluating a security label project, sample development can help verify material compatibility, printing quality, dimensions, and the intended application performance before bulk production.

Discuss Your Custom Security Label Requirements

If you are comparing tamper evident tape with security labels, the most suitable solution depends on where the seal will be applied, what evidence needs to appear after removal, and which materials are compatible with your product.

Contact Perfect Label to discuss your application, packaging surface, label dimensions, customization requirements, and estimated order quantity. Our team can help evaluate the relevant custom label options based on your project specifications.

Frequently Asked Questions About Tamper Evident Tape

Is tamper evident tape reusable?

Many tamper evident tapes are designed to show visible changes when removal is attempted. Once the security mechanism has been activated, the tape may not be suitable for reuse without visible evidence. Actual behavior depends on the product construction.

Does tamper evident tape leave residue?

It depends on the tape and the applied surface. Some products are designed to transfer a VOID message or pattern to the substrate, while others primarily reveal information on the tape itself. Adhesive residue and surface marking should be evaluated using the actual product and packaging material.

Can tamper evident tape be customized?

Some manufacturers offer customization options such as dimensions, colors, printed messages, logos, and security patterns. The available options depend on the tape construction and production capabilities. Buyers should confirm the specifications with their supplier.

What is the difference between tamper evident and tamper proof?

Tamper evident means that a product is designed to provide visible evidence of certain opening or interference attempts. Tamper proof suggests that tampering cannot occur. Tamper evident tape generally supports detection rather than guaranteeing that unauthorized access is impossible.

Is tamper evident tape suitable for plastic packaging?

Some tamper evident tapes may be suitable for particular plastic surfaces, but compatibility cannot be assumed for all plastics. Surface energy, coatings, texture, adhesive formulation, and application conditions can affect performance. Testing on the actual packaging material is recommended.

Is tamper evident tape the same as security tape?

The terms overlap in commercial usage, but not every product marketed as security tape necessarily has the same tamper-indicating mechanism. Buyers should verify whether a particular tape reveals a message, transfers a pattern, breaks apart, or simply provides a printed security design.

Should I choose security tape or a security label?

Security tape may be suitable for sealing longer package closures, while security labels may be more appropriate for smaller areas, product housings, warranty locations, or defined access points. The best choice depends on the package design, surface material, and required security effect.

What information should I provide when requesting a custom security label quotation?

Provide the application, surface material, desired tamper indication, label dimensions, printing requirements, estimated order quantity, and any relevant environmental conditions. Sharing a sample or photograph of the application can also help the manufacturer evaluate the project more accurately.

Conclusion

Tamper evident tape is designed to help reveal signs of opening, removal, or interference through visible messages, transfer patterns, or material damage. It is used in shipping, logistics, e-commerce packaging, equipment packaging, and other applications where package integrity needs to be inspected.

Choosing the right product requires evaluating the tamper-indicating mechanism, packaging surface, adhesive performance, environmental conditions, dimensions, and customization requirements. Testing the selected product on the actual packaging material is an important step before bulk purchasing.

For applications involving smaller sealing areas, product housings, warranty locations, or specialized identification requirements, custom tamper evident labels may provide a more suitable solution.

Perfect Label supports customized label projects with specialized printing and converting capabilities, an in-house technical team, and an established quality management system. If you are evaluating security labels for your product or packaging, contact our team to discuss your application and explore suitable customization options.

How to Make Water Bottle Labels

Learning how to make water bottle labels sounds simple until the finished bottle goes into a refrigerator or ice bucket.

A label may look perfect when it comes off the printer, but cold water bottles create condensation, wet hands increase friction, and the wrong adhesive can cause the edges to lift. For commercial products, additional concerns include bottle dimensions, print quality, application speed, barcode readability, packaging regulations, and production cost.

The good news is that the process is straightforward when you work from the bottle outward.

This guide explains how to make water bottle labels for parties, weddings, events, restaurants, hotels, promotional campaigns, private-label water brands, and commercial bottled-water production.

It covers the complete process:

Bottle measurement → label size → material selection → artwork → printing → finishing → sample testing → application → quality control → bulk production

What Do You Need to Make Water Bottle Labels?

Before opening Canva, Illustrator, Photoshop or another design program, prepare the physical bottle and determine how the label will be used.

You normally need:

  • The actual water bottle
  • Bottle diameter or circumference
  • Usable label height
  • Label material
  • Adhesive
  • Label artwork
  • Printer or professional printing supplier
  • Cutting or die-cutting method
  • Application method
  • Packaging and storage information

For a small event, you might only need a home printer and printable waterproof film.

For commercial production, the construction becomes more sophisticated:

Facestock + ink + protective coating/lamination + adhesive + liner

A typical pressure-sensitive label therefore has several functional layers, not just a printed piece of paper.

The most important principle is:

Choose the label according to what happens to the bottle after labeling, not just how the label looks when it comes out of the printer.

Step 1: Measure the Water Bottle Before Designing

The bottle determines the label dimensions.

This is where many beginners make their first mistake.

Do not download a generic “water bottle label size” and assume it will fit your bottle.

Even bottles with the same capacity can have different:

  • Diameters
  • Heights
  • Shoulder shapes
  • Tapers
  • Curves
  • Label panels
  • Surface textures

Measure the circumference

The easiest method is to wrap a narrow strip of paper around the bottle.

Mark where the strip meets itself, remove it and measure the length.

This gives you a practical circumference measurement.

For a wrap-around label, you then need to determine whether you want:

  • A small gap
  • Edge-to-edge contact
  • A slight overlap

For event labels, a small overlap is often practical because it makes application easier.

Some current bottle-label design guidance uses about 6–10 mm of overlap for simple wrap-around event labels, but treat this as a starting point rather than a universal specification. The actual requirement depends on the bottle diameter, label material and application method.

Measure the usable height

Do not measure the entire bottle height.

Measure only the relatively straight section where the label will sit.

If the label extends too far into the shoulder or bottom curve, you may see:

  • Wrinkles
  • Edge lifting
  • Creasing
  • Uneven application
  • Poor label alignment

A practical approach is to leave a small safety margin from the curved areas rather than using every available millimeter.

Step 2: Decide What Type of Water Bottle Label You Need

Before selecting materials, decide what the label is actually for.

Personal event labels

Common for:

  • Weddings
  • Birthday parties
  • Baby showers
  • Corporate events
  • Conferences
  • School events
  • Sports events

These labels usually prioritize appearance and easy installation.

Promotional water bottle labels

Used by:

  • Hotels
  • Restaurants
  • Gyms
  • Real estate companies
  • Schools
  • Brands
  • Marketing agencies

The label needs stronger branding and consistent print quality.

Private-label bottled water

This is a commercial application.

The requirements become much stricter because the labels may need to survive:

  • Refrigeration
  • Transportation
  • Condensation
  • Repeated handling
  • Automated labeling
  • Distribution and retail display

Premium bottled water

Premium brands may use:

  • Clear labels
  • Metallic effects
  • Textured materials
  • Embossing
  • Foil stamping
  • Minimalist artwork

The material becomes part of the brand identity.

Step 3: Choose the Right Water Bottle Label Material

This is probably the most important decision in the entire process.

Can you use ordinary paper?

Technically, yes, if the bottle stays dry and you only need the label for a short time.

But ordinary paper is a poor choice for chilled bottled water.

Why?

Because water bottles commonly develop condensation when they move from a cold environment into warmer air. Paper absorbs moisture, which can lead to:

  • Wrinkling
  • Softening
  • Edge curling
  • Ink damage
  • Adhesive failure

Recent industry guidance specifically recommends waterproof film materials such as BOPP, PET or vinyl for water bottle applications exposed to condensation.

BOPP water bottle labels

BOPP means biaxially oriented polypropylene.

It is one of the most practical materials for commercial water bottle labels because it is:

  • Waterproof
  • Lightweight
  • Flexible
  • Dimensionally stable
  • Resistant to tearing
  • Available in white and clear versions

A current BOPP technical guide lists common label-film thicknesses in roughly the 15–50 μm range, depending on the construction and grade.

For many standard bottled-water applications, white BOPP provides a good combination of:

Printability + waterproof performance + flexibility + cost control.

Clear BOPP

Clear BOPP is useful when you want a “no-label-look” appearance.

The transparent film keeps the bottle or water inside visually prominent.

However, you must prepare the artwork carefully.

Colors printed on clear material can appear less opaque because the bottle becomes part of the visual background.

You can use white ink beneath selected design areas when you need stronger color opacity.

PET

PET film provides another durable option.

It can be useful when you need:

  • Higher dimensional stability
  • Stronger durability
  • Premium appearance
  • Resistance to demanding handling

It is especially worth considering for unusual bottle shapes or applications that need a more robust film construction.

Vinyl

Printable vinyl is popular for DIY and short-run waterproof labels.

It can be practical for:

  • Parties
  • Weddings
  • Small events
  • Promotional samples
  • Small businesses

However, commercial buyers should compare vinyl with BOPP and PET rather than assuming vinyl is automatically the best material.

Quick material comparison

MaterialWaterproofAppearanceCostBest Application
Standard paperNoNaturalLowDry, short-term use
Laminated paperBetterPaper-likeLow–mediumLight moisture
White BOPPYesClean, professionalMediumCommercial water bottles
Clear BOPPYesNo-label lookMediumPremium/transparent designs
PETYesPremium/durableMedium–highDemanding applications
VinylYesFlexibleMediumDIY and small batches

The key point is that waterproof performance comes from the complete label construction, not just the face material. Adhesive, ink, coating, application surface and exposure time all matter.

Step 4: Choose the Correct Adhesive

Many buyers spend time choosing the film and almost no time choosing the adhesive.

That is a mistake.

A waterproof film with an unsuitable adhesive can still peel from the bottle.

The adhesive needs to match:

  • PET bottle
  • HDPE bottle
  • Glass bottle
  • Aluminum bottle
  • Bottle temperature
  • Application temperature
  • Condensation
  • Storage temperature
  • Application speed

Why cold bottles are difficult

A cold bottle can develop condensation on its surface.

Pressure-sensitive adhesive does not bond effectively to a layer of water. Industry guidance specifically notes that condensation can weaken the bond and that labels should be applied to the driest surface possible.

This creates an important practical rule:

Waterproof label material does not mean you can apply the label to a soaking-wet bottle.

The label may survive water after bonding, but the adhesive still needs a suitable surface during application.

Permanent adhesive

Most commercial bottled-water labels use permanent adhesive.

This is appropriate when the label is intended to remain on the bottle throughout its normal distribution and use.

Removable adhesive

Removable adhesive may make sense for:

  • Reusable bottles
  • Promotional bottles
  • Event products
  • Temporary branding
  • Products where consumers need to remove the label

Tell your label supplier the intended end use before choosing adhesive.

Step 5: Create the Water Bottle Label Design

Now you can start designing.

A water bottle label usually has limited space, so don’t try to put everything on the front.

A strong design usually has a clear visual hierarchy:

Brand → Product → Supporting information → Contact/QR code

For an event bottle, you might use:

Wedding Name → Date → Decorative Graphic

For a corporate bottle:

Company Logo → Event Name → Website

For a retail product:

Brand → Product Name → Required Product Information → Barcode/QR

Keep important information away from the seam

With a wrap-around label, part of the design will disappear around the back.

Do not put the most important element directly on the seam.

Keep:

  • Logo
  • Brand name
  • Event date
  • Main product name

Inside the primary visible panel.

Use high-resolution artwork

For raster images, a common production target is around 300 DPI at final size for sharp printed graphics. Vector artwork is preferable for logos, typography, and other scalable elements.

Suitable professional file formats may include:

  • AI
  • EPS
  • PDF
  • SVG
  • High-resolution TIFF
  • High-resolution PNG where appropriate

Always confirm the printer’s preferred file format.

Step 6: Add Bleed and Safe Area

If the background extends to the edge of the label, add bleed.

For example, if the final label is:

80 × 50 mm

the artwork file may need to extend beyond the final cut line, depending on the printer’s specifications.

The safe area is equally important.

Keep important text and logos away from:

  • Cutting edges
  • Curved bottle areas
  • Overlap areas
  • Die-cut lines

Your printer should provide a production dieline if the project uses custom dimensions or complex shapes.

Step 7: Choose the Printing Method

The right printing method depends heavily on quantity and customization.

Digital printing

Digital printing is suitable for:

  • Small orders
  • Event labels
  • Product testing
  • Multiple designs
  • Limited editions
  • Short runs

It is particularly useful when you don’t want to commit to a large quantity.

Flexographic printing

Flexographic printing becomes attractive for larger commercial orders.

It is suitable for:

  • High-volume production
  • Repeated SKUs
  • Consistent brand colors
  • Fast production
  • Roll labels

Offset printing

Offset can be useful for certain high-quality packaging projects, especially where color consistency and larger quantities justify the setup.

The practical purchasing rule

Don’t choose a printing method simply because a supplier says it is “better.”

Ask for quotes at several quantities.

For example:

QuantityWhy Compare It
500Small-batch testing
1,000Event/small business
5,000Growing product
10,000Commercial run
25,000Larger production
50,000+High-volume manufacturing

The most economical production method can change as volume increases.

Step 8: Choose the Finish

The finish affects both appearance and performance.

Matte

Matte labels have low reflection and a modern appearance.

Good for:

  • Minimalist brands
  • Corporate events
  • Premium products

Gloss

Gloss creates brighter color and stronger visual impact.

Good for:

  • Retail water
  • Promotional bottles
  • Colorful designs

Lamination

A protective laminate can help protect printed graphics from:

  • Scratching
  • Rubbing
  • Moisture

However, don’t assume that lamination alone makes a paper label suitable for prolonged immersion. The exposed label edges and adhesive still need to survive the environment.

Spot UV

Spot UV can highlight:

  • Logos
  • Product names
  • Decorative elements

Metallic effects

Gold and silver effects can create a premium appearance.

For water bottles, they are particularly useful for:

  • Luxury events
  • Premium hospitality
  • Limited editions
  • High-end promotional products

Step 9: Print a Physical Sample

Never skip this step for a commercial order.

A design that looks good on your monitor can behave differently on the bottle.

Check the physical sample for:

  • Color
  • Size
  • Alignment
  • Material feel
  • Adhesion
  • Wrinkling
  • Edge lifting
  • Barcode readability
  • QR-code scanning
  • Seam position

Then test it on the actual bottle.

Step 10: Perform the Ice-Bucket and Condensation Test

This is one of the most useful practical tests for water bottle labels.

Put the labeled bottle into:

  • Refrigerator
  • Cooler
  • Ice bucket

Then inspect it after:

15 minutes → 30 minutes → 1 hour → several hours

Look for:

  • Edge lifting
  • Wrinkles
  • Ink smearing
  • Color changes
  • Bubbles
  • Adhesive failure
  • Label movement
  • Surface whitening

The reason this test matters is simple: the real enemy is often condensation, not a splash of water.

Recent technical guidance recommends testing the finished label on the actual container because water contact, refrigeration, condensation, and immersion are different exposure conditions.

Step 11: Apply the Label Correctly

Even the best label can fail if you apply it incorrectly.

For manual application

  1. Clean the bottle surface.
  2. Make sure it is dry.
  3. Align the label.
  4. Start from one edge.
  5. Apply slowly around the bottle.
  6. Press the label firmly.
  7. Remove air bubbles.
  8. Check the seam.

Do not rush.

For commercial application

Automatic labeling machines require additional considerations:

  • Label roll direction
  • Core size
  • Roll outer diameter
  • Label gap
  • Winding direction
  • Application speed
  • Bottle diameter
  • Label flexibility
  • Adhesive tack

A label manufacturer should know these requirements before production.

Why Do Water Bottle Labels Peel Off?

There are several possible causes.

1. The bottle was wet during application

This is one of the most common problems.

If condensation exists between the bottle and adhesive, the bond can be compromised.

2. The adhesive is wrong

The adhesive may not be designed for:

  • Cold surfaces
  • Moisture
  • PET
  • Glass
  • HDPE

3. The bottle surface contains contamination

Dust, oil, release agents or other contaminants can reduce adhesion.

4. The label is too stiff

Highly rigid materials may struggle to conform to small or curved bottles.

5. The bottle shape is unsuitable

A label designed for a cylindrical bottle may wrinkle on a tapered bottle.

6. Application temperature is too low

Cold can affect the initial tack of pressure-sensitive adhesives.

How to Prevent Water Bottle Labels From Peeling

A practical solution is:

Clean bottle + dry application surface + suitable adhesive + flexible material + correct application pressure + real-world testing

If you label bottles on a commercial line while wet, the process may require equipment such as air knives to remove surface moisture before label contact. Recent industry guidance specifically recommends drying the application area as much as practical because even specialized cold-and-wet adhesives have limits when surface water becomes excessive.

For most smaller operations, however, the simplest solution is:

Apply the label to a clean, dry bottle before refrigeration.

DIY Water Bottle Labels vs Professional Printing

There are two completely different approaches.

DIY printing

Best for:

  • 10–100 bottles
  • Weddings
  • Birthday parties
  • Baby showers
  • Small events
  • One-time promotions

Typical process:

Design → print on waterproof material → cut → apply

This gives you flexibility but requires more manual labor.

Professional printing

Better for:

  • 500+ labels
  • Retail products
  • Private-label water
  • Hotels
  • Restaurants
  • Corporate promotions
  • Recurring orders

The manufacturer can provide:

  • Roll labels
  • Waterproof BOPP
  • PET
  • Clear film
  • Professional color printing
  • Die cutting
  • Lamination
  • Automatic-labeling specifications
  • Bulk packaging

For commercial buyers, the main advantage isn’t just better printing. It is repeatability.

How Much Does It Cost to Make Water Bottle Labels?

There is no universal price because label cost depends on:

  • Material
  • Size
  • Quantity
  • Printing method
  • Number of colors
  • Number of SKUs
  • Adhesive
  • Lamination
  • Die cutting
  • Special finishing
  • Packaging
  • Shipping

A small DIY project can cost much more per label because you are buying small quantities.

Commercial production generally reduces the unit price as quantities increase, but you should compare total landed cost rather than simply asking for the cheapest label.

For B2B purchasing, request quotations at several volumes and ask the supplier to separate:

Setup cost + unit label cost + finishing + packaging + shipping

This makes supplier comparisons much more accurate.

Common Mistakes When Making Water Bottle Labels

Mistake 1: Using ordinary paper

It may look fine on the printer and fail in the refrigerator.

Better solution: use waterproof synthetic material for chilled applications.

Mistake 2: Choosing material before understanding the environment

A label for a dry event table is different from one sitting in an ice bucket.

Better solution: define the actual exposure first.

Mistake 3: Measuring the bottle incorrectly

A few millimeters can affect the final fit.

Better solution: measure the actual bottle or send a physical sample.

Mistake 4: Applying labels to wet bottles

Even good adhesive cannot perform properly through a layer of condensation.

Better solution: dry the bottle surface before application.

Mistake 5: Putting the logo over the seam

Part of the logo may disappear or look distorted.

Better solution: create a clear front panel and keep important information away from the overlap.

Mistake 6: Forgetting bottle curvature

A flat design file does not show how the label behaves around a curved bottle.

Better solution: test the physical label.

Mistake 7: Skipping the refrigerator test

A label may pass a splash test and fail after hours of condensation.

Better solution: perform a cold-storage and condensation test.

Mistake 8: Choosing waterproof material but ordinary adhesive

Waterproof film does not automatically mean waterproof adhesion.

Better solution: specify both the facestock and adhesive requirements.

Mistake 9: Ordering a huge quantity before testing

This is especially risky for a new brand.

Better solution: approve a sample or pilot run first.

A Practical Water Bottle Label Specification

If you are requesting a quotation from a label manufacturer, provide a specification like this:

SpecificationExample
ProductCustom water bottle label
BottlePET bottle
Bottle size500 ml
Label sizeCustom based on bottle
MaterialWhite BOPP
AdhesivePermanent moisture-resistant
PrintingCMYK
FinishGloss or matte
ApplicationManual/automatic
EnvironmentRefrigerated
Quantity10,000 pcs
ArtworkPrint-ready PDF/AI
Special requirementsBarcode/QR code

This gives the manufacturer enough information to recommend a suitable construction rather than simply quoting a generic sticker.

Commercial Water Bottle Label Production Workflow

For a professional project, I recommend this workflow:

1. Confirm bottle

↓

2. Measure label area

↓

3. Define storage and application conditions

↓

4. Select material

↓

5. Select adhesive

↓

6. Prepare dieline

↓

7. Create artwork

↓

8. Check barcode and QR code

↓

9. Select printing method

↓

10. Produce physical sample

↓

11. Apply to actual bottle

↓

12. Refrigerator/condensation test

↓

13. Approve proof

↓

14. Mass production

↓

15. Final QC

↓

16. Packaging and shipment

This workflow may take slightly longer at the beginning, but it is much safer than discovering a material or adhesive problem after producing tens of thousands of labels.

Water Bottle Label Quality-Control Checklist

Before accepting the finished labels, check:

  • Correct dimensions
  • Correct quantity
  • Correct material
  • Correct adhesive
  • Correct artwork
  • Color matches approved sample
  • No printing defects
  • No scratches
  • Die cutting is accurate
  • Barcode scans correctly
  • QR code works
  • Label applies smoothly
  • No bubbles
  • No edge lifting
  • Cold test completed
  • Condensation test completed
  • Roll direction is correct
  • Packaging is suitable for transportation

Frequently Asked Questions About Making Water Bottle Labels

What is the best material for water bottle labels?

For chilled commercial water bottles, white BOPP is one of the most practical choices because it combines waterproof performance, printability, flexibility and good durability.

Clear BOPP works well for a no-label look, while PET is a good option when you need greater durability or a premium film construction.

Can I use paper labels on water bottles?

Yes, but only when the exposure conditions allow it.

For dry, short-term applications, paper can be economical and attractive.

For refrigerated bottles, condensation and ice exposure make standard paper much more risky. Synthetic film is generally the safer choice.

How do I make waterproof water bottle labels?

Use a waterproof synthetic facestock such as BOPP, PET or suitable vinyl, combine it with an adhesive appropriate for the bottle and temperature conditions, and use a compatible ink and protective finish.

Then test the finished label under actual conditions.

What size should a water bottle label be?

There is no universal size.

First, measure the bottle circumference and usable straight-side height.

For example, some standard 16.9 oz bottles use labels around 8 × 2 inches, but treat this only as a reference; the bottle should determine the final dimensions.

How do I measure a bottle for a wrap-around label?

Wrap a flexible paper strip around the bottle, mark the meeting point, remove it and measure the strip.

Then determine whether your production design requires a gap or overlap.

Why are my water bottle labels peeling?

The most common causes are:

  • Condensation during application
  • Incorrect adhesive
  • Contaminated bottle surface
  • Low application temperature
  • Excessively rigid material
  • Poor application pressure
  • Bottle curvature

The solution is to match the complete label construction to the actual bottle and environment.

Can I put labels on cold water bottles?

It depends on the adhesive and application system.

However, a wet, condensation-covered bottle is difficult for pressure-sensitive adhesives because the adhesive must contact the bottle surface directly.

For most small operations, applying the label to a clean, dry bottle before chilling is the safer approach.

Are BOPP water bottle labels recyclable?

BOPP is a polypropylene film, but the recyclability of the complete labeled bottle depends on the bottle polymer, adhesive, label coverage, inks, local recycling infrastructure, and packaging design.

Do not claim that a label is universally recyclable simply because the facestock itself is recyclable.

Is vinyl better than BOPP for water bottle labels?

Not automatically.

Vinyl is convenient for DIY and small-batch applications.

BOPP is widely used for commercial product labels because it offers a strong combination of moisture resistance, printability and dimensional stability.

The correct choice depends on quantity, bottle type, application method, and performance requirements.

Do water bottle labels need lamination?

Not always.

A suitable synthetic facestock and compatible printing system may already provide the required performance.

Lamination becomes useful when additional protection against abrasion, handling or environmental exposure is required.

However, the adhesive still needs to suit the bottle and conditions.

How do I make labels for a 500 ml water bottle?

Start with the actual 500 ml bottle rather than assuming every 500 ml bottle has the same dimensions.

Measure the circumference and usable label height, choose a waterproof material if the bottle will be chilled, prepare the artwork using a printer’s dieline, produce a sample, apply it to the bottle and perform a condensation test.

Can I make water bottle labels with a home printer?

Yes.

For small events, you can use printable waterproof vinyl or suitable synthetic label stock with a compatible printer.

Always confirm that the printable material is compatible with your specific inkjet or laser printer.

For commercial production, professional digital, flexographic or other industrial printing is generally more practical.

How do I make water bottle labels for a wedding?

For a wedding, keep the design simple.

Use:

  • Couple’s names
  • Wedding date
  • Simple graphic
  • Optional thank-you message

For bottles going into an ice bucket, use waterproof printable film rather than ordinary paper.

Print a small test batch first and check the labels after chilling.

How many labels should I order?

For an event, order enough for the actual number of bottles plus a reasonable reserve.

For commercial production, compare multiple quantities because the unit cost can change significantly with production volume.

Don’t order a very large quantity just to get the lowest unit price unless you are confident the design and bottle specifications will remain unchanged.

Final Takeaway

The easiest way to understand how to make water bottle labels is to stop thinking of them as ordinary stickers.

A successful water bottle label is a small packaging system.

The material must survive moisture.

The adhesive must bond to the actual bottle.

The printing must remain readable.

The size must match the bottle.

The design must account for the wrap-around seam.

And the finished label must be tested under the conditions the bottle will actually experience.

For a dry event bottle, a simple printable label may be enough.

For refrigerated commercial water, a more reliable specification is usually:

Waterproof BOPP/PET film + suitable permanent moisture-resistant adhesive + compatible printing + appropriate finish + physical condensation testing.

The most important production lesson is to test the complete label on the actual bottle before bulk production. A label that looks perfect on a computer screen hasn’t passed the real test yet. Put it on the bottle, refrigerate it, expose it to condensation, handle it with wet hands, and inspect the edges.

If it still looks good and stays firmly attached after that process, you are much closer to a label ready for real-world production.

Types of Label Paper: A Complete Guide to Choosing the Right Label Material

When buyers search for label paper types, they usually aren’t looking for a simple list of paper names. They want to know which label paper suits their product, how durable it will be, whether it works with their printing method, and whether it will survive the actual application environment.

A paper label for a dry cardboard package has very different requirements than a wine label exposed to condensation, a pharmaceutical label with small text, or a shipping label printed with a thermal printer.

Common label paper options include matte, semi-gloss, high-gloss, uncoated, kraft, cast-coated, thermal, fluorescent, metallic, and specialty decorative papers.

Most standard paper label facestocks fall roughly within the 60–90 gsm range, although the actual construction can vary considerably depending on the coating, adhesive and liner.

The key is not to ask, “Which label paper is the best?”

A better question is:

Which label paper gives the right combination of appearance, printability, durability and cost for this particular application?

Types of Label Paper at a Glance

The following table gives a practical starting point.

Label Paper TypeTypical CharacteristicsMain AdvantagesMain LimitationsCommon Applications
Matte PaperSmooth, low-glare surfaceEasy to read, writable, natural appearanceLess vibrant than glossCosmetics, pharmacy, general packaging
Semi-Gloss PaperModerate sheenGood print quality and cost balanceLimited moisture resistanceRetail, FMCG, barcode labels
High-Gloss PaperHighly reflective coated surfaceBright colors, strong shelf impactMore glare, less natural feelPremium packaging, cosmetics
Uncoated PaperNatural paper surfaceWritable, tactile, economicalLower moisture and scuff resistanceCraft products, pharmacy, cartons
Kraft PaperBrown or natural fiber appearanceEco-style appearance, strong brand characterColor reproduction can be differentOrganic food, coffee, craft beverages
Cast-Coated PaperVery smooth, high-gloss surfaceSharp graphics and vivid printingMore expensive than basic paperPremium products
Direct Thermal PaperHeat-sensitive coatingNo ribbon required, fast printingSensitive to heat, light and abrasionShipping, logistics, weighing
Thermal Transfer PaperDesigned for ribbon printingDurable variable informationRequires ribbonBarcodes, warehouse, manufacturing
Fluorescent PaperBright colored surfaceHigh visibilityLimited premium applicationsPromotions, warnings, pricing
Metallized PaperMetallic gold/silver appearancePremium visual effectMore expensive, more complex printingWine, spirits, cosmetics
Decorative Textured PaperEmbossed or tactile surfacePremium tactile experienceHigher cost and printing complexityWine, spirits, luxury packaging

This classification is more useful for purchasing than simply separating labels into “white paper” and “colored paper.”

1. Matte Label Paper

Matte paper is one of the most versatile choices for product labeling.

It has little surface reflection, making text easy to read under strong lighting. Some matte papers are coated, while others are uncoated or woodfree papers.

Typical paper constructions can be around 70–80 gsm, depending on the supplier and grade. One current paper-material specification, for example, lists matte and woodfree paper around 70–80 gsm.

Advantages

  • Low glare
  • Easy to read
  • Natural appearance
  • Suitable for handwriting on some grades
  • Good for barcodes and text
  • Works with multiple printing technologies
  • Generally economical

Disadvantages

  • Less visually vibrant than high-gloss paper
  • Standard paper grades have limited moisture resistance
  • Can absorb liquids depending on construction
  • Can scuff more easily than synthetic materials

Best applications

Matte label paper works well for:

  • Pharmaceutical packaging
  • Health and beauty products
  • Handmade products
  • Food packaging kept dry
  • Cartons
  • Logistics labels
  • Craft products
  • Minimalist branding

Production experience

Matte paper is often a safe starting point when the product needs a professional but understated appearance.

However, if the label will be exposed to water, condensation, oil or outdoor conditions, changing the paper alone may not solve the problem. A coating, laminate or synthetic facestock may be more appropriate.

2. Semi-Gloss Label Paper

Semi-gloss paper is one of the most practical choices for general-purpose printed labels.

It sits between matte and high-gloss finishes, providing enough sheen for good color reproduction without the glare of a mirror-like surface.

A typical semi-gloss paper specification is around 78–80 gsm, although suppliers offer different constructions.

Advantages

  • Good color reproduction
  • Smooth printing surface
  • Professional appearance
  • Good balance between price and visual quality
  • Suitable for barcode printing
  • Works well with flexographic, offset and thermal-transfer printing

Disadvantages

  • Not waterproof
  • Can have limited resistance to oil and abrasion
  • Less premium-looking than specialty textured materials
  • May require lamination for demanding environments

Best applications

Semi-gloss is suitable for:

  • Retail product labels
  • Food packaging
  • Beverage packaging
  • Household products
  • Personal care
  • Barcode labels
  • Logistics labels
  • General FMCG packaging

One current technical comparison describes semi-gloss as a common economical option for retail, food and general product labels that remain in dry conditions.

When should you choose semi-gloss?

If you sell your product indoors, the packaging stays relatively dry, and you want good printing without paying for premium specialty paper, semi-gloss is often a sensible starting point.

3. High-Gloss Label Paper

High-gloss label paper has a highly smooth, reflective surface.

It is designed to make printed colors appear stronger and graphics more visually prominent.

Advantages

  • Excellent color impact
  • High visual brightness
  • Sharp graphics
  • Attractive product presentation
  • Suitable for photographs and detailed artwork
  • Strong shelf visibility

Disadvantages

  • More glare under direct lighting
  • Fingerprints can be more noticeable
  • Less natural tactile appearance
  • Usually more expensive than basic matte paper
  • Still fundamentally a paper material, so it is not automatically waterproof

Best applications

High-gloss paper is commonly used for:

  • Cosmetics
  • Promotional packaging
  • Consumer products
  • Premium retail packaging
  • Food products
  • Colorful product labels

If your design contains large photographic areas, gradients or highly saturated colors, high-gloss paper can provide a stronger visual effect.

However, don’t confuse high gloss with high durability.

A glossy surface may look premium while still being vulnerable to moisture.

4. Uncoated Label Paper

Uncoated paper has no conventional glossy coating on the printing surface.

It provides a more natural paper texture and is often chosen when tactile quality matters more than maximum color brilliance.

Avery Dennison describes uncoated papers as having no coating and notes that they can work with toner-based, inkjet and thermal-transfer printing as well as traditional printing methods.

Advantages

  • Natural appearance
  • Excellent tactile feel
  • Often writable
  • Good for minimalist designs
  • Suitable for traditional or handmade branding
  • Can be economical

Disadvantages

  • Lower moisture resistance
  • Can absorb ink differently from coated stock
  • Fine graphics may appear less saturated
  • Can be more vulnerable to scuffing

Best applications

  • Pharmacy
  • Craft products
  • Handmade products
  • Organic brands
  • Paper packaging
  • Internal identification
  • Products where handwriting is required

Buyer tip

If you need both a natural appearance and strong color reproduction, ask the manufacturer to provide a physical sample.

The same artwork can look noticeably different on coated and uncoated paper.

5. Kraft Label Paper

Kraft paper is instantly recognizable because of its natural brown or kraft-colored appearance.

It is popular with brands that want to communicate:

  • Natural
  • Organic
  • Handmade
  • Rustic
  • Sustainable
  • Artisan

Advantages

  • Distinctive natural appearance
  • Strong brand personality
  • Excellent for craft-style packaging
  • Works well with simple one- or two-color designs
  • Suitable for organic and handmade product positioning

Disadvantages

  • White colors may require special treatment
  • Bright colors can look different on brown stock
  • Limited moisture resistance
  • Not ideal for highly photographic artwork
  • Color consistency requires careful printing control

Best applications

Kraft label paper is particularly suitable for:

  • Coffee
  • Tea
  • Organic food
  • Handmade soap
  • Candles
  • Craft beer
  • Craft spirits
  • Natural cosmetics
  • Gift products

A common mistake

Many designers create artwork assuming a white background, then print it on brown kraft paper.

The result can be significantly darker than expected.

If the design requires bright colors or white graphics, discuss white ink or a different substrate with the printer before production.

6. Cast-Coated Label Paper

Cast-coated paper has an exceptionally smooth, high-gloss surface.

It is designed to provide strong ink holdout and high visual quality.

Current label-stock specifications commonly place high-gloss cast-coated paper around 80–90 gsm, although construction varies by manufacturer.

Advantages

  • Very smooth surface
  • High-gloss appearance
  • Strong color reproduction
  • Excellent detail
  • Premium shelf presentation

Disadvantages

  • Higher cost
  • More reflective
  • Still not equivalent to waterproof film
  • May require careful adhesive selection depending on application

Best applications

  • Premium food
  • Cosmetics
  • Wine
  • Spirits
  • Luxury consumer goods
  • Promotional packaging

If the primary goal is premium visual impact, cast-coated paper can be more appropriate than ordinary gloss paper.

7. Direct Thermal Label Paper

Direct thermal paper is different from conventional decorative label paper because it contains a heat-sensitive coating.

A direct thermal printer creates the image directly on the label surface, so it doesn’t require a ribbon.

Avery Dennison describes direct thermal paper as a material designed for variable-information printing with direct thermal printers.

Advantages

  • No ribbon required
  • Fast printing
  • Simple printer setup
  • Suitable for variable information
  • Efficient for high-volume short-term labeling

Disadvantages

  • Image can be sensitive to heat
  • Some grades are sensitive to light
  • Can be affected by abrasion
  • Not ideal for long-term premium product identification

Typical applications include:

  • Shipping labels
  • Logistics
  • Weigh-scale labels
  • Receipts
  • Coupons
  • Inventory
  • Event tickets

One technical specification for a standard direct thermal grade lists a 3.3 mil caliper and a service temperature range of approximately −4°F to +176°F, showing why you must check actual specifications rather than assume every thermal paper performs the same.

Production experience

Don’t choose direct thermal paper just because it is cheaper to print.

If the barcode or product information must remain readable for several years, thermal transfer or a more durable synthetic construction may be a better solution.

8. Thermal Transfer Label Paper

Thermal transfer paper is designed to receive ink from a thermal-transfer ribbon.

Unlike direct thermal printing, the image is transferred from the ribbon to the label.

Advantages

  • Longer-lasting print
  • Good barcode quality
  • Suitable for variable information
  • Available in matte and semi-gloss grades
  • Can be paired with different ribbon technologies

Disadvantages

  • Requires a ribbon
  • Printer settings must match the material
  • Higher consumable complexity
  • Not every paper/ribbon combination gives the same result

Thermal-transfer paper is commonly used for:

  • Warehouse labels
  • Product identification
  • Barcode labels
  • Manufacturing
  • Pharmaceutical packaging
  • Inventory management

A practical technical guide lists thermal-transfer paper around 75–80 gsm for some standard constructions.

9. Fluorescent Label Paper

Fluorescent paper uses highly visible colors such as:

  • Yellow
  • Orange
  • Red
  • Green

Its purpose is visibility, not a luxury appearance.

Advantages

  • Extremely noticeable
  • Good for warnings
  • Useful for promotions
  • Easy to identify from a distance

Disadvantages

  • Limited premium applications
  • Strong background colors restrict design choices
  • Not suitable for every brand identity

Best applications

  • Sale labels
  • Clearance labels
  • Warning labels
  • Promotional stickers
  • Warehouse identification
  • Urgent handling instructions

Current paper-stock ranges commonly list fluorescent grades around 70–80 gsm.

10. Metallic Label Paper

Metallic paper can create gold, silver or other reflective effects without relying entirely on metallic foil stamping.

Advantages

  • Premium appearance
  • Strong shelf impact
  • Suitable for luxury branding
  • Works well with dark colors
  • Useful for decorative packaging

Disadvantages

  • More expensive
  • Color reproduction requires testing
  • Metallic background changes the appearance of printed colors
  • Some designs require white ink or special printing techniques

Best applications

  • Wine
  • Spirits
  • Cosmetics
  • Premium food
  • Luxury gifts
  • Special editions

Metallic paper is especially effective when the label needs to communicate a premium positioning before the customer even reads the text.

11. Textured and Decorative Label Paper

This category includes papers with:

  • Linen texture
  • Felt texture
  • Embossed patterns
  • Cotton-like surfaces
  • Fibrous finishes
  • Rough natural textures

These papers are frequently used when tactile experience is an important part of the brand.

Advantages

  • Premium tactile experience
  • Strong differentiation
  • Excellent for luxury packaging
  • Works well with embossing and foil
  • Can strengthen brand identity

Disadvantages

  • Higher cost
  • More complicated printing
  • Fine text can be affected by surface texture
  • Not always suitable for high-speed automatic application

Best applications

  • Wine
  • Whiskey
  • Gin
  • Luxury cosmetics
  • Premium food
  • Boutique products

For premium liquor and wine labels, textured paper combined with embossing or foil can create a significantly stronger physical impression than ordinary coated paper.

Paper Label vs Synthetic Label: An Important Decision

Although the search term is types of label paper, buyers should understand one important boundary: sometimes paper is simply the wrong material.

If your label needs high resistance to:

  • Water
  • Condensation
  • Oil
  • Chemicals
  • Tearing
  • Outdoor exposure
  • Repeated abrasion

you may need a synthetic material such as PP/BOPP or PET rather than paper.

For example, a current material comparison describes polypropylene as moisture-resistant and suitable for applications that require stronger material performance, while standard matte and gloss paper are generally intended for indoor, dry applications.

Simple decision rule

Dry + economical → Paper

Premium + tactile → Specialty paper

Natural/organic appearance → Kraft or uncoated paper

High color impact → Gloss or cast-coated paper

Thermal printer → Direct thermal or thermal-transfer stock

Wet/chilled → Consider PP/BOPP or another synthetic material

Outdoor/industrial → Usually consider synthetic materials

How to Choose the Right Label Paper

Instead of choosing by appearance alone, evaluate six factors.

1. Where will the label be used?

Indoor and dry:

→ Paper is usually sufficient.

Refrigerated:

→ Test moisture resistance carefully.

Outdoor:

→ Paper may require special protection or a synthetic alternative.

2. How long must the label last?

Short-term:

→ Economy paper or direct thermal may work.

Long-term:

→ Consider coated paper with protection or synthetic materials depending on conditions.

3. What printing technology are you using?

Check whether your printer uses:

  • Inkjet
  • Laser
  • Flexographic printing
  • Offset
  • Digital printing
  • Direct thermal
  • Thermal transfer

Material compatibility matters.

4. Does the label need to be writable?

If users need to write on the label, a matte or uncoated surface may be more suitable.

5. What appearance does the brand need?

Brand PositioningMaterial Direction
MinimalistMatte
Mass-marketSemi-gloss
Colorful/premiumHigh-gloss
OrganicKraft
HandmadeUncoated/textured
LuxuryMetallic/textured
Traditional spiritsTextured or specialty paper
LogisticsThermal/semi-gloss

6. What is the real budget?

Don’t compare only the paper price.

Your total label cost can include:

Paper + adhesive + printing + coating + finishing + die cutting + setup + packaging + shipping.

A premium paper that costs slightly more per label may be worthwhile if it substantially improves the product’s shelf presentation.

Common Label Paper Selection Mistakes

Choosing waterproof paper for a wet environment

Paper and waterproof film are not the same thing.

A coating may improve resistance, but it does not automatically turn paper into a waterproof material.

Choosing glossy paper because it “looks premium”

Gloss is a visual effect, not a guarantee of durability.

Selecting kraft without testing colors

Kraft changes how printed colors look.

Ignoring adhesive

The face paper can be perfect while the label still fails because the adhesive is unsuitable for glass, plastic, cold surfaces or condensation.

Ordering without a physical sample

Always test unusual materials on the actual package.

Choosing the cheapest paper for premium packaging

The label is part of the product experience.

A low-cost material can undermine an otherwise premium bottle or box.

What Experienced Label Buyers Usually Check

After years of dealing with label production, one practical lesson is clear:

The paper is only one part of the label construction.

A finished self-adhesive label normally consists of:

Face stock + printing + adhesive + liner

And the final performance also depends on:

Surface + application temperature + storage environment + printing method + finishing

For example, a 78 gsm semi-gloss paper may perform perfectly on a dry cardboard package but fail on a refrigerated glass bottle if the adhesive and construction are not designed for condensation.

This is why professional label manufacturers usually need more information than simply:

“I need 10,000 white paper labels.”

A useful quotation should specify the material, size, adhesive, printing method, finish, quantity and application environment.

How to Order the Correct Label Paper from a Manufacturer

When requesting a quotation, provide:

  • Label size
  • Label shape
  • Product/package material
  • Application surface
  • Indoor or outdoor use
  • Expected service life
  • Temperature range
  • Moisture exposure
  • Printing method
  • Number of colors
  • Required finish
  • Quantity
  • Application method
  • Target market

For example:

10,000 self-adhesive labels, 80 × 50 mm, semi-gloss paper, permanent acrylic adhesive, 4-color printing, matte varnish, applied to glass bottles, refrigerated after filling.

This specification is much more useful than simply asking for “paper sticker prices.”

Frequently Asked Questions About Types of Label Paper

What are the most common types of label paper?

The most common options include matte, semi-gloss, high-gloss, uncoated, kraft, cast-coated and thermal papers. Specialty options include fluorescent, metallic and textured papers.

What is the best paper for product labels?

For general dry product packaging, semi-gloss is a practical choice because it provides a good balance between print quality, appearance and cost.

For premium packaging, textured, metallic or cast-coated paper may be more appropriate.

What is the difference between matte and glossy label paper?

Matte paper reflects less light and provides a softer, more understated appearance.

Glossy paper reflects more light and generally produces stronger visual color impact.

Neither is automatically more durable simply because of the finish.

Is label paper waterproof?

Ordinary paper labels are not waterproof.

Some coated or specially treated papers provide improved moisture resistance, but if the label must survive prolonged water, condensation or wet handling, a synthetic material such as PP/BOPP may be more appropriate.

Is kraft paper good for product labels?

Yes. Kraft is particularly suitable for organic, handmade, natural and craft-oriented brands.

However, it is less suitable when the design requires very bright colors or a pure white background unless additional printing techniques are used.

What paper is best for wine labels?

There is no single best wine-label paper.

Premium wines often use textured, uncoated, coated, metallic or specialty papers depending on the desired brand image.

The environment also matters. A bottle stored in an ice bucket needs different performance considerations from a bottle kept at room temperature.

What paper is best for barcode labels?

Semi-gloss and thermal-transfer paper are common choices for barcode applications because they can provide smooth surfaces and good print definition.

The correct choice depends on the barcode printer, ribbon, application environment and required service life.

What is the difference between direct thermal and thermal-transfer paper?

Direct thermal paper reacts directly to heat from the printhead and does not require a ribbon.

Thermal-transfer printing uses a ribbon to transfer the image onto the label.

Direct thermal is commonly used for short-term logistics and retail applications, while thermal transfer is often selected when you need longer-lasting printed information.

Is matte paper better than semi-gloss paper?

Neither is universally better.

Choose matte when readability, low glare and a natural appearance are priorities.

Choose semi-gloss when you want stronger color reproduction and a more polished appearance while keeping costs reasonable.

What GSM is normally used for label paper?

Common label-paper facestocks are often around 60–90 gsm, although exact specifications vary by grade and supplier. Current examples include approximately 70–80 gsm matte/woodfree, 78–80 gsm semi-gloss and 80–90 gsm high-gloss cast-coated paper.

GSM alone, however, does not determine label quality.

The coating, adhesive, liner, caliper and printing process are also important.

Can paper labels be used on glass bottles?

Yes.

Paper labels are widely used on glass bottles for products such as wine, spirits, sauces and beverages.

The important question is whether the bottle will encounter condensation, refrigeration, ice or water. If it will, test the complete label construction rather than evaluating the paper alone.

Can I use the same label paper for all my products?

Technically, you can standardize materials, but it is not always the best approach.

A cosmetics jar, refrigerated beverage, shipping carton and outdoor industrial product may require completely different constructions.

Standardizing where possible can reduce purchasing complexity, but the material should still match the actual application.

Final Guide: Which Label Paper Should You Choose?

The easiest way to narrow down the choices is to start with the environment rather than the color.

For general dry product labels: choose matte or semi-gloss paper.

For strong shelf graphics: consider high-gloss or cast-coated paper.

For natural and handmade branding: consider kraft or uncoated paper.

For premium wine and spirits: consider textured, metallic or specialty decorative paper.

For short-term shipping and logistics: consider direct thermal paper.

For durable variable-data printing: consider thermal-transfer paper.

For wet, chilled or highly demanding environments: don’t automatically choose paper—evaluate synthetic PP/BOPP or PET materials as well.

The biggest lesson in choosing label paper is that appearance should never be the only selection criterion. A good label material has to work with the printing technology, adhesive, package surface, storage conditions, expected service life and brand positioning.

For B2B buyers, the safest purchasing process is simple: define the application first, shortlist two or three materials, request physical samples, apply them to the real packaging, test them under actual conditions, and only then approve the bulk order.

That small amount of testing can prevent a much larger problem later—thousands of labels that look good in a quotation but fail after they reach the production line or the retail shelf.

How to Avoid Misleading Food Labels: A Guide to Clear and Accurate Label Design

Food labels play an important role in helping consumers understand what they are buying. Product names, ingredient lists, nutrition information, allergen declarations, claims, images, and other packaging elements all contribute to the way a food product is perceived.

For food brands, creating an effective label is therefore about more than making packaging attractive. The information needs to be accurate, easy to understand, and presented clearly.

A food label can potentially create confusion when wording, images, layout, or other design elements give consumers an impression that does not accurately reflect the product. In some markets, specific labeling and advertising claims are also subject to regulatory requirements.

The good news is that many potential problems can be reduced through careful content review, thoughtful label design, and appropriate material and printing choices.

This guide explains common food labeling issues, how businesses can improve label clarity, and what to consider when producing custom food labels.

What Makes a Food Label Misleading?

A food label may become misleading or confusing when the information presented does not accurately communicate the characteristics of the product.

Importantly, misleading communication is not always caused by an obviously false statement. The overall presentation can also influence consumer expectations.

For example, consumers may form an impression based on the combination of:

  • Product claims
  • Ingredient images
  • Product names
  • Colors and graphics
  • Nutrition information
  • Ingredient lists
  • Allergen information
  • Typography and layout
  • The relative prominence of different elements

In the United States, the FDA regulates food labeling and distinguishes between different types of claims, including nutrient content claims and health claims. Businesses should review the requirements applicable to their specific products and claims before finalizing label content.

The following table summarizes some common issues brands should review before printing.

Common Food Labeling Issues to Watch For

Potential IssueWhat Consumers May UnderstandWhat Brands Should Check
Ambiguous claimsThe product provides a particular nutritional or health benefitVerify that claims are accurate and applicable to the product
Product imageryA pictured ingredient is a major component of the productMake images consistent with the actual product
Unclear ingredient informationImportant ingredients may be overlookedUse readable typography, spacing, and organization
Hard-to-find allergen informationAllergen information may be difficult to identifyFollow applicable allergen-labeling requirements
Poor readabilityImportant information may be missedReview font size, contrast, spacing, and layout
Confusing visual hierarchyPromotional information may appear more important than essential informationOrganize information into logical sections
Outdated informationThe label may not reflect the current productReview artwork when ingredients, claims, or specifications change

A useful principle is simple:

A food label should communicate what the product is, what it contains, and what consumers can reasonably expect from it as clearly as possible.

7 Common Food Labeling Issues to Avoid

1. Ambiguous or Unsupported Claims

Words such as “natural,” “healthy,” “low fat,” “high protein,” and “no added sugar” can influence how consumers perceive a product.

However, some claims have specific regulatory requirements depending on the market and product category. In the United States, for example, FDA provides specific guidance on nutrient content claims and health claims.

Before putting a claim on a food label, brands should ask:

  • Is the statement factually accurate?
  • Does the product meet any applicable requirements for the claim?
  • Could consumers reasonably interpret the wording differently from what the business intends?
  • Does the rest of the package support the same message?
  • Has the claim been reviewed for the target market?

The goal is not simply to make a product sound attractive. The goal is to communicate its characteristics accurately.

2. Misleading Product Images

Images can be just as influential as words.

A package featuring large images of strawberries, blueberries, almonds, chocolate, or other ingredients can create strong expectations about the product.

That does not mean food packaging should avoid attractive imagery. Instead, visual elements should be consistent with the actual product and its positioning.

Brands should review whether:

  • The images accurately represent the product.
  • Ingredient imagery is consistent with the product’s composition.
  • The overall design could create an unrealistic expectation.
  • Supporting text provides sufficient context where necessary.

The key consideration is the overall impression created by the package rather than any single visual element.

3. Unclear Ingredient Information

Ingredient information is one of the most practical parts of a food label.

Even when the information is technically correct, poor design can make it difficult for consumers to read or understand.

Common problems include:

  • Very small text
  • Insufficient contrast
  • Excessive text density
  • Poor spacing
  • Inconsistent alignment
  • Decorative backgrounds behind text
  • Information placed in difficult-to-read areas

A well-designed ingredient section should prioritize clarity over decoration.

4. Incomplete or Hard-to-Find Allergen Information

Allergen information deserves particular attention because some consumers rely on food labels to identify ingredients that may pose a health risk.

For packaged foods in the United States, federal requirements address the declaration of major food allergens. FDA currently identifies nine major food allergens: milk, egg, fish, Crustacean shellfish, tree nuts, wheat, peanuts, soybeans, and sesame.

Businesses should review the applicable requirements for their products and market.

From a design perspective, required allergen information should also remain readable and easy to locate.

This is a good example of why content accuracy and label design need to work together.

5. Confusing Nutrition Information

Nutrition information can become difficult to use when the label contains too many competing visual elements.

For example, a package may contain:

  • A large product image
  • Multiple promotional claims
  • Brand messaging
  • Certifications
  • Marketing copy
  • Nutrition information
  • Ingredient information

If all of these elements receive similar visual emphasis, consumers may have difficulty finding the information they need.

A clear information hierarchy can help.

A typical hierarchy might look like:

Brand → Product Name → Key Product Information → Claims → Ingredients & Nutrition → Additional Information

The exact structure depends on the product and applicable requirements, but the principle remains the same: important information should be easy to find.

6. Important Information That Is Difficult to Read

A label can contain accurate information and still provide a poor user experience if the information is difficult to read.

Readability can be affected by:

Design FactorPotential ProblemBetter Approach
Font sizeText is too smallUse an appropriate, readable size
ContrastText blends into the backgroundProvide sufficient contrast
TypefaceDecorative fonts reduce readabilityUse clear typefaces for essential information
SpacingSections appear crowdedUse appropriate line and section spacing
BackgroundImages interfere with textKeep important text areas visually clean
FinishReflections make text harder to seeSelect a suitable finish for the application
LayoutInformation is scatteredGroup related information logically

This is why readability should be considered during the design stage rather than after the artwork has already been finalized.

7. Inconsistent Information Across Packaging

Another potential source of confusion is inconsistency.

Food products can change over time. Ingredients, formulas, serving information, packaging formats, and marketing claims may all be updated.

When a product changes, its label artwork should be reviewed accordingly.

Before printing a new batch, businesses should check whether the current artwork still matches:

  • Product formulation
  • Ingredient information
  • Nutrition information
  • Allergen information
  • Product claims
  • Net quantity
  • Product specifications
  • Barcode information
  • Storage instructions

Keeping artwork synchronized with the actual product can help reduce both consumer confusion and costly reprints.

Common Food Labeling Issues to Avoid

Food Label Content vs. Label Design: What’s the Difference?

One of the most important distinctions for food brands is the difference between what a label says and how that information is presented.

Accurate content is the foundation, but good design helps consumers find and understand that content.

Label ElementContent ConsiderationDesign & Printing Consideration
Product claimsClaims should accurately represent the productMake claims visible without overwhelming essential information
IngredientsInformation should be accurate and completeUse readable type, spacing, and contrast
AllergensRequired allergen information should be reviewedMake information easy to locate and read
Nutrition informationNutrition details should be verifiedMaintain a clean and structured layout
Product imagesImages should represent the product appropriatelyUse printing quality suitable for detailed graphics
BarcodeBarcode information should be correctMaintain sufficient print sharpness and contrast
Storage instructionsInstructions should reflect actual product requirementsChoose materials suitable for the storage environment
Brand elementsVisual identity should remain consistentSelect appropriate colors, finishes, and printing techniques

This leads to an important principle:

Clear food labeling requires both accurate content and effective physical presentation.

A label manufacturer does not replace the brand’s responsibility for product information or regulatory review. However, the manufacturer can play an important role in translating approved artwork into a physical label that is readable, durable, and appropriate for the intended application.

How to Design Clearer and More Accurate Food Labels

Once the content has been reviewed, the next step is to make sure the information works effectively as a physical label.

1. Create a Clear Information Hierarchy

Consumers should be able to understand the basic identity of a product quickly.

Use differences in:

  • Font size
  • Weight
  • Position
  • Spacing
  • Alignment
  • Sections
  • Supporting graphics

to distinguish primary information from supporting details.

Avoid filling every available area simply because there is space.

A clean layout can often communicate more information than an overcrowded design.

2. Prioritize Readability

When evaluating label artwork, review it at the actual printed size.

Text that looks comfortable on a large computer monitor may become difficult to read once reduced to the final label dimensions.

Pay attention to:

  • Font size
  • Letter spacing
  • Line spacing
  • Contrast
  • Text placement
  • Background complexity

A physical proof can be particularly useful for evaluating readability before mass production.

3. Keep Claims and Visuals Consistent

The words and images on a package should work together.

If a product emphasizes a particular ingredient, nutritional characteristic, or product attribute, the visual presentation should not create a substantially different expectation.

Review the front, back, and side panels as one complete communication system rather than treating each section independently.

4. Make Important Information Easy to Find

Consumers should not have to search through decorative elements to find essential information.

Use clear sections and logical grouping for:

  • Ingredients
  • Nutrition information
  • Allergen information
  • Storage instructions
  • Preparation instructions
  • Product details
  • Contact information

The exact content required will depend on the product and target market.

5. Consider the Physical Environment

Food labels exist in real-world conditions.

A label may be exposed to:

  • Refrigeration
  • Freezing
  • Condensation
  • Moisture
  • Oil
  • Frequent handling
  • Abrasion
  • Bright retail lighting

The design should therefore be evaluated together with the physical label specification.

Examples of clear and accurate industry-specific labels

Choosing the Right Food Label for Your Product

A visually attractive label is not necessarily the right label for every application.

The label material, adhesive, printing process, finish, and construction should match the product and its environment.

Common ChallengePossible Label SolutionSpecification to Consider
Refrigerated productsMoisture-resistant label constructionSuitable material and adhesive
Frozen productsCold-environment label constructionFreezer-compatible material and adhesive
Oil or grease exposureMore resistant label constructionMaterial and adhesive compatibility
Frequent handlingDurable label constructionAppropriate material or protective finish
Premium positioningDecorative finishingEmbossing, hot stamping, specialty finishes
Small packagingSpace-efficient custom labelCustom dimensions and shape
Detailed graphicsHigh-quality printingFine text and image reproduction
Multiple SKUsFlexible productionCustomized artwork and SKU management
Large production volumesScalable manufacturingSuitable production and finishing capacity

There is no single “best” food label material for every application. The right specification depends on the packaging surface, product environment, application method, desired appearance, and expected service life.

What Should Brands Consider When Printing Food Labels?

After the artwork is approved, production quality becomes another important part of the process.

Label Material

Different packaging surfaces and environments may require different label materials.

Common considerations include:

  • Packaging substrate
  • Moisture exposure
  • Temperature
  • Product handling
  • Label size
  • Required appearance
  • Expected product life

Adhesive

The adhesive needs to work with the packaging surface and intended conditions.

A label intended for glass, plastic, coated cartons, flexible packaging, or another substrate may require different adhesive characteristics.

Printing Quality

Food labels can contain very small text, detailed graphics, barcodes, icons, and other fine elements.

Consistent printing helps preserve:

  • Text clarity
  • Barcode readability
  • Image detail
  • Color consistency
  • Fine lines
  • Brand identity

Finishing

Finishing techniques can add visual differentiation to food packaging.

Depending on the design, options may include:

  • Matte finish
  • Gloss finish
  • Soft-touch effects
  • Embossing
  • Hot stamping
  • Specialty decorative effects

Finishing should support the overall design rather than make essential information harder to read.

Durability

The finished label should be appropriate for the environment in which the product will be stored, transported, displayed, and used.

For example, refrigerated and frozen products may require different considerations from dry packaged foods.

Food Label Checklist Before Printing

Before approving a label for mass production, a structured review can help reduce mistakes and unnecessary reprints.

CategoryQuestions to Ask Before Printing
Product informationIs the product information accurate and up to date?
IngredientsHas the ingredient list been reviewed?
AllergensHas applicable allergen information been checked?
ClaimsHave product and nutritional claims been reviewed?
ArtworkIs all important text readable at actual print size?
ImagesDo images accurately represent the product?
DimensionsDoes the label fit the packaging correctly?
MaterialIs the material appropriate for the application?
AdhesiveIs the adhesive compatible with the packaging surface?
StorageCan the label withstand the intended environment?
BarcodeHas the barcode artwork been checked?
FinishingAre the requested finishes suitable for the design?
ProofingHas a final proof or physical sample been reviewed?

For products sold in regulated markets, businesses should also conduct any required regulatory review before production.

Why Work With a Custom Food Label Manufacturer?

For food brands, producing the right label involves more than printing an existing design.

A capable label manufacturing partner can help translate approved artwork into a finished product with the appropriate:

  • Material
  • Adhesive
  • Size
  • Shape
  • Printing process
  • Finishing
  • Durability
  • Production volume

This becomes particularly important when a project involves multiple SKUs, unusual packaging surfaces, special finishes, demanding storage conditions, or large production quantities.

The manufacturer should also be able to provide appropriate technical support during sampling and production.

Custom Food Labels for Food & Beverage Brands

At Perfect Label, we provide custom label solutions for food and beverage brands, packaging companies, and manufacturers.

As an original label manufacturer based in Qingdao, China, we have more than 16 years of experience in the label printing industry. Our capabilities cover custom printed labels, specialty-material labels, decorative labels, functional labels, security labels, smart labels, and industry-specific label solutions.
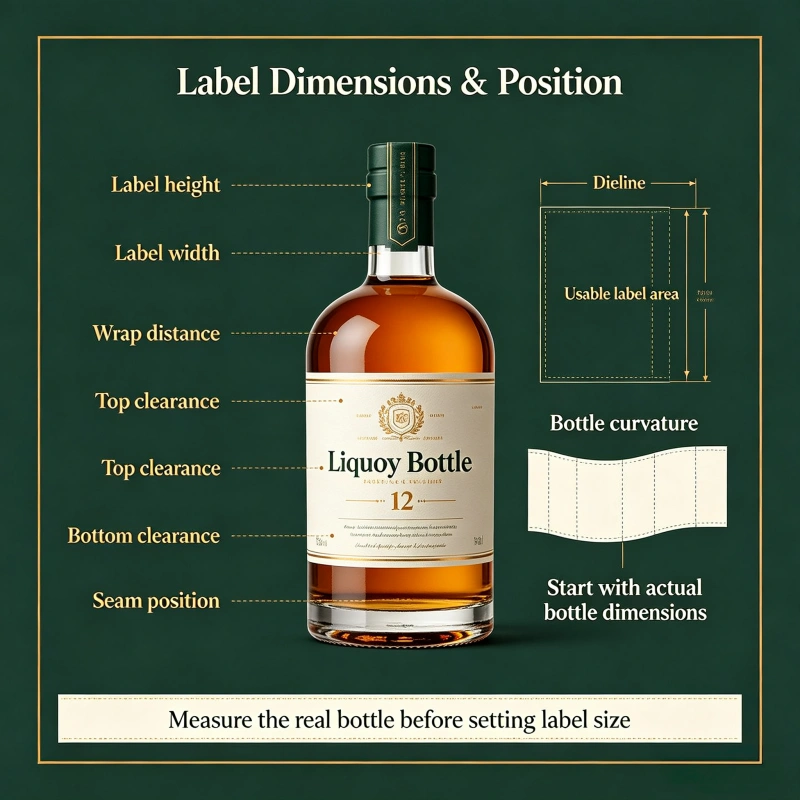
For food and beverage applications, our approach combines label design support, material selection, printing, finishing, sampling, and mass production.

Our manufacturing capabilities include a 12-color satellite rotary printing press, automated production lines, die-cutting, hot stamping, embossing, and other post-press processes. Our in-house technical team supports customers with customized label requirements, while our production facilities are equipped to handle both flexible custom projects and high-volume orders.

We also provide rapid sample-making services so customers can evaluate the physical label before moving into mass production.

What Perfect Label Can Support

Customer RequirementPerfect Label Capability
Custom label sizesCustomized dimensions and shapes
Detailed label artworkHigh-quality multi-color printing
Premium packagingEmbossing, hot stamping and decorative finishes
Special application environmentsCustomized material and construction options
Multiple product SKUsFlexible customized production
Prototype evaluationRapid sample-making
Large-volume ordersScalable production capacity
One-stop label sourcingDesign support, printing and finishing

Our experience spans food & beverage, beauty & personal care, healthcare, electronics, industrial manufacturing, and other applications.
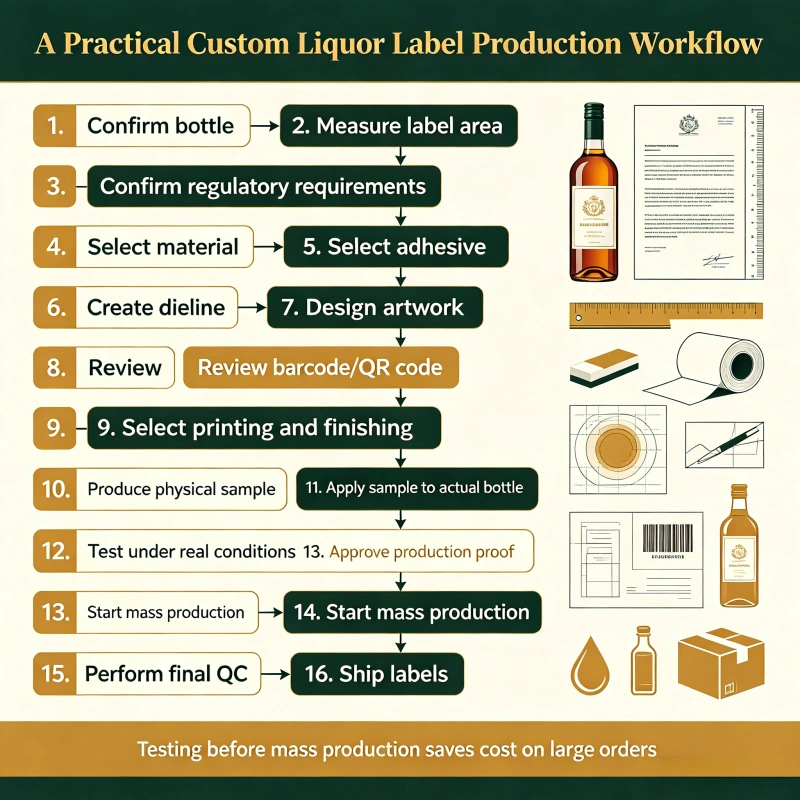
For each project, the appropriate label solution depends on the product, packaging, environment, design, and production requirements.

Samples of food labels we have produced.

Final Thoughts

Avoiding misleading food labels starts with accurate information, but effective food labeling goes further than simply checking the words on the package.

A successful food label brings together:

Accurate Content + Clear Design + Readability + Appropriate Materials + Reliable Printing

Brands should review product claims, ingredient information, allergen information, nutrition details, imagery, and other content before approving artwork. At the same time, they should consider typography, information hierarchy, label dimensions, material, adhesive, finishing, and durability.

The physical label is ultimately the medium through which all of that information reaches the consumer.

By considering content, design, and production together, food businesses can create labels that are clearer, more consistent, and better suited to their products and packaging environments.

If you are developing a new food or beverage product or looking for a reliable supplier for an existing label program, Perfect Label can provide customized label solutions from sampling through mass production.

Contact us to discuss your custom food label requirements and request a quotation.

Frequently Asked Questions

Can food labels be misleading?

Yes. A food label can potentially create a misleading impression through inaccurate claims, unclear information, product imagery, omissions, or the overall way different elements are presented. Specific requirements vary by market and product category.

What makes a food label misleading?

Common issues include unsupported or unclear claims, inaccurate or confusing imagery, difficult-to-read information, unclear ingredient or allergen information, and inconsistencies between the label and the actual product.

How can businesses avoid misleading food labels?

Businesses should verify product information, review applicable claims and labeling requirements, use appropriate imagery, prioritize readability, and conduct a thorough artwork review before printing.

Why is food label design important?

Food label design affects how easily consumers can locate and understand product information. Typography, contrast, spacing, layout, images, and information hierarchy all contribute to readability.

What should businesses consider when choosing custom food labels?

Important considerations include the packaging material, label size and shape, adhesive, storage environment, moisture and temperature exposure, durability, printing requirements, and desired finishing.

Can food labels be customized for refrigerated or frozen products?

Yes. Food labels can be specified according to different application and storage environments. Refrigerated and frozen products may require materials and adhesives suitable for low temperatures, moisture, condensation, or other environmental conditions.
Can a label manufacturer help with food label compliance?

A label manufacturer can provide technical support regarding label size, materials, printing, finishing, and production. However, the food business remains responsible for ensuring that its product information and claims meet applicable regulatory requirements. Where necessary, businesses should consult a qualified regulatory professional.

How to Make Custom Liquor Bottle Labels: A Complete Step-by-Step Guide

Custom liquor bottle labels do much more than display a logo. A good label must fit the bottle accurately, withstand handling and condensation, communicate the product clearly, meet applicable labeling requirements, and still look attractive enough to compete on a retail shelf.

Whether you are launching a craft gin, whiskey, vodka, rum, tequila, liqueur, or a private-label spirits brand, the process is easier when you treat the label as a complete packaging project rather than simply a piece of printed paper.

This guide explains how to make custom liquor bottle labels from start to finish, including bottle measurement, artwork preparation, material selection, printing, finishing, sampling, application, quality control, and common mistakes to avoid.

What Do You Need Before Making Custom Liquor Bottle Labels?

Before creating artwork, collect the bottle’s physical and commercial information.

At minimum, you should have:

InformationWhy It Matters
Bottle heightDetermines available label area
Bottle diameter or circumferencePrevents incorrect label width
Bottle materialAffects adhesive selection
Bottle shapeDetermines whether a flat or curved label is appropriate
Label positionDetermines dimensions and artwork layout
Bottle capacityMay affect mandatory label information
Product typeWhiskey, vodka, gin, rum, liqueur, etc.
Alcohol contentImportant for regulatory information
Sales marketLabel requirements vary by country
Application methodHand application or automatic labeling
Expected quantityInfluences printing technology and unit cost

One of the most common mistakes is designing the label before confirming the actual bottle.

A label that looks perfect on a computer screen can wrinkle badly when applied to a tapered or heavily curved bottle.

For commercial production, it is much safer to send the label manufacturer an actual bottle, a bottle specification sheet, or an accurate dimensional drawing.

Step 1: Measure the Liquor Bottle

The first practical step is measuring the bottle.

You normally need to determine:

  • Bottle circumference
  • Straight-side height
  • Available front-panel width
  • Available back-panel width
  • Neck circumference
  • Shoulder shape
  • Taper angle
  • Distance between label areas
  • Clearance from bottle edges and seams

For a simple cylindrical bottle, you can measure the circumference and calculate the maximum theoretical label width.

However, maximum theoretical width is not necessarily the correct production width.

For example, if the bottle circumference is 250 mm, you shouldn’t automatically order a 250 mm-wide wrap-around label. You may need a small gap, or the label may need to stop before a curved or tapered section.

For bottles with strong shoulders or tapering, a physical sample is much more useful than measurements alone.

A practical measurement method

  1. Clean and dry the bottle.
  2. Measure the circumference with a flexible measuring tape.
  3. Measure the straight vertical surface.
  4. Mark the intended label position.
  5. Measure the usable width and height.
  6. Photograph the bottle from the front and side.
  7. Send the measurements to your label supplier.
  8. Request a digital dieline before final artwork.

This prevents one of the most expensive mistakes in custom label production: printing thousands of labels that do not fit the bottle correctly.

Step 2: Decide What Information Goes on the Label

Before designing the graphics, create a content checklist.

A liquor label may contain:

  • Brand name
  • Product name
  • Spirit class or type
  • Alcohol content
  • Net contents
  • Producer or bottler information
  • Address information
  • Country of origin when applicable
  • Age statement when applicable
  • Batch or lot information
  • Barcode
  • QR code
  • Website
  • Brand story
  • Ingredients or other disclosures when applicable
  • Required health warning
  • Marketing claims

The exact requirements depend on the country where the product will be sold.

For example, in the United States, TTB states that distilled spirits labels generally have mandatory information including the brand name, class/type designation, alcohol content, and other applicable information such as age statement, commodity statement, health warning, name/address, net contents, and country of origin for imports.

For distilled spirits, the alcohol-content statement must appear in the same field of vision as the brand name and class/type designation. TTB also specifies minimum type sizes depending on container capacity and requires the statement to be readily legible and displayed against a contrasting background.

Therefore, don’t finalize the artwork based on aesthetics alone.

Regulatory review should happen before mass production.

Step 3: Create the Label Structure

Most liquor bottles use one or more of the following:

Front label

The front label usually carries the strongest branding elements:

  • Logo
  • Brand name
  • Spirit type
  • Product name
  • Alcohol content
  • Net contents
  • Key visual elements

The front label should communicate the product within a few seconds.

Back label

The back label provides space for:

  • Product description
  • Producer information
  • Brand story
  • Barcode
  • QR code
  • Required statements
  • Serving suggestions
  • Additional product information

Neck label

A neck label can add a premium appearance and is commonly used for:

  • Limited editions
  • Distillery branding
  • Small-batch information
  • Vintage information
  • Promotional messaging

Seal or closure label

Some premium spirits also use:

  • Bottle seals
  • Tamper-evident labels
  • Closure stickers
  • Foil labels
  • Capsule decorations

You can produce these elements separately or as part of a complete bottle-label program.

Step 4: Choose the Right Label Material

Material selection is one of the most important decisions in custom liquor bottle labels.

The same artwork can produce very different results depending on the substrate.

Paper liquor bottle labels

Paper remains popular for premium spirits because it provides a traditional, tactile appearance.

Common options include:

  • Uncoated paper
  • Coated paper
  • Textured paper
  • Cotton-style paper
  • Embossed paper
  • Kraft paper
  • Wet-strength paper

Paper works particularly well for whiskey, craft gin, wine-style spirits and premium liqueurs where the tactile experience is part of the brand identity.

However, ordinary paper may not be the best choice for bottles exposed to ice, condensation or refrigeration.

Synthetic labels

Synthetic materials such as PP and PET can provide better resistance to:

  • Moisture
  • Condensation
  • Handling
  • Scratching
  • Refrigeration

They are worth considering when the bottle will be stored in an ice bucket, refrigerator, cooler or humid environment.

Clear labels

Transparent film creates the popular “no-label-look” effect.

Instead of seeing a white rectangle around the artwork, the bottle itself becomes part of the design.

This can work especially well on clear glass bottles.

However, transparent labels require careful artwork preparation. White ink may be needed beneath selected areas of the design to make certain colors visible.

Metallic and specialty materials

For premium liquor packaging, manufacturers can also use:

  • Silver film
  • Gold-effect stock
  • Metallic paper
  • Pearlescent paper
  • Holographic film
  • Textured stocks

Select the material alongside the printing and finishing process, not separately.

Step 5: Choose the Adhesive

The adhesive is often overlooked until the finished labels start failing.

Your supplier should know:

  • Bottle material
  • Storage temperature
  • Condensation level
  • Humidity
  • Application speed
  • Hand or automatic application
  • Expected shelf conditions

A label applied to a dry glass bottle in a controlled warehouse environment has different requirements from a label applied to a chilled bottle covered with condensation.

Common adhesive considerations include:

ConditionWhat to Consider
Dry glassStandard permanent adhesive may work
Refrigerated bottleCold-temperature performance
CondensationMoisture-resistant adhesive
Humid storageStronger moisture resistance
Textured glassAdhesive conformability
Automatic labelingConsistent release and application
Short-term promotionRemovable or repositionable options where appropriate

Do not select adhesive simply because it is described as “strong.”

The correct adhesive is the one that remains stable under the actual application and storage conditions.
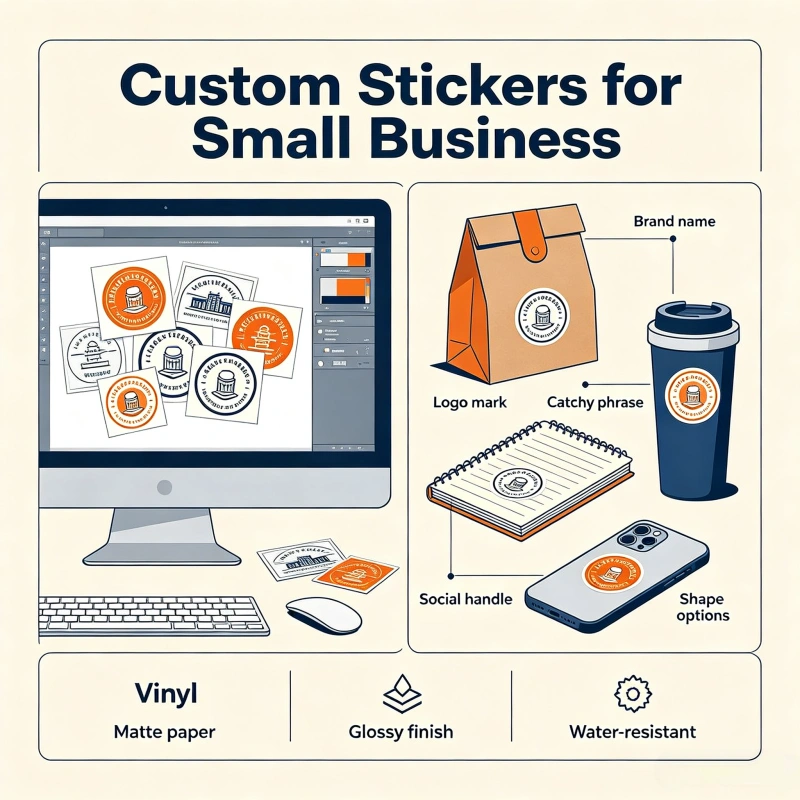
Step 6: Design the Artwork

Once the dimensions, material and label structure are confirmed, create the artwork.

A professional label file should normally include:

  • Correct final dimensions
  • Bleed
  • Safe area
  • Dieline
  • CMYK artwork where applicable
  • Vector logo
  • High-resolution images
  • Correct fonts
  • Barcode
  • QR code
  • White ink layer when required
  • Foil or special-finishing layers where applicable

Ask the printer for the exact dieline before finalizing the design.

Why the dieline matters

A bottle label is not just a rectangle.

The printer needs to know:

  • Where the label will be cut
  • Where special finishes will appear
  • Which areas require foil
  • Which areas require embossing
  • Where white ink is needed
  • Which parts must remain inside the safe area

A good dieline eliminates guesswork between designer and printer.

Step 7: Select Printing Technology

Different printing methods make sense at different production volumes.

Digital printing

Digital printing is useful for:

  • Small and medium runs
  • Multiple SKUs
  • Limited editions
  • Product testing
  • Variable data
  • Frequent artwork changes

It generally allows brands to order smaller quantities without creating traditional printing plates.

Flexographic printing

Flexographic printing can become attractive for larger production quantities.

It is commonly used for:

  • Large-volume label production
  • Multiple repeat orders
  • Consistent production
  • High-speed manufacturing

The most economical printing method depends on order quantity, artwork complexity, number of colors, finishing requirements and repeat volume.

Do not ask a supplier only, “What is your price per label?”

Ask for a complete quotation based on your actual specifications.
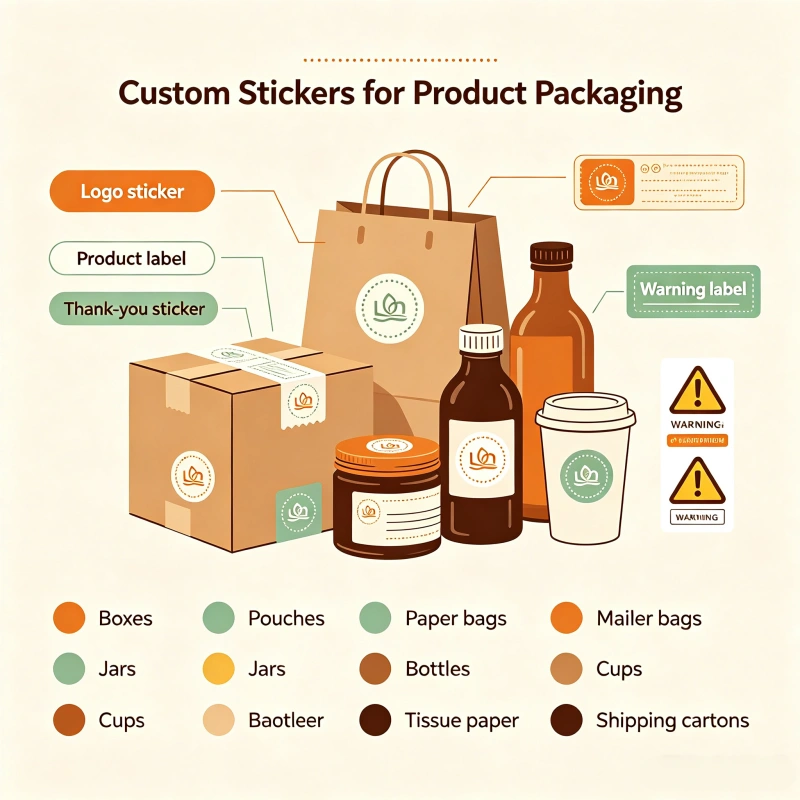
Step 8: Add Premium Finishing

Finishing turns an ordinary bottle label into a premium packaging component.

Popular options include:

Hot foil stamping

Gold, silver, copper and other metallic effects can highlight:

  • Logos
  • Borders
  • Product names
  • Limited-edition information

Embossing

Embossing creates a raised tactile effect.

It works particularly well for:

  • Brand logos
  • Crests
  • Typography
  • Decorative patterns

Debossing

Debossing pushes the selected design into the label surface rather than raising it.

Spot UV

Spot UV creates a localized glossy effect.

For example, a label can have a matte background with a glossy brand logo.

Soft-touch coating

Soft-touch finishes provide a smooth tactile surface and are often used for premium packaging.

Die cutting

Custom die cutting lets the label take shapes beyond a standard rectangle.

For a premium spirits brand, the shape itself can become part of the visual identity.

Step 9: Make a Physical Sample

Never skip the sample stage for a new liquor bottle label.

This is one of the most important recommendations in the entire process.
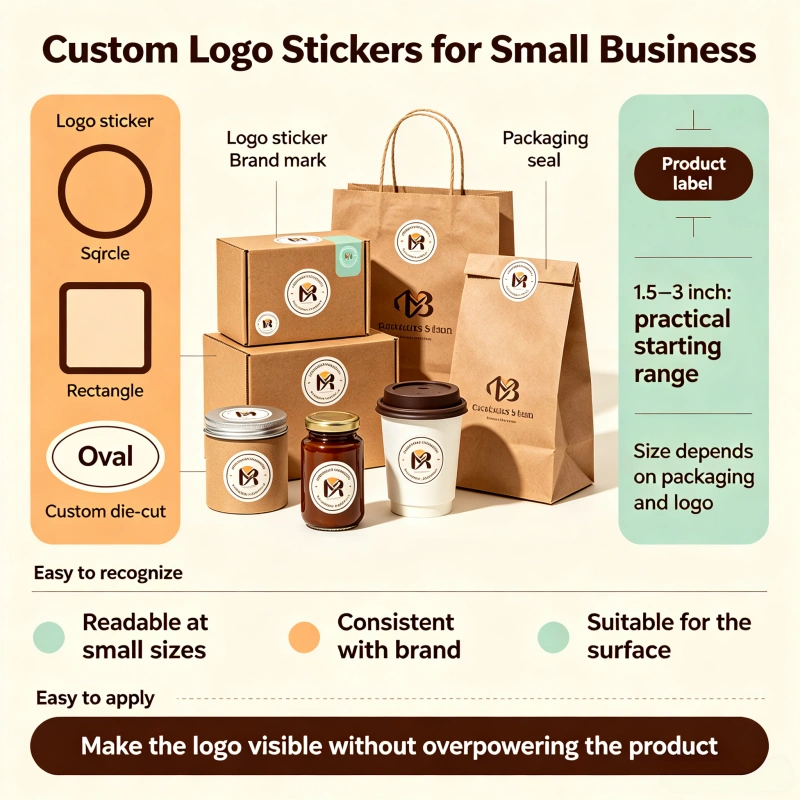
A digital proof cannot show you everything.
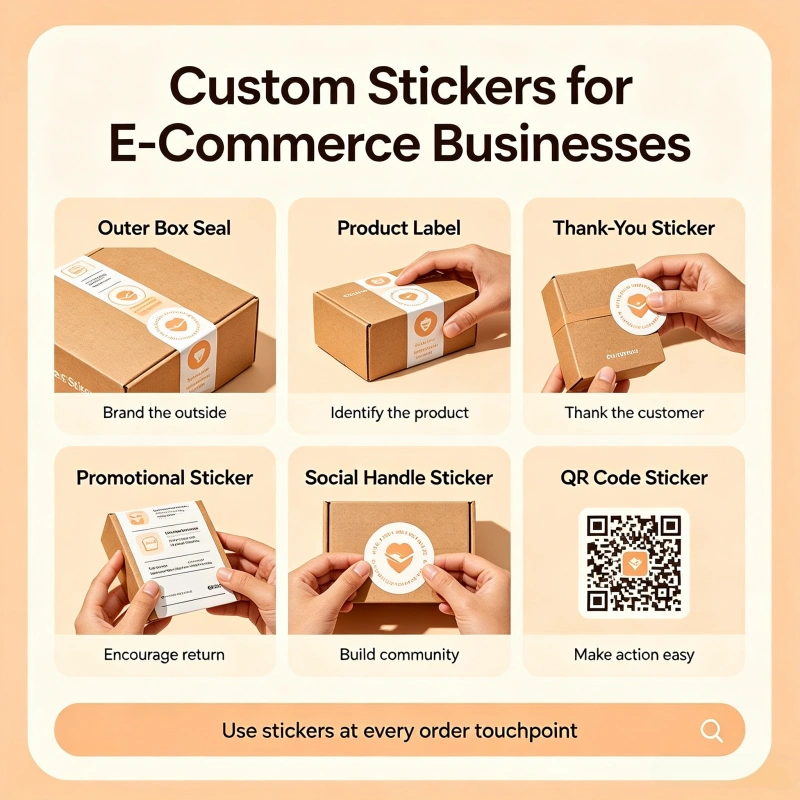
You need to inspect:

  • Actual color
  • Material texture
  • Adhesion
  • Label dimensions
  • Bottle curvature
  • Foil accuracy
  • Embossing depth
  • Barcode readability
  • QR-code scanning
  • Label positioning
  • Overall shelf appearance

Ideally, apply the sample to the actual bottle.

Then inspect it from:

  • Front
  • Side
  • Back
  • 45-degree angle
  • Normal retail viewing distance

A label can look excellent on a flat proof but appear unbalanced once wrapped around glass.

Step 10: Test the Label Under Real Conditions

For liquor packaging, laboratory-style testing is not always necessary for every project, but practical testing is extremely valuable.

Try to reproduce the actual environment.

For example:

If the bottle is refrigerated

Put the labeled bottle into the refrigerator and observe:

  • Edge lifting
  • Wrinkling
  • Moisture penetration
  • Adhesive failure
  • Ink or coating changes

If the bottle will be placed in an ice bucket

Test the label against:

  • Condensation
  • Water
  • Repeated handling
  • Cold temperatures

If bottles will be transported internationally

Test:

  • Carton vibration
  • Stacking
  • Humidity
  • Temperature changes
  • Rubbing between bottles or packaging

This is where many label problems are discovered before mass production.

The 10 Most Common Custom Liquor Bottle Label Mistakes

1. Designing before measuring the bottle

A beautiful label is useless if it does not fit.

Solution: Obtain the actual bottle dimensions or send a physical bottle to the label manufacturer.

2. Choosing material based only on appearance

A beautiful textured paper may not perform well under heavy condensation.

Solution: Choose material based on the storage and handling environment.

3. Ignoring the adhesive

Many buyers focus on the printed surface and forget the adhesive.

Solution: Tell the manufacturer exactly how and where the bottles will be stored.

4. Using tiny regulatory text

A designer may reduce mandatory information to make the front label look cleaner.

This can create compliance and readability problems.

Solution: Check applicable regulations before artwork approval.

5. Skipping physical samples

This is particularly risky for unusual bottles.

Solution: Approve a physical sample before mass production.

6. Ordering too many labels

New brands sometimes order tens of thousands of labels before confirming product-market demand.

Solution: Consider a smaller initial run or digital printing for new SKUs.

7. Ordering too few labels

The opposite problem is also common.

If the brand launches successfully, a small initial quantity can create frequent reorders and higher unit costs.

Solution: Compare the economics of several quantity levels before approving the order.

8. Forgetting variable information

If your label requires batch numbers, lot codes or different ABV/product information, confirm how these will be printed.

9. Not checking the barcode

A barcode that looks correct may still fail to scan.

Solution: Scan the production sample before mass production.

10. Treating every market as having the same regulations

A label designed for one country may not automatically satisfy another country’s requirements.

Solution: Confirm the rules for every target market.

How to Avoid Being Overcharged for Custom Liquor Bottle Labels

The cheapest quote is not always the lowest total cost.

When comparing suppliers, request the same specifications from every manufacturer:

Label size + material + adhesive + printing + finishing + quantity + packaging + shipping terms.

For example, do not compare:

Supplier A: $0.08/label

against:

Supplier B: $0.11/label

without checking what is included.

Supplier A may be quoting:

  • Standard paper
  • Basic CMYK printing
  • No lamination
  • No foil
  • No special adhesive

while Supplier B may include:

  • Premium textured stock
  • Waterproof film
  • Gold foil
  • Die cutting
  • Stronger adhesive
  • Individual packaging

The correct comparison is apples to apples.

How to Reduce Custom Label Costs

You can reduce cost without making the label look cheap.

Use the right printing method

Small orders may be more economical digitally, while larger repeat orders may benefit from conventional processes.

Simplify finishing

Instead of using foil, embossing, spot UV and specialty materials simultaneously, identify the one or two effects that contribute most to the brand.

Standardize label sizes

If several products can share similar label dimensions, production can become easier.

Consolidate SKUs

If several flavors or variants use the same basic label structure, you may reduce design and setup complexity.

Order according to realistic demand

The lowest unit price is meaningless if half the labels remain unused.

How to Order Custom Liquor Bottle Labels from a Manufacturer

For a commercial order, provide the manufacturer with a complete specification.

A useful RFQ should include:

Product: Custom liquor bottle labels

Bottle type: Glass / PET / other

Bottle dimensions: Height × diameter/circumference

Label size: Width × height

Label position: Front/back / neck / wrap-around

Material: Paper / PP / PET / clear / textured / metallic

Adhesive: Standard/waterproof/refrigerated / other

Printing: CMYK / Pantone / spot colors

Finishing: Matte / gloss / foil / embossing / UV / lamination

Quantity: Number of labels

Number of SKUs: Number of designs

Application: Manual or automatic

Storage: Ambient/refrigerated / ice bucket / humid environment

Target market: Country or region

Required delivery date: Date required

The more complete the specification, the less likely you are to receive an inaccurate quotation.

A Practical Custom Liquor Label Production Workflow

For most projects, the process can be organized into these stages:

1. Confirm bottle

↓

2. Measure label area

↓

3. Confirm regulatory requirements

↓

4. Select material

↓

5. Select adhesive

↓

6. Create dieline

↓

7. Design artwork

↓

8. Review barcode/QR code

↓

9. Select printing and finishing

↓

10. Produce physical sample

↓

11. Apply sample to actual bottle

↓

12. Test under real conditions

↓

13. Approve production proof

↓

14. Start mass production

↓

15. Perform final QC

↓

16. Ship labels

This workflow may seem slower than uploading artwork and ordering labels, but it can save substantial money on large orders.

Custom Liquor Bottle Label Quality Control Checklist

Before accepting the production batch, inspect:

QC ItemWhat to Check
DimensionsCorrect width and height
QuantityActual quantity matches order
MaterialCorrect substrate
ColorConsistent with approved sample
TextNo spelling or content errors
LogoCorrect version
BarcodeScans correctly
QR codeOpens the intended destination
AdhesiveNo premature lifting
Die cutClean and accurate
FoilCorrect position and coverage
EmbossingCorrect depth and registration
SurfaceNo scratches, stains or printing defects
PackagingLabels protected during transportation

For high-volume production, ask the manufacturer to keep an approved master sample for comparison.

How Much Do Custom Liquor Bottle Labels Cost?

There is no single universal price.

The final cost depends on:

  • Label dimensions
  • Quantity
  • Material
  • Number of colors
  • Printing method
  • Adhesive
  • Die-cut shape
  • Lamination
  • Foil
  • Embossing
  • Number of SKUs
  • Packaging
  • Shipping

A simple small paper label can cost dramatically less than a premium textured label using foil, embossing and specialty adhesive.

For B2B purchasing, it is better to request quotes at several quantities, such as:

  • 500 pieces
  • 1,000 pieces
  • 5,000 pieces
  • 10,000 pieces
  • 25,000 pieces
  • 50,000+ pieces

This shows where the unit-cost curve changes.

More importantly, ask the supplier to separate setup/tooling costs and unit printing costs so you can understand the real economics of the order.

Video on wine label printing

Discover how premium wine labels are printed from artwork preparation and material selection to color printing, finishing, die cutting, and quality inspection. This video shows the complete wine label printing process, highlighting advanced equipment, precise color reproduction, specialty finishes, and quality control for durable, attractive labels designed for wine brands.


Frequently Asked Questions

Can I make liquor bottle labels at home?

Yes, for prototypes, gifts, events or very small quantities, you can design and print labels yourself using a home printer and suitable adhesive label stock.

However, commercial liquor brands normally need better control over color, material, adhesive, finishing, durability and regulatory information.

For a retail product, professional label production is usually more practical.

What is the best material for liquor bottle labels?

There is no single best material.

Textured and specialty papers are popular for premium spirits because of their tactile appearance. PP, PET and other synthetic materials can be more suitable when moisture and condensation resistance are important.

The best material depends on the bottle, storage environment, brand positioning and budget.

Can liquor bottle labels be waterproof?

Yes.

Water-resistant or waterproof label solutions can use synthetic substrates, suitable coatings or laminations and adhesives designed for the intended environment.

However, don’t treat “waterproof” as a generic specification. Tell your supplier whether the bottles will experience refrigeration, condensation, ice buckets or prolonged water exposure.

Can I use clear labels on liquor bottles?

Yes.

Clear labels are commonly used when the designer wants the glass bottle to remain visually prominent.

They can create a premium no-label look, especially on clear glass.

However, consider white ink and color opacity when preparing artwork.

How do I prevent liquor bottle labels from peeling?

Start with the correct adhesive.

Then make sure the bottle surface is:

  • Clean
  • Dry
  • Free of oil
  • Free of dust
  • Suitable for the adhesive

If the bottles are refrigerated or exposed to condensation, test the adhesive under those conditions before mass production.

Should I use paper or plastic labels for liquor bottles?

Use paper when tactile appearance and traditional premium aesthetics are priorities.

Consider synthetic materials when durability, moisture resistance and refrigeration performance are more important.

For many brands, the decision is not simply “paper versus plastic”; it is a balance between appearance, durability, application conditions and brand positioning.

What finish makes a liquor bottle label look expensive?

No single finish automatically makes a label look premium.

Popular combinations include:

  • Textured paper + embossing
  • Matte surface + gold foil
  • Dark stock + metallic foil
  • Clear film + selective white ink
  • Matte label + spot UV
  • Premium paper + subtle debossing

The best results usually come from using one or two finishes strategically rather than adding every available effect.

How large should a liquor bottle label be?

The correct size depends on the bottle.

Measure the usable straight surface rather than simply calculating the entire bottle circumference.

For unusual, tapered or embossed bottles, make a physical mock-up or use the actual bottle before finalizing the size.

Do liquor bottle labels need to include alcohol content?

Requirements depend on the product and sales market.

For U.S. distilled spirits, TTB states that an alcohol-content statement is required and must meet specific placement, format and legibility requirements.

Always verify the current requirements applicable to your exact product and destination market before printing.

Do I need regulatory approval before printing custom liquor labels?

Potentially, depending on the jurisdiction and product.

In the United States, TTB provides a Certificate of Label Approval process for applicable alcohol products and publishes a mandatory-information checklist for distilled spirits.

Do not assume that a label approved for another product or market can simply be reused.

Can I print different liquor flavors on the same label order?

Yes, but clearly identify each SKU during the quotation and proofing process.

For example, a gin brand might have:

  • Original Gin
  • Citrus Gin
  • Pink Gin
  • Navy Strength Gin

If the basic design is identical but product names, colors or regulatory information differ, ask the printer how multiple SKUs will affect setup and unit pricing.

Should I order labels before my bottles arrive?

It is safer to confirm the bottle first.

Even small differences in bottle dimensions or curvature can affect label performance.

For a new bottle, send the manufacturer an actual bottle or accurate technical drawing before approving the final label dimensions.

What is the biggest mistake when ordering custom liquor bottle labels?

For most new projects, the biggest avoidable mistake is treating the label as a graphic-design job rather than a packaging-engineering job.

The design, bottle, material, adhesive, printing method, finishing and application process all have to work together.

A label that looks beautiful but peels in a refrigerator is not a successful label.

Final Checklist Before You Approve Production

Before giving your manufacturer the final approval, confirm these points:

  • Actual bottle dimensions confirmed
  • Label position confirmed
  • Dieline approved
  • Material approved
  • Adhesive tested
  • Regulatory information checked
  • Alcohol content checked
  • Net contents checked
  • Brand and product names checked
  • Barcode tested
  • QR code tested
  • Colors approved
  • Finishing approved
  • Physical sample applied to the actual bottle
  • Refrigeration/condensation test completed if necessary
  • Quantity confirmed
  • Delivery date confirmed
  • Packaging method confirmed
  • Final production proof approved

The most reliable way to make custom liquor bottle labels is to work backward from the finished bottle and its real-world environment. Start with the bottle, define the usable label area, confirm regulatory requirements, choose the material and adhesive, prepare the artwork, produce a physical sample, test it under actual conditions, and only then move to mass production.

That approach prevents the most expensive problems: incorrect dimensions, unsuitable materials, adhesive failure, unreadable information, poor finishing, and thousands of unusable labels.

For a commercial spirits brand, the goal should not simply be to make a beautiful label. The goal is to produce a label that fits correctly, performs reliably, communicates the product clearly, satisfies applicable requirements, and supports the brand at the point of sale.


Custom Stickers for Small Business: A Complete Guide

For a small business, branding does not always require expensive custom packaging, professional retail displays, or large advertising budgets. Custom stickers for small businesses offer a simpler way to put your brand name, logo, product information, or marketing message directly onto packaging, products, mailers, shopping bags, and promotional materials.

The challenge is choosing the right sticker.

A handmade candle company has different requirements from a coffee shop. An Etsy seller may need attractive logo stickers, while a cosmetics brand may need waterproof product labels. A local bakery may care more about food packaging and moisture resistance, while an online retailer may need stickers for shipping boxes and customer orders.

This guide explains how small businesses can choose the right custom stickers, control costs, prepare artwork, select materials, decide quantities, and build a practical sticker program that can grow with the business.

Content Details Navigation

Why Do Small Businesses Need Custom Stickers?
What Are the Best Custom Stickers for a Small Business?
Custom Stickers for Product Packaging
Custom Logo Stickers for Small Business
Custom Stickers for E-Commerce Businesses
Custom Stickers for Handmade Businesses
Custom Stickers for Food and Beverage Businesses
Custom Stickers for Beauty and Cosmetics Brands
Custom Stickers for Small Business Marketing
Custom QR Code Stickers for Small Business
How Much Do Custom Stickers Cost for a Small Business?
Should a Small Business Order 100, 500 or 1,000 Stickers?
How to Choose the Right Sticker Material
What Sticker Finish Should a Small Business Choose?
How to Design Custom Stickers for a Small Business
Custom Die-Cut Stickers vs. Standard Shapes
A Practical Sticker Strategy for a New Small Business
Example: A Small Cosmetics Brand
How to Order Custom Stickers for Your Small Business
How to Avoid Common Small Business Sticker Mistakes
Factory-Direct Custom Stickers for Small Business

Why Do Small Businesses Need Custom Stickers?

Custom stickers give small businesses a flexible way to add branding without redesigning all of their packaging.

For example, a company using standard kraft boxes can add a branded logo sticker and immediately create a more consistent presentation. A plain mailer bag can become recognizable with a custom sticker. A product jar can use a printed label instead of requiring expensive custom-printed containers.

Current small-business sticker guides commonly identify packaging, product labeling, giveaways, events, customer orders, and promotional campaigns as major applications.

The biggest advantage is flexibility.

A small business can order stickers separately from its packaging and change designs more easily when:

  • A logo changes
  • A product is redesigned
  • A seasonal campaign starts
  • A new product is launched
  • A promotion is introduced
  • Different languages are required
  • A new market is entered

This makes stickers particularly useful for growing brands that do not yet want to commit to large quantities of fully printed packaging.

What Are the Best Custom Stickers for a Small Business?

No single “best” sticker fits every small business.

The right option depends on what you want the sticker to do.

Business NeedRecommended Sticker
Logo brandingDie-cut or round stickers
Product packagingProduct labels
Box sealingLogo seal stickers
E-commerce ordersLogo + thank-you stickers
Outdoor brandingWaterproof vinyl stickers
Food packagingPP/BOPP or suitable food-packaging label
Bottles and jarsWaterproof adhesive labels
Premium productsClear, metallic, foil or decorative labels
EventsPromotional die-cut stickers
QR code marketingQR code stickers
Multiple languagesMulti-layer/booklet labels
Inventory trackingRFID labels

For most new businesses, it is better to start with one or two practical sticker formats than to order ten different designs.

Custom Stickers for Product Packaging

Packaging is one of the most practical uses for small business stickers.

A custom sticker can turn standard packaging into branded packaging without requiring the business to purchase custom-printed boxes, bags, or containers.

Common applications include:

  • Boxes
  • Pouches
  • Paper bags
  • Mailer bags
  • Jars
  • Bottles
  • Cups
  • Tissue paper
  • Shipping cartons
  • Product containers

For example, an online candle brand could use:

Logo sticker + product label + warning label + thank-you sticker

Instead of printing everything directly onto the box, the business can use stickers to keep packaging flexible.

This is especially useful when a company has multiple products but relatively low sales volume for each SKU.

Custom Logo Stickers for Small Business

A custom logo sticker is one of the easiest places to start.

A good logo sticker should be:

  • Easy to recognize
  • Simple enough to read at small sizes
  • Consistent with the brand identity
  • Suitable for the intended surface
  • Easy to apply

Common shapes include:

  • Circle
  • Square
  • Rectangle
  • Oval
  • Custom die-cut

For packaging, a 1.5–3 inch sticker is often a practical starting range, although the ideal size depends on the packaging dimensions and logo design.

The goal is not to make the sticker as large as possible.

The goal is to make the logo visible without overpowering the product.

Custom Stickers for E-Commerce Businesses

Small online stores can use stickers throughout the order process.

A single shipment might include:

Outer box → logo seal → product label → thank-you sticker → promotional sticker

For example, an Etsy or Shopify seller could include one small branded sticker with every order.

The sticker can contain:

  • Logo
  • Website
  • Social media handle
  • QR code
  • Thank-you message
  • Discount code
  • Brand slogan

Current small-business sticker guides specifically identify e-commerce packaging, inserts, thank-you stickers, product labels, and promotional stickers as common applications.

This creates multiple brand touchpoints without requiring expensive packaging changes.

Custom Stickers for Handmade Businesses

Handmade businesses are particularly well suited to custom stickers.

Examples include:

  • Candle makers
  • Soap makers
  • Jewelry brands
  • Handmade cosmetics
  • Pottery businesses
  • Craft businesses
  • Handmade food products
  • Gift businesses

For these companies, packaging often needs to feel personal, not mass-produced.

A kraft box plus a high-quality custom sticker can create a very different impression from a completely generic package.

For handmade brands, consider:

Kraft + matte sticker + simple logo + one brand color

This can create a consistent visual identity without making the packaging look overdesigned.

Custom Stickers for Food and Beverage Businesses

Food businesses should consider the environment where the sticker will be used.

Common applications include:

  • Coffee cups
  • Takeaway containers
  • Bakery boxes
  • Food bags
  • Sauce bottles
  • Jam jars
  • Beverage bottles
  • Meal-preparation containers

The sticker may encounter:

  • Moisture
  • Refrigeration
  • Oil
  • Condensation
  • Temperature changes
  • Handling

Therefore, paper stickers may not always be appropriate.

For moisture-exposed packaging, synthetic materials such as PP/BOPP, PET, or suitable waterproof constructions may be more practical.

Select the material based on the actual application rather than simply choosing the cheapest sticker.

Custom Stickers for Beauty and Cosmetics Brands

Small cosmetics brands often need packaging that looks premium.

Typical products include:

  • Skincare
  • Lip balm
  • Soap
  • Hair products
  • Essential oils
  • Body care
  • Makeup
  • Beauty accessories

Possible sticker options include:

  • Clear stickers
  • White PP labels
  • Matte labels
  • Glossy labels
  • Metallic labels
  • Foil labels
  • Decorative labels

For premium products, finishing can be as important as the base material.

A simple logo with matte lamination may create a sophisticated appearance without the cost of highly complex finishing.

For luxury positioning, consider metallic effects, foil stamping, embossing, or specialty materials.

Custom Stickers for Small Business Marketing

Stickers should not be limited to packaging.

They can also become a low-cost promotional product.

Businesses can distribute them at:

  • Markets
  • Trade shows
  • Pop-up stores
  • Events
  • Coffee shops
  • Conferences
  • Product launches
  • Local community events

A good promotional sticker should give people a reason to keep it.

Instead of putting only a logo on the sticker, consider:

  • A memorable slogan
  • A mascot
  • A product illustration
  • A useful QR code
  • A limited-edition design
  • A humorous message

Shopify’s 2026 guide also highlights stickers as a flexible marketing tool that can go in packaging, be distributed at events, or be sold as merchandise.

Custom QR Code Stickers for Small Business

QR code stickers are particularly useful for small businesses because one small physical label can connect customers to a digital destination.

A QR code could link to:

  • Website
  • Product page
  • Online menu
  • Instagram
  • TikTok
  • Review page
  • Warranty registration
  • Instruction manual
  • Discount page

However, do not make the QR code too small.

The code needs enough clear space around it and should be tested with several smartphones before mass production.

For packaging, the QR code should support the customer journey rather than simply exist because QR codes are fashionable.

For example:

Product → Scan QR → Usage instructions

is more useful than:

Product → Scan QR → Homepage

How Much Do Custom Stickers Cost for a Small Business?

The cost of custom stickers depends mainly on material, size, quantity, printing, finishing, and production method.

For small businesses, low-volume orders normally have a higher unit cost, while larger orders reduce the average cost per sticker.

A recent 2026 industry guide gives a broad reference range of approximately $0.05–$0.50 per sticker, depending on size, material, quantity, and printing method.

However, B2B factory pricing can be substantially different from retail or small online-printing prices.

For example, actual factory reference pricing for customized label products can fall into the following ranges:

ProductFactory Reference Price
Security Labels$0.015–$0.030/pc
Dome Labels$0.030–$0.074/pc
RFID Tags$0.060–$0.119/pc
Wine & Beverage Labels$0.089–$0.179/pc
Multi-Layer Booklet Labels$0.119–$0.223/pc
Decorative Labels$0.179–$0.298/pc

These are reference factory ranges, not fixed prices.

The final custom sticker price depends on the exact specification.

Should a Small Business Order 100, 500 or 1,000 Stickers?

This is one of the most practical purchasing decisions.

If you are testing a new design, starting with 100–200 pieces can reduce the risk of committing too much money to an unproven design. Some current small-business sticker guides recommend a small test run, then increasing volume after confirming customer response.

A practical approach is:

100–200 Pieces

Best for:

  • New businesses
  • New logos
  • Product testing
  • Seasonal campaigns
  • New packaging

500 Pieces

Good for:

  • Established packaging
  • Regular e-commerce orders
  • Local events
  • Small product launches

1,000+ Pieces

Better for:

  • Regular product sales
  • High-volume packaging
  • Popular designs
  • Wholesale orders

5,000+ Pieces

Suitable when:

  • The design is stable
  • The sticker is used on every order
  • The product has predictable demand
  • Lower unit cost is important

The key principle is:

Don’t buy 10,000 stickers just because the unit price is lower if you will only use 500.

Inventory that sits in a warehouse is not savings.

How to Choose the Right Sticker Material

Select material based on the application.

Paper Stickers

Best for:

  • Indoor packaging
  • Short-term promotions
  • Kraft packaging
  • Low-cost branding

Advantages:

  • Low cost
  • Easy to print
  • Natural appearance
  • Suitable for many indoor uses

Vinyl Stickers

Best for:

  • Outdoor promotion
  • Promotional giveaways
  • Bottles
  • Equipment
  • Long-term branding

Vinyl is commonly chosen when durability and moisture resistance matter.

PP/BOPP Stickers

Best for:

  • Food packaging
  • Cosmetics
  • Bottles
  • Moisture-exposed products

They offer a practical combination of durability, printability, and moisture resistance.

PET Stickers

Best for:

  • Industrial applications
  • Durable product labels
  • Electronics
  • Harsh environments

Clear Stickers

Best for:

  • Premium packaging
  • Glass bottles
  • Transparent containers
  • “No-label-look” designs

Always test the correct material on the actual product surface before large-scale production.

What Sticker Finish Should a Small Business Choose?

The finish changes both appearance and performance.

Matte

Good for:

  • Premium packaging
  • Minimalist brands
  • Cosmetics
  • Handmade products

Glossy

Good for:

  • Bright colors
  • Promotional stickers
  • Product images
  • Retail packaging

Holographic

Good for:

  • Youth brands
  • Artists
  • Collectibles
  • Promotional products

Metallic

Good for:

  • Premium products
  • Cosmetics
  • Wine
  • Luxury packaging

Lamination

Useful when you need extra protection against moisture, abrasion, or handling.

A small business does not need the most expensive finish.

Choose the finish that supports the brand positioning and actual use.


How to Design Custom Stickers for a Small Business

A common mistake is putting too much information on one sticker.

A small sticker usually works better when it has one primary purpose.

For a logo sticker:

Logo + brand name

For a promotional sticker:

Message + visual

For a QR sticker:

QR code + short instruction

For a product label:

Brand + product name + required information

Before sending artwork to the manufacturer, check:

  • Correct dimensions
  • Bleed
  • Safe area
  • Color mode
  • Resolution
  • Font conversion
  • QR code readability
  • Spelling
  • Logo proportions

If possible, request a digital proof before production.

Custom Die-Cut Stickers vs. Standard Shapes

Small businesses can choose between standard shapes and custom die-cut stickers.

Standard Shapes

Examples:

  • Circle
  • Square
  • Rectangle
  • Oval

Advantages:

  • Simple
  • Easy to design
  • Efficient production
  • Often cost-effective

Die-Cut Stickers

The sticker follows the shape of the artwork or logo.

Advantages:

  • More distinctive
  • Stronger visual identity
  • Better for illustrations
  • Suitable for promotional merchandise

Die-cut stickers are especially popular among artists, creators, and brands selling merchandise.

If the sticker will mainly be used as a packaging seal, a standard circle or rectangle may provide better value.

A Practical Sticker Strategy for a New Small Business

If you are launching a business and have never purchased custom stickers before, do not start with six different products.

Use a simple three-stage system.

Stage 1: Build the Brand

Order:

Logo sticker

Use it on:

  • Boxes
  • Bags
  • Mailers
  • Thank-you cards

Recommended starting quantity:

100–500 pieces

Stage 2: Improve Packaging

Add:

Product label + packaging seal

The sticker system now serves both branding and product-information functions.

Stage 3: Add Marketing

Introduce:

Promotional / QR / giveaway stickers

Include these with orders or distribute them at events.

This approach lets the sticker program grow with the business instead of creating unnecessary inventory.

Example: A Small Candle Business

Imagine a small candle company selling handmade soy candles online.

The company uses plain kraft boxes.

Instead of ordering expensive printed boxes, it could use:

1. Logo sticker

Placed on the outside of the box.

2. Product label

Applied to the candle jar.

3. Safety label

Placed underneath the candle.

4. Thank-you sticker

Added inside the package.

5. QR code sticker

Links to candle-care instructions.

The company can create a complete branded packaging experience while still using standard packaging materials.

This is one of the strongest reasons custom stickers for small businesses remain practical: the business can change one component without replacing its entire packaging system.

Example: A Small Cosmetics Brand

A skincare startup may have only three products:

  • Face serum
  • Moisturizer
  • Cleanser

Instead of ordering three types of custom bottles, it can use standard containers combined with customized PP or PET labels.

Each product can share:

  • Brand logo
  • Typography
  • Brand colors

while changing:

  • Product name
  • Ingredients
  • Usage
  • Volume
  • Batch information

This creates a consistent product family while maintaining production flexibility.

How to Order Custom Stickers for Your Small Business

A practical ordering process should look like this:

Step 1: Define the Application

Ask:

Where will the sticker be used?

Packaging, outdoor promotion, bottles, shipping boxes, or products?

Step 2: Choose the Material

Match the material to:

  • Surface
  • Moisture
  • Temperature
  • Handling
  • Expected lifespan

Step 3: Select the Size

Measure the actual application surface.

Don’t design the sticker first and then discover it doesn’t fit the package.

Step 4: Select the Shape

Choose:

  • Circle
  • Rectangle
  • Square
  • Oval
  • Custom die-cut

Step 5: Choose the Finish

Select matte, glossy, laminate, metallic, holographic, or another finish according to the desired result.

Step 6: Prepare the Artwork

Provide:

  • Logo
  • Artwork
  • Text
  • QR code
  • Product information

Step 7: Request a Sample or Proof

Before ordering thousands of pieces, verify:

  • Color
  • Size
  • Adhesion
  • Material
  • Surface appearance

Step 8: Compare Quantity Pricing

Ask for quotations at multiple volumes.

For example:

500 / 1,000 / 5,000 / 10,000 pcs

Step 9: Start Production

Once the proof is approved, proceed with the production order.

Step 10: Evaluate and Reorder

After using the stickers for several weeks, evaluate:

  • Adhesion
  • Customer response
  • Appearance
  • Durability
  • Consumption rate

Then adjust the next order. The most important step is partnering with an experienced manufacturer that can provide solutions for a wide range of product labels.

How to Avoid Common Small Business Sticker Mistakes

Mistake 1: Ordering Too Many

A new company may order 10,000 stickers because the unit price looks attractive.

If the design changes six months later, the remaining inventory becomes waste.

Mistake 2: Choosing Material Only by Price

A cheap paper sticker may fail on a refrigerated bottle.

Mistake 3: Ignoring Adhesion

Different surfaces require different adhesives.

Mistake 4: Making the Sticker Too Small

A beautiful logo becomes useless if customers cannot read it.

Mistake 5: Adding Too Much Information

A sticker is not a website.

Keep the main message clear.

Mistake 6: Skipping a Sample

A digital design cannot fully show:

  • Material texture
  • Adhesive performance
  • Actual color
  • Gloss level
  • Thickness

Always test important applications before a large production run.

Factory-Direct Custom Stickers for Small Business

Small businesses often begin with online printing services because they need relatively small quantities.

As the business grows, direct manufacturing can become more attractive, particularly when monthly sticker consumption increases.

A factory can provide customization across:

  • Material
  • Size
  • Shape
  • Adhesive
  • Printing
  • Finishing
  • Packaging
  • Variable data
  • RFID
  • Security features
  • Multi-layer construction

For a small business, factory-direct sourcing is not necessarily about buying the largest possible quantity.

It is about creating a sticker specification that matches the actual product and purchasing volume.

Perfect Label provides custom label and sticker manufacturing for brands, product manufacturers, distributors, and other B2B buyers. Depending on the application, solutions can include standard stickers, waterproof labels, security labels, RFID tags, dome labels, beverage labels, multi-layer booklet labels, and decorative labels.

The most cost-effective solution is not always the sticker with the lowest unit price.

It is the sticker that provides the required appearance, adhesion, durability, functionality, and cost for the actual application.

FAQ About Custom Stickers for Small Business

What are the best custom stickers for a small business?

For many new businesses, a simple custom logo sticker is a good starting point. Vinyl works well when moisture or outdoor durability matters, while paper suits many indoor packaging applications.

How many custom stickers should a small business order?

Start with around 100–500 pieces when testing a new design. Once the design and application are proven, larger quantities can reduce the unit cost.

Are custom stickers good for product packaging?

Yes. You can use them on boxes, bags, jars, bottles, mailers, tissue paper, and other packaging surfaces. They allow businesses to add branding without ordering fully custom-printed packaging.

What is the best material for waterproof business stickers?

Vinyl, PP/BOPP, PET, and other synthetic constructions can suit moisture-resistant applications. The best choice depends on the surface, temperature, exposure, and required lifespan.

Can I put my logo on custom stickers?

Yes. You can print a logo as a standard circle, rectangle, square, or custom die-cut shape.

Are custom stickers expensive for small businesses?

They do not have to be. Simple stickers can be produced at relatively low unit costs, particularly as order quantities increase. The biggest cost drivers are usually size, material, quantity, printing, and finishing.

Can small businesses use QR code stickers?

Yes. QR stickers can connect physical products or packaging to websites, menus, social media, instructions, reviews, promotions, or other digital content.

Should I buy stickers directly from a manufacturer?

If your volume is increasing or you require specific materials, adhesives, finishes, or custom constructions, buying directly from a manufacturer can be worth evaluating. It allows you to compare factory pricing and communicate specifications directly with the production team.

A Simple Implementation Plan for Your Small Business

To put this guide into practice, use the following checklist.

Week 1 — Define the purpose

Choose one primary application:

Packaging / Product Label / Logo / Promotion / QR Code

Week 1 — Select specifications

Determine:

  • Size
  • Shape
  • Material
  • Adhesive
  • Finish
  • Quantity

Week 2 — Prepare artwork

Create one primary design and one alternative version.

Week 2 — Request samples

Test the sticker on the actual packaging or product.

Week 3 — Evaluate

Check:

  • Appearance
  • Adhesion
  • Durability
  • Customer response
  • Cost per unit

Week 3 — Place the first production order

Choose a quantity based on your actual monthly consumption.

After 1–3 months — Optimize

Review how quickly you use the stickers and whether the material and design work as expected.

Then negotiate larger-volume pricing if demand is stable.

Final Thoughts

Custom stickers for small businesses work best when treated as part of a practical branding and packaging system, not just promotional decoration.

Start with the application.

Then choose the material, size, adhesive, finish, and quantity.

For a new business, a sensible starting point might be:

Logo sticker → Product label → Packaging seal → QR/promotional sticker

As sales grow, the sticker program can become more sophisticated with waterproof materials, premium finishes, security features, RFID, multi-layer labels, or other customized constructions.

The key is to scale your sticker purchasing as fast as your business.

You do not need 10,000 stickers to look professional.

You need the right 100, 500, or 1,000 stickers for the job—and a supplier that can scale with you when those numbers start getting bigger.

types-of-packaging-labels

Types of Packaging Labels: A Complete Guide

Packaging labels do much more than display a brand name. They identify products, communicate essential information, support traceability, protect product authenticity, and create a visual connection between a product and its customers.

But with so many options available—including pressure-sensitive labels, shrink sleeve labels, paper labels, BOPP labels, security labels, and smart labels—choosing the right type of packaging label can be challenging.

The best packaging label depends on several factors, including the packaging material, product environment, application method, information requirements, branding objectives, and functional needs.

In this guide, we explain the main types of packaging labels, their materials, applications, and how to choose the right solution for your product.

What Are Packaging Labels?

Packaging labels are printed or functional labels applied to product packaging to provide identification, information, branding, decoration, tracking, security, or other functions.

They can be applied to bottles, jars, cartons, boxes, pouches, cans, tubes, and many other packaging formats.

Depending on the product and application, a packaging label may contain:

  • Brand name and logo
  • Product name
  • Ingredients and nutritional information
  • Instructions for use
  • Barcodes and QR codes
  • Batch and lot numbers
  • Manufacturing and expiration dates
  • Regulatory information
  • Warning information
  • Security or authentication features
  • Promotional messages

Packaging labels can therefore be classified in several ways, including by application method, function, material, and industry.

Types of Packaging Labels at a Glance

Label TypeBest ForMain Benefit
Pressure-Sensitive LabelsBottles, jars, boxes, pouchesVersatile and easy to apply
Shrink Sleeve LabelsComplex-shaped containers360-degree coverage
Wrap-Around LabelsBottles and cansLarge printable area
Paper LabelsDry products and cartonsCost-effective and highly printable
BOPP LabelsFood, beverage, cosmeticsMoisture resistance and durability
PET LabelsIndustrial and demanding applicationsExcellent durability
Clear LabelsGlass and transparent containersNo-label-look appearance
Security LabelsSensitive or premium productsAnti-counterfeiting protection
Smart LabelsTracking and authenticationRFID, NFC, or digital functionality
Booklet LabelsSmall products with extensive informationMore content in limited space
Tamper-Evident LabelsSealed productsEvidence of opening

Types of Packaging Labels by Application Method

1. Pressure-Sensitive Labels

Pressure-sensitive labels, also called self-adhesive labels, are one of the most widely used packaging label formats.

They consist of a printable face material, adhesive, and usually a release liner. The label can be applied by hand or through an automated labeling machine.

Pressure-sensitive labels are suitable for:

  • Glass bottles
  • Plastic bottles
  • Jars
  • Cartons
  • Boxes
  • Pouches
  • Tubes
  • Cans

They are available in many materials, shapes, sizes, adhesives, finishes, and printing options.

For general-purpose product packaging, pressure-sensitive labels are often a highly versatile choice.

Pressure-Sensitive Labels

2. Shrink Sleeve Labels

Shrink sleeve labels are made from flexible film that is applied around a container and then shrunk using controlled heat.

Unlike a conventional front or back label, a shrink sleeve can provide extensive coverage around the package.

They are particularly suitable for:

  • Beverages
  • Cosmetics
  • Personal care products
  • Promotional packaging
  • Unusually shaped containers

The major advantage of shrink sleeves is their ability to provide strong 360-degree graphics while conforming to complex container shapes.

Shrink Sleeve Labels

3. Wrap-Around Labels

Wrap-around labels extend around part or all of a cylindrical package.

They are commonly used for bottles, cans, and other round containers.

Wrap-around labels can provide a large printable area while maintaining an efficient packaging format. Depending on the application, they can be produced using different materials and adhesive technologies.

4. Heat-Transfer Labels

Heat-transfer labeling uses heat and pressure to transfer a printed design onto a container or product surface.

This method can create a clean, integrated appearance and is useful for selected plastic containers and other packaging applications.

The appropriate process depends on the packaging substrate, container geometry, production equipment, and required durability.

5. In-Mold Labels

In-mold labeling integrates the label into a container during the molding process rather than applying a conventional adhesive label afterward.

This approach is used in selected high-volume packaging applications where the label and container are designed to work together as part of the manufacturing process.

Types of Packaging Labels by Function

Packaging labels are not only differentiated by how they are applied. They can also be classified according to what they are designed to do.

1. Brand and Decorative Labels

Brand labels are designed primarily to communicate brand identity and create visual differentiation.

They may include:

  • Logos
  • Brand colors
  • Product names
  • Decorative graphics
  • Metallic effects
  • Embossing
  • Special coatings
  • Textured finishes

Premium decorative labels are widely used for cosmetics, beverages, food products, personal care products, and other consumer goods where shelf appearance is important.

2. Product Information Labels

Information labels communicate essential product details to customers and other stakeholders.

Depending on the product, information may include:

  • Product specifications
  • Ingredients
  • Nutritional information
  • Directions
  • Manufacturer information
  • Product quantity
  • Storage instructions
  • Warnings

The required information varies by product category and market, so packaging labels should be designed with the relevant regulatory requirements in mind.

3. Barcode and Variable Data Labels

Variable-data labels are used when each label needs unique or changing information.

Examples include:

  • Barcodes
  • QR codes
  • Serial numbers
  • Batch numbers
  • Lot numbers
  • Manufacturing dates
  • Expiration dates

These labels are important for inventory management, traceability, logistics, authentication, and product identification.

4. Security and Anti-Counterfeit Labels

Security labels help brands protect products against unauthorized duplication, tampering, or counterfeiting.

Possible security features include:

  • Tamper-evident constructions
  • Destructible materials
  • Void effects
  • Holographic elements
  • Specialized printing
  • Serialized codes
  • Authentication technologies

Security labels can be particularly valuable for pharmaceuticals, electronics, premium consumer goods, cosmetics, and other products where authenticity is important.

5. Tamper-Evident Labels

Tamper-evident labels are designed to provide visible evidence if a package has been opened or interfered with.

They can be used on:

  • Bottles
  • Cartons
  • Boxes
  • Jars
  • Healthcare packaging
  • Cosmetic packaging
  • Food packaging

The appropriate construction depends on the package design and the level of tamper evidence required.

Tamper-Evident Labels

6. Booklet and Extended-Content Labels

Booklet labels provide more information than a conventional single-layer label while maintaining a relatively compact footprint.

They are useful when packaging needs to communicate:

  • Multiple languages
  • Detailed instructions
  • Ingredients
  • Safety information
  • Regulatory information
  • Usage instructions
  • Promotional content

They are especially useful for small packages where the available labeling area is limited.

7. Smart Labels

Smart labels combine conventional labeling with technologies such as RFID, NFC, or digitally connected codes.

Depending on the solution, smart labels can support:

  • Product authentication
  • Inventory tracking
  • Supply-chain visibility
  • Product identification
  • Consumer engagement
  • Digital product information

For businesses that need both physical packaging communication and digital functionality, smart labels can provide capabilities beyond conventional printed labels.

Types of Packaging Labels by Material

The material used for a packaging label has a major impact on its appearance, durability, print quality, and performance.

Paper Labels

Paper is a popular label material because it offers excellent printability and can be a cost-effective solution for many applications.

Paper labels are commonly used for:

  • Dry food products
  • Cartons
  • Boxes
  • General retail products
  • Artisan products
  • Promotional packaging

However, standard paper labels may not be the best choice for products exposed to high moisture, condensation, chemicals, or heavy abrasion.

BOPP Labels

BOPP, or biaxially oriented polypropylene, is a popular synthetic label material for packaging.

BOPP labels offer a combination of:

  • Moisture resistance
  • Good printability
  • Durability
  • Flexible appearance options
  • Clear or white constructions

They are widely used in food, beverage, cosmetics, personal care, and other applications where resistance to moisture is important.

PET Labels

PET labels are designed for demanding applications where durability is a major requirement.

They can provide good resistance to:

  • Abrasion
  • Chemicals
  • Heat
  • Moisture

PET and other durable synthetic materials are commonly considered for industrial products, electronics, healthcare applications, and demanding packaging environments.

PVC and Vinyl Labels

PVC or vinyl materials can offer flexibility, water resistance, and durability.

They may be used for selected packaging and industrial applications where the label needs to withstand moisture or environmental exposure.

However, material selection should consider the complete packaging system, including disposal and recycling requirements.

Specialty and Sustainable Label Materials

Brands can also choose specialty materials to achieve specific sustainability, appearance, or performance objectives.

Options may include selected recycled papers, specialty films, and other material constructions.

The right sustainable label should be evaluated as part of the entire packaging system rather than based only on the face material.

Types of Packaging Labels for Different Industries

Food and Beverage Packaging Labels

Food and beverage labels may need to withstand:

  • Moisture
  • Condensation
  • Refrigeration
  • Oil
  • Handling and transportation

Common solutions include pressure-sensitive labels, BOPP labels, shrink sleeves, and other specialty constructions.

Cosmetic and Personal Care Labels

Cosmetic packaging often places a strong emphasis on both performance and appearance.

Common requirements include:

  • Premium printing
  • Metallic effects
  • Embossing
  • Transparent labels
  • Water resistance
  • Chemical resistance
  • High-quality finishes

For premium beauty products, the label can become an important part of the overall brand experience.

Pharmaceutical and Healthcare Labels

Healthcare and pharmaceutical applications may require labels with high information density, reliable adhesion, variable data, security features, and strong traceability.

Small-format and extended-content labels can be particularly useful when a large amount of information must fit onto a limited package surface.

Electronics Labels

Electronic products often require durable identification labels containing:

  • Serial numbers
  • Barcodes
  • QR codes
  • Product specifications
  • Traceability information

The label material and adhesive should be selected according to the product’s operating environment.

Industrial Labels

Industrial products may expose labels to chemicals, abrasion, temperature changes, moisture, or outdoor conditions.

For these applications, durable synthetic materials and specialized adhesives may be more appropriate than standard paper labels.

How to Choose the Right Packaging Label

There is no single best packaging label for every product. The right choice depends on the complete application.

1. Consider the Packaging Material

First determine what surface the label will be applied to.

Common substrates include:

  • Glass
  • Plastic
  • Metal
  • Cardboard
  • Paper
  • Flexible packaging

Different surfaces can require different adhesive and label constructions.

2. Consider the Package Shape

Is the container:

  • Flat?
  • Cylindrical?
  • Curved?
  • Irregularly shaped?
  • Flexible?

For complex shapes, shrink sleeves or specially designed pressure-sensitive labels may provide better coverage than conventional labels.

3. Consider Environmental Conditions

Think about what the label will experience during its life cycle.

Will it be exposed to:

  • Water?
  • Condensation?
  • Oil?
  • Chemicals?
  • Heat?
  • Cold?
  • UV exposure?
  • Abrasion?

Environmental conditions can significantly affect the choice of face material, adhesive, coating, and printing process.

4. Consider the Labeling Process

Will the labels be applied manually or automatically?

For automated production, label dimensions, roll specifications, liner construction, adhesive behavior, and dispensing performance all need to be compatible with the labeling equipment.

5. Consider Information Requirements

If the package only needs a brand logo and product name, a conventional label may be sufficient.

If the package needs extensive instructions, multiple languages, variable data, or regulatory information, consider extended-content or booklet labels.

6. Consider Brand Appearance

For consumer products, appearance can be just as important as functionality.

Depending on the desired result, you can consider:

  • Matte finishes
  • Gloss finishes
  • Transparent labels
  • Metallic effects
  • Hot stamping
  • Embossing
  • Specialty coatings
  • Custom shapes

7. Consider Security and Smart Functions

If your product requires authentication, traceability, anti-counterfeiting, or digital interaction, conventional printed labels may not be enough.

Security features, QR codes, NFC, RFID, or other smart label technologies can be incorporated into a customized labeling solution.

Which Packaging Label Is Best for Your Product?

The answer depends on your priorities.

Your RequirementPossible Label Solution
General-purpose packagingPressure-sensitive labels
360-degree brandingShrink sleeve labels
Cylindrical containersWrap-around or pressure-sensitive labels
Dry indoor productsPaper labels
Moisture exposureBOPP or suitable synthetic labels
High durabilityPET or specialty synthetic labels
Transparent packagingClear labels
Premium appearanceDecorative specialty labels
Anti-counterfeitingSecurity labels
Evidence of package openingTamper-evident labels
Extensive information on small packagingBooklet labels
Product tracking or authenticationRFID/NFC smart labels

The final selection should be based on the actual package, product, production process, and required performance rather than simply choosing the most popular label type.

Custom Packaging Labels from Perfect Label

At Perfect Label, we understand that packaging labels need to balance appearance, functionality, durability, and production efficiency.

Qingdao Perfect Printing and Packaging Co., Ltd. is an original manufacturer of custom labels based in Qingdao, China, with more than 16 years of experience in the label printing industry.

Our capabilities cover a wide range of customized packaging label solutions, including:

  • Pressure-sensitive labels
  • Security and anti-counterfeit labels
  • RFID and NFC smart labels
  • Specialty-material labels
  • Structural and functional labels
  • Decorative craft labels
  • Industry-specific labels

Our production capabilities include a 12-color satellite rotary printing press, automated RFID smart label production lines, and more than 100 sets of printing and post-press equipment.

Our 5,000 m² intelligent manufacturing workshop supports both high-volume production and flexible customization.

For customers with urgent development schedules, we provide rapid sample-making services, with samples available in as little as 24 hours for suitable projects. Mass-production orders can be completed in approximately 3–7 working days depending on project requirements.

Our quality management system follows ISO 9001:2015, with full-process inspection throughout production.

Whether you need premium decorative labels for cosmetics, moisture-resistant labels for beverages, security labels for authentication, or RFID smart labels for traceability, our technical team can help develop a label construction based on your packaging and application requirements.

Frequently Asked Questions

What are the most common types of packaging labels?

The most common types include pressure-sensitive labels, shrink sleeve labels, wrap-around labels, paper labels, synthetic labels, security labels, tamper-evident labels, booklet labels, and smart labels.

What is the difference between pressure-sensitive labels and shrink sleeve labels?

Pressure-sensitive labels use adhesive to attach to the packaging surface, while shrink sleeve labels are formed around the container using heat. Pressure-sensitive labels are highly versatile, while shrink sleeves are particularly useful for 360-degree coverage and complex container shapes.

What material is best for packaging labels?

There is no universal best material. Paper may be suitable for dry applications, while BOPP or other synthetic materials may be better for moisture exposure. PET and specialty materials can be considered when higher durability is required.

What type of label is best for bottles?

The best choice depends on the bottle material, shape, environment, labeling equipment, and desired appearance. Pressure-sensitive labels are a versatile option for many bottles, while shrink sleeves can be useful for complex shapes or full-body graphics.

What type of label is best for cosmetic packaging?

Cosmetic packaging often uses pressure-sensitive labels, clear labels, specialty films, and decorative labels with finishes such as embossing or hot stamping. The final choice depends on the container material and the product environment.

What are smart packaging labels?

Smart packaging labels incorporate technologies such as RFID, NFC, or connected QR codes to add functions such as tracking, authentication, inventory management, or consumer engagement.

How do I choose the right packaging label?

Start with the packaging substrate, shape, environmental conditions, labeling process, information requirements, appearance, and functional requirements. A professional label manufacturer can then help determine the appropriate material, adhesive, printing process, and construction.

Conclusion

Packaging labels can be classified by application method, function, material, and industry. Understanding these categories makes it easier to select a label that performs reliably while supporting your brand and packaging objectives.

For general packaging, pressure-sensitive labels offer excellent versatility. Shrink sleeves are useful for full-body graphics and complex shapes. Paper and BOPP labels can serve different environmental and visual requirements, while PET and specialty materials can provide enhanced durability. Security, tamper-evident, RFID, NFC, and booklet labels add specialized functions for products with more demanding requirements.

The most important point is that the right packaging label should be selected according to the complete application—not simply based on appearance or price.

If you are developing a new product or looking for a reliable supplier for custom packaging labels, working with an experienced label manufacturer can help you optimize material selection, printing, finishing, functionality, and production efficiency.  Welcome to contact us.