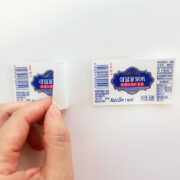
blog

Self Adhesive Labels: Materials, Applications and Benefits.

Self Adhesive Labels are one of the most versatile labeling solutions for modern product packaging, retail, logistics, industrial identification, and promotional applications. Unlike labels that require water, heat, or a separate bonding process, self-adhesive labels use a pressure-sensitive adhesive that bonds when pressure is applied.
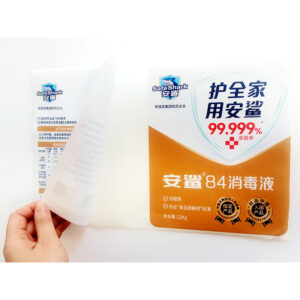
For buyers, however, choosing the right label is not as simple as selecting a color or ordering a “standard sticker.” The performance of a self-adhesive label depends on the face material, adhesive, liner, printing method, application surface, temperature, moisture, chemicals, and expected service life.

This is particularly important when selecting white self adhesive labels, red self adhesive labels, or yellow self adhesive labels. Color affects visibility and branding, but it does not determine whether a label will survive refrigeration, outdoor exposure, abrasion, or chemical contact.

This guide explains what Self Adhesive Labels are, how they are constructed, which materials are available, where different types are used, and how to select the right solution for your products.

What Are Self Adhesive Labels?

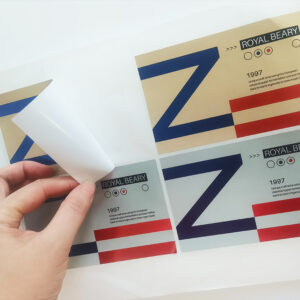
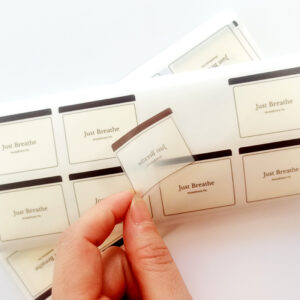
Self Adhesive Labels are labels with a pressure-sensitive adhesive layer on the reverse side. The adhesive is protected by a release liner until the label is ready to be applied.

A typical construction contains three primary functional components:

  1. Face stock – the printable top layer
  2. Pressure-sensitive adhesive – the bonding layer
  3. Release liner – the backing that protects the adhesive before application

Some constructions also include printable coatings, varnishes, laminates, or other functional layers.

The application process is straightforward:

Peel → Position → Apply Pressure → Bond

No water, heat, or solvent activation is normally required. This makes Self Adhesive Labels particularly suitable for automated and manual labeling processes.

The apparent simplicity of the product can be misleading. A label intended for a dry cardboard box may require a completely different construction from a label applied to a refrigerated beverage bottle or an outdoor machine.

How Do Self Adhesive Labels Work?

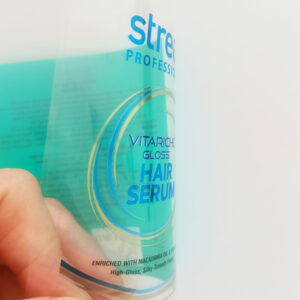
The adhesive used in Self Adhesive Labels is designed to remain tacky under normal conditions.

When the label is pressed onto a surface, the adhesive flows into microscopic irregularities in the substrate and creates contact between the label and the surface.

The actual bonding result depends on several factors:

  • Surface material
  • Surface cleanliness
  • Surface energy
  • Adhesive formulation
  • Application pressure
  • Temperature
  • Label flexibility
  • Contact area
  • Storage conditions

For example, glass and stainless steel generally provide relatively favorable surfaces for adhesive bonding, while low-surface-energy plastics such as polyethylene and polypropylene can require specially selected adhesives.

This is why simply requesting a “strong adhesive” is not always the correct solution. The right adhesive is one that matches the surface and operating environment.

Main Materials Used for Self Adhesive Labels

Material selection is one of the most important decisions when sourcing Self Adhesive Labels.

1. Paper Self Adhesive Labels

Paper remains one of the most widely used label face materials because it provides good printability at a relatively low cost. It is suitable for many indoor and dry applications.

Common paper options include:

  • Semi-gloss paper
  • Gloss paper
  • Matte paper
  • Coated paper
  • Kraft paper
  • Textured paper
  • Thermal paper
  • Specialty art paper

Best applications

Paper Self Adhesive Labels are commonly used for:

  • Retail packaging
  • Food products
  • Cartons
  • Promotional products
  • Product identification
  • Shipping and logistics
  • Price labels
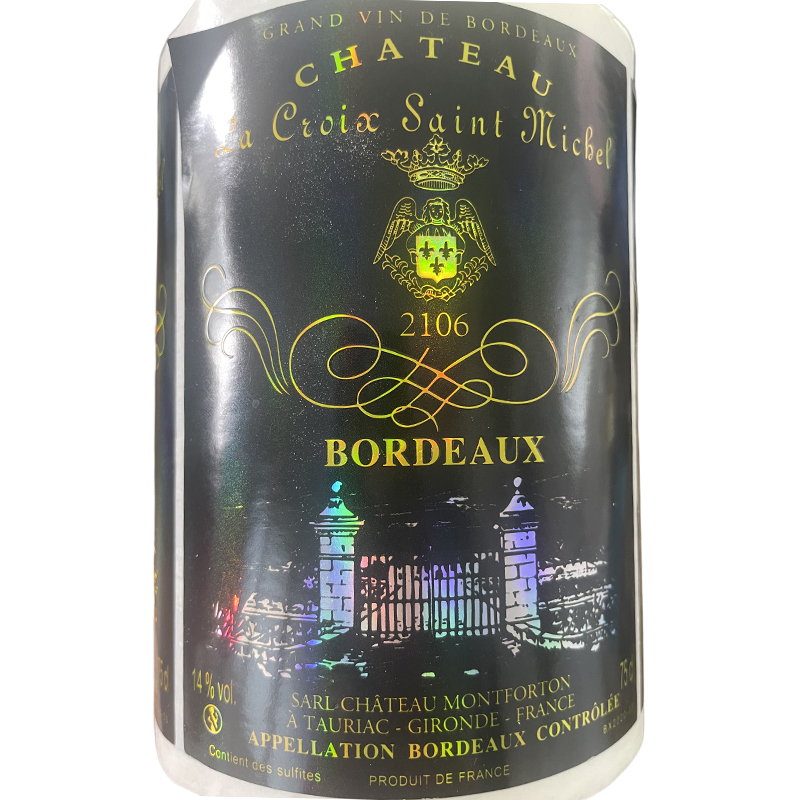
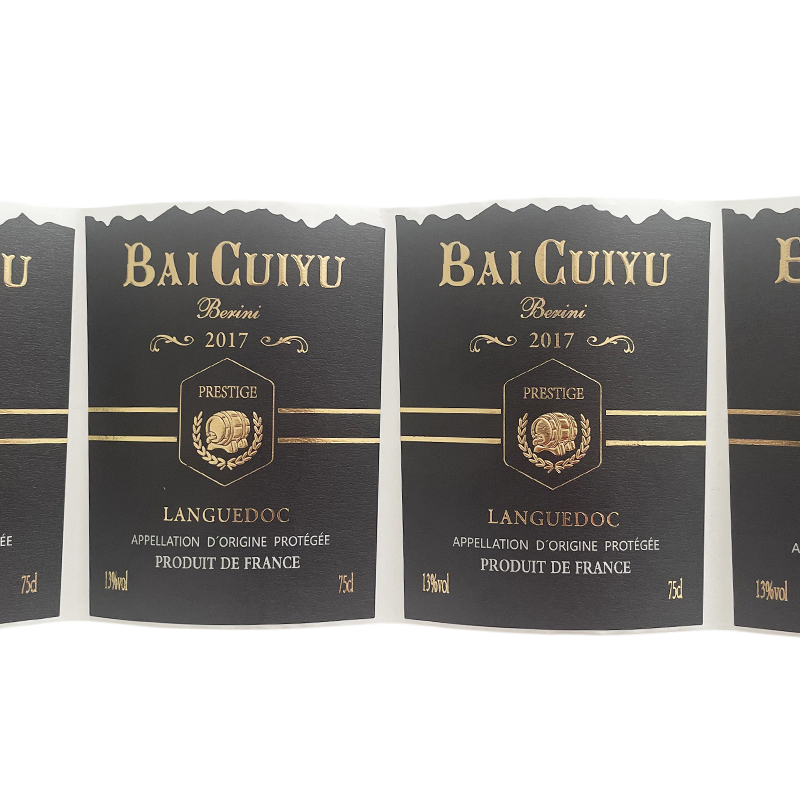
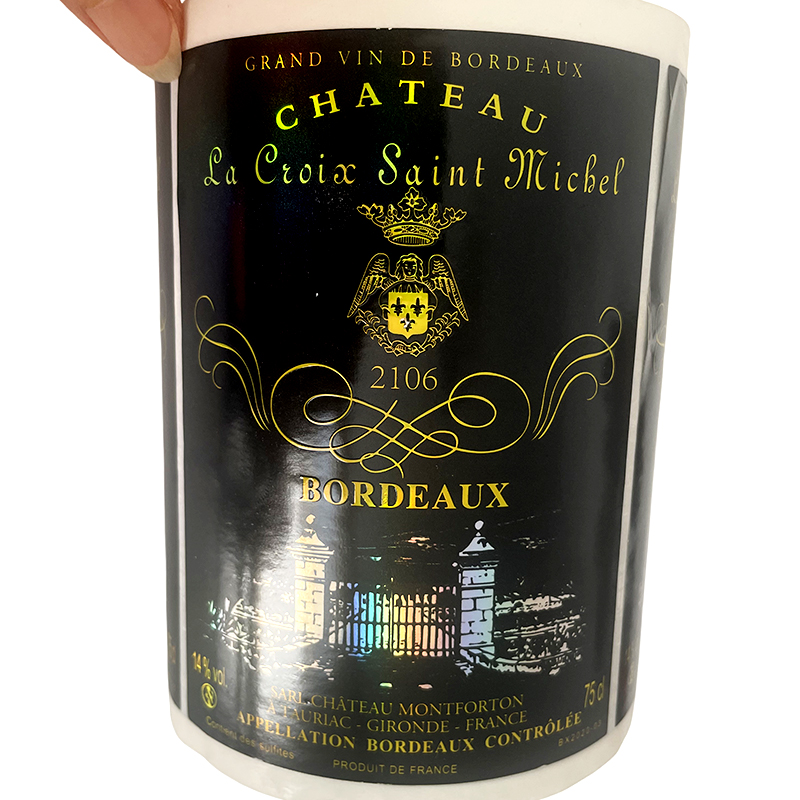
  • Wine and specialty packaging

The main limitation is moisture. Ordinary paper can absorb water and may become damaged or lose appearance when exposed to prolonged moisture.

For dry indoor products, however, paper can offer an excellent balance of cost, print quality, and appearance.


2. BOPP / PP Self Adhesive Labels

Polypropylene film is widely used when a label needs greater resistance to moisture and tearing than ordinary paper.

PP/BOPP labels can be produced in:

  • White
  • Clear
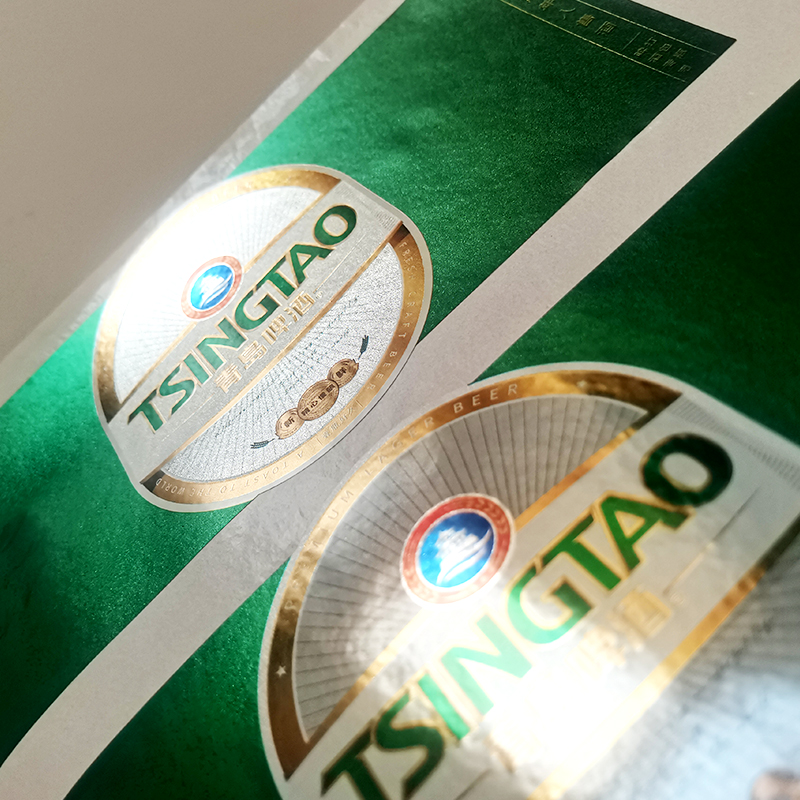
  • Metallic
  • Gloss
  • Matte

They are suitable for:

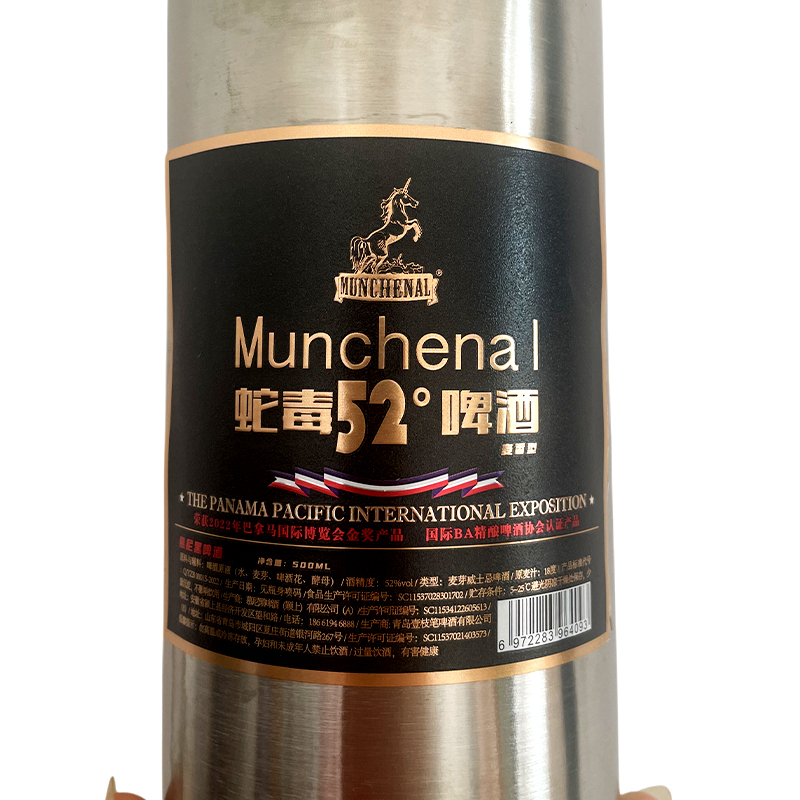
  • Beverages
  • Food packaging
  • Cosmetics
  • Personal care
  • Household products
  • Refrigerated products
  • Retail packaging

A major advantage is that polypropylene is resistant to water and offers good flexibility. Current label-material guidance identifies PP as a common durable face material for applications where moisture resistance and flexibility are required.


3. PET Self Adhesive Labels

PET is a strong synthetic film commonly selected for demanding applications.

Compared with ordinary paper, PET can offer improved:

  • Tear resistance
  • Dimensional stability
  • Chemical resistance
  • Abrasion resistance
  • Temperature resistance
  • Moisture resistance

PET Self Adhesive Labels are particularly useful for:

  • Electronics
  • Automotive components
  • Industrial equipment
  • Electrical products
  • Laboratory containers
  • Outdoor identification
  • Chemical packaging

For long-life industrial labels, PET is often a better starting point than conventional paper.


4. PE Self Adhesive Labels

Polyethylene is a flexible film that can be useful when labels need to conform to squeezable or flexible packaging.

Potential applications include:

  • Personal-care containers
  • Flexible bottles
  • Household products
  • Specialty packaging

The key advantage is flexibility. However, PE is a relatively low-surface-energy substrate, so the adhesive construction must be selected carefully when PE itself is the application surface.


5. Synthetic Paper

Synthetic paper combines a paper-like appearance with improved resistance to moisture and tearing.

It can be considered for:

  • Outdoor tags
  • Logistics labels
  • Retail labels
  • Industrial identification
  • Product packaging

For products that need a paper appearance but require greater durability, synthetic paper can be a useful middle-ground option.
White Self Adhesive Labels

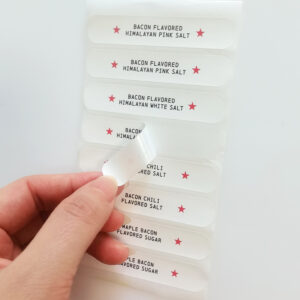
White self adhesive labels are the most versatile option for general-purpose branding and identification.

White provides a neutral background that allows:

  • Black text
  • Full-color graphics
  • Product photographs
  • Barcodes
  • QR codes
  • Logos
  • Regulatory information

to remain easy to read.

White labels can be produced using both paper and synthetic materials.

Common applications

White self adhesive labels are widely suitable for:

  • Food packaging
  • Cosmetics
  • Electronics
  • Logistics
  • Retail products
  • Pharmaceutical packaging
  • Industrial identification
  • Shipping cartons

For a standard indoor product, white coated paper may be sufficient.

For refrigerated, wet, or outdoor applications, a white PP, BOPP, or PET construction can provide greater durability.

The important point is that “white” describes the appearance, not the technical performance.

A white paper label and a white PET label can look similar on a computer screen while performing very differently in the real world.

Red Self Adhesive Labels

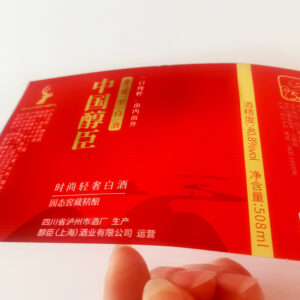
Red self adhesive labels are often selected when visibility and visual attention are priorities.

Red has strong visual impact and can be used to highlight:

  • Promotions
  • Warnings
  • Discounts
  • Special offers
  • Product variations
  • Priority information
  • Brand identity

Typical applications

Red Self Adhesive Labels can be used for:

  • Retail promotions
  • Clearance products
  • Warning identification
  • Food packaging
  • Warehouse marking
  • Industrial identification
  • Event products

For example, a retailer may use a red label to make promotional pricing immediately visible.

An industrial manufacturer may use red labels to differentiate a specific component or identification category.

However, color alone should not be relied upon to communicate safety information. Where labels are used for regulated hazard communication, the applicable standard determines the required label elements, not simply the buyer’s preferred color.

Yellow Self Adhesive Labels

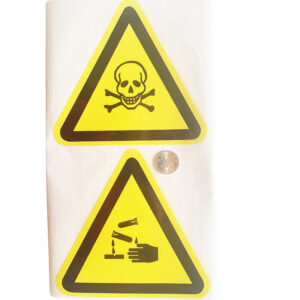
Yellow self adhesive labels are commonly selected for high visibility and quick visual recognition.

Yellow can be particularly effective when labels need to stand out against:

  • Black
  • White
  • Gray
  • Metallic
  • Dark-colored surfaces

Potential applications include:

  • Warehouse identification
  • Industrial marking
  • Warning labels
  • Inventory management
  • Promotional packaging
  • Product classification
  • Temporary identification

Yellow labels can also be combined with black printing for strong contrast.

For industrial environments, however, the final design should follow the relevant safety or regulatory requirements rather than using yellow simply because it is highly visible.


White vs. Red vs. Yellow Self Adhesive Labels

The best color depends on what the label needs to accomplish.

Label ColorMain AdvantageTypical Applications
WhiteVersatile, clean appearanceProduct packaging, barcodes, branding
RedStrong visual attentionPromotions, warnings, special identification
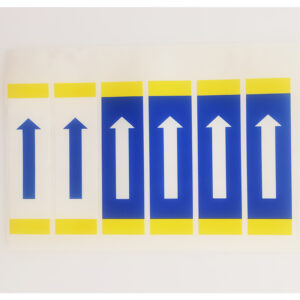
YellowHigh visibilityIndustrial marking, inventory, warnings
ClearNo-label appearanceGlass, cosmetics, premium packaging
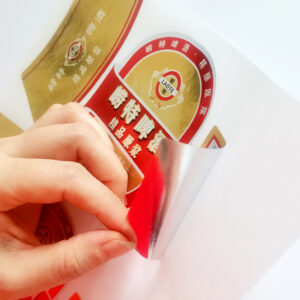
SilverMetallic appearanceElectronics, automotive, premium products

Color should be treated as part of the communication and branding strategy, while material and adhesive should be selected according to performance requirements.

Choosing the Right Adhesive for Self Adhesive Labels

The adhesive is just as important as the face material.

Permanent Adhesive

Permanent adhesives are designed for long-term attachment.

Suitable applications include:

  • Product packaging
  • Industrial equipment
  • Electronics
  • Automotive components
  • Asset identification

Removable Adhesive

Removable adhesives are designed for applications where the label needs to be removed with minimal residue.

Suitable for:

  • Temporary promotions
  • Retail displays
  • Temporary identification
  • Reusable packaging

Repositionable Adhesive

Repositionable adhesives allow the label to be adjusted during application.

This can be helpful when:

  • Labels are manually applied
  • Accurate positioning is critical
  • Operators need additional adjustment time

Freezer Adhesive

Products exposed to refrigeration or freezing may require a specialized adhesive designed to maintain bonding performance at low temperatures.

Examples include:

  • Frozen food
  • Cold-chain products
  • Laboratory samples
  • Refrigerated beverages

High-Temperature Adhesive

Industrial products exposed to elevated temperatures may require specialized adhesive systems.

Examples include:

  • Automotive components
  • Electronics
  • Industrial machinery
  • Manufacturing processes

Adhesive selection should always consider the actual substrate and environment. A permanent adhesive that works well on glass may not provide the same result on polyethylene or polypropylene.

Self Adhesive Labels for Different Applications

Food & Beverage

Food and beverage labels need to combine attractive graphics with reliable adhesion.

Typical applications include:

  • Bottles
  • Jars
  • Sauces
  • Coffee
  • Snacks
  • Frozen food
  • Beverages

For refrigerated products, condensation is a major consideration.

A conventional paper label may not be the best choice if the package repeatedly moves between cold storage and room temperature.

In these cases, BOPP, PP, PET, or other moisture-resistant constructions can be considered.


Cosmetics & Beauty

Cosmetic packaging is highly visual.

Labels need to support both branding and functional information.

Common products include:

  • Shampoo
  • Skincare
  • Serum
  • Lotion
  • Perfume
  • Hair-care products
  • Makeup

Popular materials and finishes include:

  • White BOPP
  • Clear PET
  • Specialty paper
  • Gold foil
  • Silver foil
  • Matte coating
  • Soft-touch coating
  • Embossing
  • Spot UV

For premium cosmetics, the tactile experience of the label can be almost as important as the printed design.

Wine & Liquor

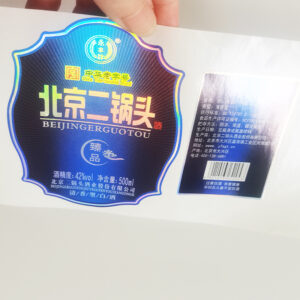
Wine and liquor labels often prioritize premium appearance.

Popular materials include:

  • Textured paper
  • Cotton paper
  • Pearl paper
  • Kraft paper
  • Clear film
  • Metallic paper

Decorative processes can include:

  • Hot stamping
  • Embossing
  • Debossing
  • Spot UV
  • Metallic printing

Bottle curvature should also be considered before selecting label dimensions.

A material that performs well on a flat carton may not be appropriate for a curved wine bottle.


Pharmaceutical & Healthcare

Pharmaceutical and healthcare labels require accurate information and reliable identification.

Applications include:

  • Medicine bottles
  • Medical devices
  • Laboratory containers
  • Healthcare packaging
  • Diagnostic products

Depending on the market and application, labels may require:

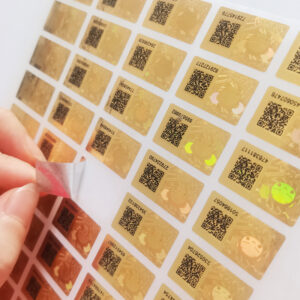
  • Barcodes
  • QR codes
  • Lot numbers
  • Expiration dates
  • Serial numbers
  • Variable data
  • Tamper-evident features

For regulated products, the label specification should be developed around approved artwork and applicable market requirements.


Electronics & Industrial Equipment

Industrial labels often need durability rather than decorative effects.

They may be exposed to:

  • Heat
  • Cold
  • Oil
  • Chemicals
  • Moisture
  • Abrasion
  • UV exposure

PET, polyester, and other synthetic constructions can be considered for demanding environments. Polyester is widely used where resistance to solvents, abrasion, and elevated temperatures is required.

Typical applications include:

  • Serial-number labels
  • Equipment identification
  • Rating plates
  • Control panels
  • Electrical products
  • Automotive components

Benefits of Self Adhesive Labels

1. Easy Application

Self Adhesive Labels require only pressure to bond, eliminating the need for water, heat, or separate glue activation.

2. Flexible Customization

Labels can be customized in:

  • Size
  • Shape
  • Material
  • Color
  • Adhesive
  • Printing
  • Finish

3. Suitable for Automation

Self-adhesive labels are available in roll formats compatible with many automated labeling systems.

This makes them suitable for high-volume manufacturing.

4. Excellent Branding Potential

The same basic label format can support:

  • Full-color graphics
  • Metallic effects
  • Textures
  • Embossing
  • QR codes
  • Variable information

5. Wide Material Selection

Paper, PP, PE, PET, synthetic paper, transparent films, foil, and specialty materials allow labels to be matched to different environments.

6. Cost Efficiency

For many packaging applications, self-adhesive labels provide an efficient combination of printing quality, application speed, customization, and production scalability.


Common Self Adhesive Label Problems and Solutions

ProblemPossible CauseRecommended Direction
Label peelingWrong adhesive/surfaceMatch adhesive to substrate
WrinklingCurved surface or rigid face materialUse more conformable material
Water damagePaper face stockConsider PP/BOPP/PET
Ink fadingUV exposureUse suitable inks/protection
Barcode failurePoor print quality or contrastOptimize artwork and printing
Edge liftingSmall diameter or difficult surfaceUse flexible construction
Residue after removalPermanent adhesiveUse removable adhesive
Poor cold adhesionUnsuitable adhesiveUse freezer-grade construction
Chemical damageIncompatible face materialConsider PET or specialized material

The important lesson is that label failure is rarely solved by changing only one component. Face material, adhesive, surface, and environment work as a system.

How to Choose the Right Self Adhesive Labels

A practical selection process can be reduced to eight questions.

1. What surface are you labeling?

Glass, cardboard, PET, PP, PE, metal, wood, or another substrate?

2. What environment will the label experience?

Indoor, outdoor, refrigerated, frozen, humid, or chemically aggressive?

3. How long must the label last?

Hours, months, one year, or several years?

4. Is the label permanent or removable?

This determines the adhesive direction.

5. Does the label need to resist water?

If yes, consider synthetic materials such as PP or PET.

6. Does the label need to resist heat or chemicals?

If yes, a durable synthetic construction may be more appropriate than ordinary paper.

7. What information must be printed?

Consider:

  • Logo
  • Product name
  • Barcode
  • QR code
  • Variable data
  • Regulatory information

8. What visual effect does the brand require?

Choose among:

  • Matte
  • Gloss
  • Transparent
  • Metallic
  • Textured
  • Embossed
  • Foil

This process is much more reliable than choosing a label solely by color or price.
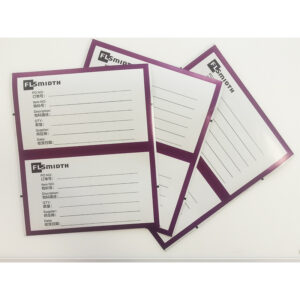

Custom Self Adhesive Labels from Perfect Label

Perfect Label provides custom Self Adhesive Labels manufacturing and OEM/ODM solutions for brands, manufacturers, distributors, retailers, and packaging companies.

Custom options can include:

  • White self adhesive labels
  • Red self adhesive labels
  • Yellow self adhesive labels
  • Clear labels
  • Metallic labels
  • Paper labels
  • PP/BOPP labels
  • PET labels
  • Synthetic paper labels
  • Permanent adhesive labels
  • Removable labels
  • Repositionable labels
  • Freezer labels
  • High-temperature labels

Perfect Label can also customize:

Size + Shape + Material + Adhesive + Printing + Finishing + Packaging

For demanding projects, the recommended workflow is:

Application analysis → Material selection → Adhesive selection → Artwork → Sample → Application testing → Mass production

This approach allows the label construction to be evaluated under actual conditions before a large production order is placed.


Self Adhesive Labels vs. Traditional Labels

One reason Self Adhesive Labels are so widely used is their simplicity.

Traditional wet-glue labeling may require a separate adhesive application process. Heat-activated systems require thermal activation. Self Adhesive Labels arrive with the adhesive already integrated into the label construction.

This can simplify:

  • Manual application
  • Automated labeling
  • Product changeovers
  • Short production runs
  • Packaging customization

The exact production advantages depend on the labeling equipment and application process, but the fundamental benefit remains the same: the label is ready to bond when the liner is removed and pressure is applied.
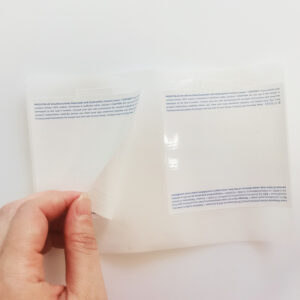

FAQ About Self Adhesive Labels

What are Self Adhesive Labels?

Self Adhesive Labels are labels with a pressure-sensitive adhesive that bonds to a surface when pressure is applied. They generally consist of a face material, adhesive, and release liner.

What are the main materials for Self Adhesive Labels?

Common materials include paper, PP/BOPP, PE, PET, synthetic paper, foil, and specialty films. The best choice depends on the application environment and required durability.

What are white self adhesive labels used for?

White self adhesive labels are suitable for general product identification, packaging, barcodes, retail products, food, cosmetics, logistics, and industrial applications. They provide a neutral background for text and graphics.

What are red self adhesive labels used for?

Red self adhesive labels are commonly used for promotions, visual identification, special product markings, and applications where high visual impact is required.

What are yellow self adhesive labels used for?

Yellow self adhesive labels are useful when high visibility is important, including inventory identification, warehouse marking, industrial applications, and promotional labeling.

Are Self Adhesive Labels waterproof?

Not all Self Adhesive Labels are waterproof. Standard paper labels can be affected by moisture, while PP/BOPP, PET, and other synthetic constructions generally provide better water resistance.

Can Self Adhesive Labels be removed?

Yes, if they are manufactured with a removable adhesive. Permanent and removable adhesives are designed for different applications, so the adhesive should be specified before production.

Can Self Adhesive Labels be customized?

Yes. Perfect Label can customize the material, adhesive, color, size, shape, printing, barcode, QR code, and finishing according to the application.


Final Thoughts

The best Self Adhesive Labels are not simply the labels with the strongest adhesive or the lowest unit price. They are labels engineered around the actual product and its environment.

White self adhesive labels are a versatile choice for general packaging and identification. Red self adhesive labels can provide strong visual emphasis for promotions and product identification. Yellow self adhesive labels are useful when visibility and quick recognition are important.

But color is only one part of the specification.

For reliable performance, consider the complete system:

Surface → Environment → Face Material → Adhesive → Printing → Finish → Application → Service Life

Paper may be ideal for a dry retail carton. BOPP can be more suitable for a wet beverage environment. PET may be better for industrial equipment exposed to abrasion, chemicals, or temperature changes.

The right specification can reduce peeling, wrinkling, fading, residue, and re-labeling costs while improving both product presentation and operational efficiency.

For brands and manufacturers sourcing Self Adhesive Labels in bulk, the most effective approach is to provide the label manufacturer with the product surface, environmental conditions, required service life, label dimensions, quantity, artwork, and performance requirements before production. That gives the supplier enough information to recommend a construction based on actual performance rather than simply selecting a label from a color chart.
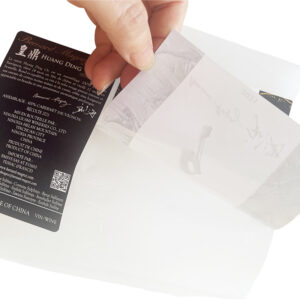

How to Choose the Right Custom Labels For Your Products?

Wendy XiaoInternational Trade Sales professional with 10+ years of experience in the label printing and packaging industry. Specializing in export sales, global market development, and client relationship management, with expertise in custom labeling solutions across paper and film substrates (PP, PE, PET). Serving global clients across FMCG, pharmaceutical, and personal care sectors. Committed to delivering […]

Wine Label Size Guide: Standard Dimensions

Choosing the right wine label size is more complicated than simply selecting a standard template. A 750ml Bordeaux bottle, a Burgundy bottle, a Champagne bottle, and a tall Alsace-style bottle may all hold the same volume but have very different usable labeling surfaces.

For most 750ml still-wine bottles, a practical starting point for a front label is around 90–100 mm wide × 90–120 mm high (3.5–4 × 3.5–4.7 inches). However, this is a starting range, not a universal standard. Current commercial label guides, for example, list approximately 90 × 120 mm for a Bordeaux 750ml front label and 90 × 115 mm for a Burgundy 750ml label, while Champagne bottles commonly use a shorter label around 90 × 80 mm.

The most important rule is simple: measure the actual bottle before finalizing the wine label dimensions. Bottle capacity tells you how much wine is inside; it does not tell you exactly how much flat surface is available for your label.

What Is the Standard Wine Label Size?

No single wine label size is globally mandated. Label dimensions are determined primarily by bottle geometry, design requirements, information content, material, application method, and the market in which the wine will be sold.

For a conventional 750ml wine bottle, the following dimensions are useful starting points:

Bottle / Label TypeCommon Starting Size
Bordeaux 750ml front label90 × 120 mm
Bordeaux 750ml back label80 × 105 mm
Burgundy 750ml front label90 × 115 mm
Champagne / sparkling wine90 × 80 mm
375ml half bottle70 × 90 mm
1.5L Magnum110 × 140 mm

These dimensions are examples, not mandatory industry standards. Bottle manufacturers can use different glass dimensions, so a label that fits one 750ml bottle may not fit another 750ml bottle perfectly. One current label-size guide specifically recommends measuring the actual container before production because manufacturers vary.

Another useful commercial reference for 750ml bottles places many front labels around 3.5–4 inches wide × 3.5–4 inches high, while back labels are often approximately 3–4 inches wide × 3.5–4.5 inches high.

So, if you are creating a new wine brand and do not yet have a final label specification, 90 × 120 mm is a reasonable size to test on a Bordeaux-style 750ml bottle. But don’t send that dimension to production until you’ve checked the physical bottle.


750ml Wine Bottle Label Size

The 750ml wine bottle is the most important format for many wine brands, so it deserves special attention.

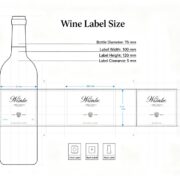
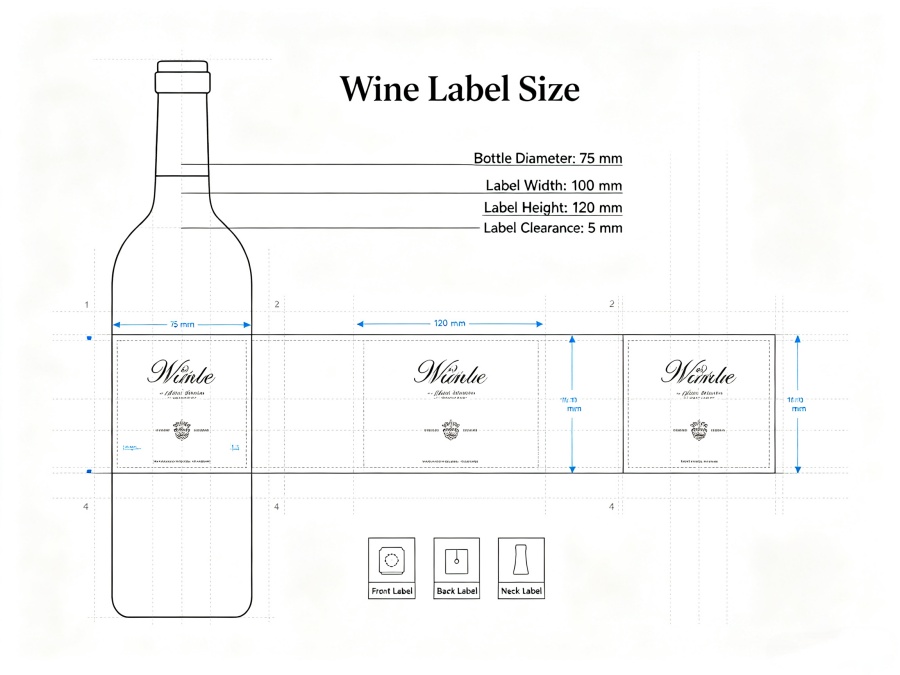
A typical 750ml bottle may be roughly 290–305 mm tall and 75–81 mm in diameter, although dimensions vary considerably by bottle design. A recent packaging reference gives approximately 11.5–12 inches in height and 3–3.2 inches in diameter for a typical 750ml Bordeaux-style bottle. Burgundy bottles can be wider, while sparkling wine bottles are often wider and heavier.

This variation explains why 750ml is a capacity specification, not a label-size specification.

Recommended starting dimensions for a 750ml bottle

For a traditional Bordeaux-style bottle:

  • Front label: around 90 × 120 mm
  • Back label: around 80 × 105 mm
  • Alternative front label: approximately 100 × 90 mm
  • Neck label: commonly much smaller and highly dependent on bottle shape
  • Full-wrap label: must be calculated from the bottle circumference and usable height

A front label of approximately 4 × 3.5 inches (102 × 89 mm) can also be a useful starting point for brands wanting a wider, shorter presentation. Commercial guides cite this general range as a practical option for common 750ml bottles.

The correct choice depends on your design.

A wine brand with a large central logo may prefer a wider horizontal label. A traditional European wine design with a crest, vintage, appellation, and producer information may work better with a taller rectangular label.


Front Wine Label Size vs. Back Wine Label Size

The front and back labels do not have to be identical.

In fact, making them different sizes can make the packaging more practical.

Front Wine Label

The front label is primarily a branding element. It may contain:

  • Brand name
  • Wine name
  • Vintage
  • Grape variety
  • Region or appellation
  • Winery logo
  • Product style
  • Decorative graphics

Because its primary purpose is visual presentation, the front label can be designed around the bottle’s appearance.

A starting size of 90 × 120 mm or 100 × 90 mm is often practical for a standard Bordeaux-style 750ml bottle.

Back Wine Label

The back label normally has less visual emphasis but may need considerably more information.

Depending on the market, it can include:

  • Product information
  • Alcohol content
  • Net contents
  • Producer or bottler information
  • Origin information
  • Barcode
  • QR code
  • Sulfite declaration
  • Warning information
  • Ingredients or nutrition information where applicable
  • Tasting notes
  • Brand story

For US-market wines, the TTB identifies mandatory information including brand name, class/type designation, and certain appellation information on the brand label, while alcohol content, net contents, name and address, health warning, sulfite declaration, and certain other information may appear on any label.

This is why a back label often needs enough vertical space for small but readable text.

For a 750ml bottle, 80 × 105 mm is one practical starting point for a back label, although the final size should be determined by the amount of information and the bottle’s available surface.


Wine Label Size by Bottle Type

The bottle shape is one of the biggest factors influencing label dimensions.

Bordeaux Wine Bottle Label Size

Bordeaux-style bottles have relatively straight sides and are among the easiest bottles to label.

A useful starting point for a 750ml Bordeaux bottle is:

90 × 120 mm front label

or approximately:

3.5 × 4.7 inches

A back label around 80 × 105 mm is another commonly used starting point.

Because the bottle has a relatively straight central body, rectangular labels generally work well.

Burgundy Wine Bottle Label Size

Burgundy-style bottles typically have broader shoulders and a more curved transition from the body to the neck.

A 750ml Burgundy bottle may use a front label around:

90 × 115 mm

This is close to the Bordeaux format, but the slightly different bottle geometry means the same label cannot automatically be transferred between bottle types.

When using textured paper, thick specialty paper, or rigid metallic materials, test the curvature carefully.

Champagne and Sparkling Wine Label Size

Champagne and sparkling wine bottles are different again.

A typical commercial starting point is around:

90 × 80 mm

for the main label.

Sparkling wine bottles need to withstand internal pressure, so their shape and glass construction differ from many still-wine bottles. A shorter label can create a better visual balance on the wider bottle.

375ml Half-Bottle Label Size

Half bottles commonly hold 375ml, exactly half the volume of a 750ml bottle.

However, the label should not simply be scaled to 50% of a 750ml label.

A commercial starting point is approximately:

70 × 90 mm

for a 375ml bottle.

The bottle’s actual diameter and straight-sided area still need to be checked.

1.5L Magnum Wine Label Size

A Magnum contains 1.5 liters, or twice the wine volume of a standard 750ml bottle.

A practical starting point is approximately:

110 × 140 mm

for the front label.

However, the design should not simply enlarge every element by the same percentage. Reconsider typography, logo proportions, decorative elements, and white space for the larger bottle.


How to Measure a Wine Bottle for a Custom Label

Before ordering custom wine labels, measure the actual bottle rather than relying only on the stated capacity.

Step 1: Measure the bottle diameter

Use a ruler or caliper to measure the diameter of the straight section where the label will be placed.

Step 2: Measure the usable height

Measure from the lower point of the label area to the point where the bottle begins to curve toward the shoulder.

This is the usable labeling height, not the total bottle height.

Step 3: Measure the circumference

For a wrap-around label, measure the circumference of the actual labeling area.

The circumference can be estimated from diameter:

Circumference = π × Diameter

For example, if a cylindrical section has a diameter of 78 mm:

78 × 3.1416 ≈ 245 mm

That gives approximately 245 mm around the bottle before accounting for the specific design and application requirements.

Step 4: Check the curvature

This is particularly important for Burgundy, Champagne, and unusual bottle shapes.

A label can technically have the correct width but still wrinkle if it extends too far into a curved shoulder.

Step 5: Create a paper mockup

This is one of the simplest and most useful tests.

Print the proposed label at 100% actual size, cut it out, and place it on the real bottle.

Check:

  • Width
  • Height
  • Curvature
  • Position
  • Logo visibility
  • Barcode placement
  • Text readability
  • Distance from bottle edges

Only after this physical test should you confirm the final wine label dimensions.


Wine Label Dimensions in Inches and Millimeters

International wine brands frequently work between inches and millimeters.

Here are some useful conversions:

InchesApprox. Millimeters
2 × 3 in51 × 76 mm
2.5 × 3.5 in64 × 89 mm
3 × 4 in76 × 102 mm
3 × 4.5 in76 × 114 mm
3.5 × 4 in89 × 102 mm
3.5 × 4.7 in89 × 120 mm
4 × 3.5 in102 × 89 mm
4 × 5 in102 × 127 mm

For B2B wine label production, it is usually best to provide the manufacturer with dimensions in millimeters, especially when the label will be die-cut or produced according to a technical drawing.

For example:

Instead of saying:

“Make the label about 3.5 × 4.5 inches.”

provide:

89 × 114 mm finished size

This reduces ambiguity during artwork preparation and production.


What Size Should a Custom Wine Label Be?

There is no single “best” wine label size.

The correct size is a combination of:

  1. Bottle capacity
  2. Bottle diameter
  3. Bottle shape
  4. Usable straight surface
  5. Label position
  6. Amount of information
  7. Artwork proportions
  8. Material
  9. Adhesive
  10. Application method

For example, a premium 750ml Burgundy wine with a textured cotton-paper label may need a different construction from a mass-market Bordeaux wine using standard coated paper.

Similarly, a transparent PET label can look very different from a heavily embossed paper label, even if both have the same dimensions.

This is why professional wine label manufacturing should begin with the bottle, not the label template.


Wine Label Size and Artwork Requirements

The finished label size is not necessarily the same as the artwork file size.

Suppose the finished label is:

90 × 120 mm

The printer may require additional bleed outside the trim line.

A commercial label guide may use a 2 mm bleed zone and 3 mm safe zone, for example, but these specifications are not universal and should be confirmed with the actual label manufacturer.

Finished Size

This is the final physical size of the label after cutting.

Bleed

Bleed extends background colors or graphics beyond the cutting line to prevent unwanted white edges caused by minor cutting variation.

Safe Area

Important text and logos should remain inside the safe area rather than being positioned too close to the trim.

Die-Cut Line

For custom-shaped wine labels, the die-cut path defines the final shape.

For example, a wine brand may request:

  • Oval label
  • Shield label
  • Arch-top label
  • Circular label
  • Custom winery logo shape
  • Irregular artistic shape

The manufacturer should receive the final dimensions and cutting requirements before production.


Does Wine Label Material Affect Label Size?

Yes.

Wine labels are strongly associated with material texture and finishing quality, especially in premium wine packaging.

Coated Paper

Coated paper is economical and suitable for high-volume wine production.

It works well for:

  • Entry-level wine
  • Private-label wine
  • Promotional products
  • Large production runs

Specialty Art Paper

Premium wines often use:

  • Cotton paper
  • Pearl paper
  • Kraft paper
  • Textured paper
  • Embossed paper
  • Soft-touch paper

These materials can give the bottle a more sophisticated appearance.

Clear PET

Transparent PET is suitable for minimalist wine packaging.

The bottle or wine color can become part of the visual design.

Foil and Metallic Materials

Gold, silver, copper, and other metallic effects can be used for premium wine and spirits.

Finishing options can include:

  • Hot stamping
  • Embossing
  • Debossing
  • Spot UV
  • Metallic printing
  • Holographic effects

Select the material based on the bottle shape and label size. A rigid material may behave differently around a curved surface than a flexible synthetic film.


Common Wine Label Size Mistakes

Mistake 1: Assuming Every 750ml Bottle Uses the Same Label

A 750ml Bordeaux bottle and a 750ml Champagne bottle are not the same shape.

Capacity does not determine the usable label area.

Mistake 2: Measuring the Whole Bottle

You only need to measure the usable labeling area, not the entire bottle height.

Mistake 3: Ignoring Bottle Curvature

A label may look fine on a computer but wrinkle when applied to a curved shoulder.

Mistake 4: Making the Back Label Too Small

Regulatory and product information can quickly consume available space.

For US wine products, TTB guidance identifies multiple mandatory statements, including alcohol content, net contents, name and address, health warning information, and sulfite declarations, depending on the product and circumstances.

Mistake 5: Designing Before Confirming the Bottle

The correct workflow is:

Bottle → measurements → label structure → artwork → sample → mass production

not:

Artwork → find a bottle later

Mistake 6: Forgetting Barcode and QR Code Space

A back label may look attractive until the barcode, QR code, legal information, and producer details are added.

Leave enough space for all required information before finalizing the design.


How to Choose the Right Wine Label Size

A practical decision process looks like this:

For a standard 750ml Bordeaux bottle

Start by testing:

90 × 120 mm front label

and approximately:

80 × 105 mm back label

For a Burgundy bottle

Test:

90 × 115 mm

and check the shoulder curvature carefully.

For Champagne or sparkling wine

Test a shorter format such as:

90 × 80 mm

For a 375ml bottle

Start around:

70 × 90 mm

For a 1.5L Magnum

A starting point around:

110 × 140 mm

can be considered.

These figures should be treated as starting dimensions, not fixed standards. Actual bottles vary, and the final specification should be confirmed using the physical bottle or technical bottle drawing.


Custom Wine Labels from Perfect Label

Perfect Label provides custom wine label manufacturing and OEM/ODM label solutions for wineries, wine brands, private-label producers, importers, distributors, and packaging companies.

Rather than forcing every project into a standard template, labels can be customized to match the bottle and branding requirements.

Customization can include:

  • Label dimensions
  • Custom shapes
  • Front and back labels
  • Neck labels
  • Wrap-around labels
  • Paper materials
  • Specialty art papers
  • Clear PET
  • Metallic materials
  • Waterproof materials
  • Custom adhesives
  • Gold and silver foil
  • Embossing
  • Debossing
  • Spot UV
  • Matte or glossy finishes
  • Variable data
  • Barcode and QR code printing
  • Custom die-cutting

For premium wine brands, material selection is particularly important. A textured paper with embossing can create a completely different perception from a standard coated-paper label, even when both use exactly the same dimensions.

Perfect Label can also work from the actual bottle dimensions, bottle sample, artwork, or packaging requirements to develop a suitable label construction before bulk production.

For international wine projects, review regulatory requirements for the destination market before approving the final artwork. For example, the US TTB states that wine sold in the US must comply with applicable wine-labeling requirements, and its current guidance identifies mandatory information and approval requirements depending on the product.


Wine Label Size FAQ

What is the standard wine label size for a 750ml bottle?

There is no universal standard. A practical starting point for a Bordeaux-style 750ml bottle is around 90 × 120 mm for the front label. Other common designs use approximately 90–100 mm widths with different heights depending on the bottle and artwork.

What size should a 750ml wine back label be?

A practical starting size is around 80 × 105 mm, although the required size depends on the amount of mandatory and optional information and the bottle’s available surface.

What size is a Champagne wine label?

A commonly used starting point for a 750ml Champagne or sparkling wine bottle is approximately 90 × 80 mm. Check the actual dimensions against the bottle before production.

Can I use the same wine label size on different bottles?

Not necessarily. Two bottles may both contain 750ml but have different diameters, shoulder shapes, and usable labeling areas. Always test the label on the actual bottle.

How do I measure a wine bottle for a label?

Measure the diameter, circumference, and usable vertical height of the straight labeling area. Then create a full-size paper mockup and test it on the actual bottle before production.

What is the best wine label size for a premium wine?

There is no single premium size. Premium wine labels are often selected based on bottle shape, brand positioning, information requirements, material, and finishing. A smaller textured label can sometimes look more premium than an oversized label.

Does the label material affect the recommended size?

Yes. Paper, PET, foil, textured stock, and other materials have different flexibility and surface characteristics. Bottle curvature and adhesive performance should be considered together with the material.

Do wine labels need bleed?

Most professionally printed labels require some bleed when artwork extends to the edge, but the exact specification varies by manufacturer and printing process. Confirm the bleed and safe-area requirements with your label supplier before preparing final artwork.

Can Perfect Label make custom-size wine labels?

Yes. Perfect Label provides customized wine labels in different sizes, shapes, materials, adhesives, printing methods, and decorative finishes. Custom specifications can be developed according to the actual wine bottle and packaging requirements.


Final Guide: Start With the Bottle, Not the Template

If you need a quick answer, 90 × 120 mm is a useful starting point for a front label on a conventional 750ml Bordeaux-style wine bottle, while approximately 80 × 105 mm can be considered for the back label. Burgundy, Champagne, 375ml, Magnum, and unusual bottle formats require different starting dimensions.

But the most important principle is:

There is no one-size-fits-all wine label size.

The best label dimensions are determined by the actual bottle’s diameter, circumference, usable surface, curvature, information requirements, material, and application method.

For wine brands preparing a new label, the safest workflow is to measure the bottle → select a starting size → create a full-size mockup → test the label physically → finalize artwork → approve a production sample → begin bulk production.

That approach reduces the risk of wrinkles, poor positioning, insufficient information space, and expensive reprints—and gives the final wine bottle a much more professional appearance.

How to Make Stickers Without Sticker Paper

Making stickers does not always require specialized sticker paper. If you want to decorate a notebook, journal, gift box, phone case, folder, or craft project, you can make simple stickers using ordinary paper, clear packing tape, scissors, and wax paper or parchment paper.

The most practical no-sticker-paper method is a packing-tape sticker. The design is placed between layers of transparent tape, while wax or parchment paper acts as a temporary release backing. This creates a flexible, glossy sticker-like piece without buying adhesive sticker sheets. Craft guides from Crayola and other DIY sources essentially use this tape-and-release-paper approach.

However, homemade stickers and commercially manufactured sticker-paper labels are not equivalent. DIY tape stickers are excellent for small quantities, crafts, testing designs, and personal projects. Sticker paper is generally better when you need predictable adhesion, clean production, professional appearance, or larger quantities.

Can You Make Stickers Without Sticker Paper?

Yes. The simplest method uses regular paper + clear packing tape + wax/parchment paper.

The basic structure is:

Clear tape → printed or hand-drawn design → clear tape → release backing

The tape protects the artwork and creates the outer surface, while the release paper allows the finished sticker to be stored and peeled later.

A typical DIY sticker can be completed in roughly 5–20 minutes, depending on the number, size, and complexity of the designs. Recent DIY guides describe the basic taped method as taking only a few minutes once the artwork is ready.

The method is inexpensive because it uses materials that many households already have.

What You Need

For a basic batch of homemade stickers, prepare:

  • Plain printer or copy paper
  • Clear packing tape
  • Wax paper or parchment paper
  • Scissors or a craft knife
  • Pencil and markers, or a printer
  • Ruler or plastic card
  • Optional: double-sided tape
  • Optional: colored pencils
  • Optional: cutting machine

For beginners, clear packing tape around 48–75 mm wide is convenient because it provides enough surface area for small stickers. If the tape is narrower than the artwork, several strips can be overlapped slightly.

One important distinction: the backing paper must allow the adhesive to release. Crayola’s DIY method specifically places packing tape on wax paper before adding the artwork and another tape layer.

How to Make Stickers Without Sticker Paper Step by Step

Step 1: Create Your Sticker Design

Start with a simple illustration, logo, cartoon, lettering, photograph, or graphic.

You can draw directly on ordinary paper or print the design using a home printer.

For the easiest cutting process, leave a border around the artwork. A 2–5 mm border is a useful practical starting point for small handmade stickers, although the ideal border depends on the design.

If your artwork contains very small text or extremely thin lines, test one sticker first. Homemade tape construction can visually soften very fine details compared with professionally printed label stock.

Step 2: Cut the Artwork

Cut around each design, leaving a small amount of surrounding paper.

Do not cut directly against every tiny detail at this stage. A simple outline is faster and makes it easier to seal the design between the tape layers.

For example, if you are making a 50 mm cartoon sticker, leaving approximately 2–4 mm around the artwork can make the final piece easier to handle.

Step 3: Prepare the Release Backing

Place a sheet of wax paper or suitable parchment paper on a flat work surface.

Place a strip of clear packing tape onto the release paper.

The important point is that the tape should be positioned so its adhesive side contacts the release backing. This creates the peelable base of the sticker.

Crayola’s published DIY method follows this basic construction: tape is placed on wax paper, the design is placed on the tape, and another strip of tape covers the design.

Step 4: Place the Artwork on the Tape

Put your cut design onto the exposed adhesive surface.

Press the paper down gently.

Work from the center toward the edges to reduce air pockets. Use a ruler, bank card, or plastic scraper to smooth the surface.

Avoid pressing too aggressively because excessive pressure can distort lightweight paper.

Step 5: Add the Top Tape Layer

Place another piece of clear packing tape over the entire design.

The top tape should extend slightly beyond the artwork on all sides.

This creates a sealed sandwich:

Top tape → artwork → bottom tape → release paper

Press the top layer firmly but smoothly.

Check the edges carefully. If the artwork extends beyond the tape, it may not be fully protected.

Step 6: Remove Air Bubbles

Small bubbles do not necessarily make the sticker unusable, but they reduce the visual quality.

Use a plastic card to gently push bubbles toward the edge.

For a professional-looking result, work slowly from one side to the other instead of pressing the entire surface at once.

Step 7: Cut the Finished Sticker

Cut around the sticker while leaving a small sealed border.

This border is important because the two tape layers need to remain connected around the artwork.

A practical starting point is a 2–5 mm transparent border.

For complex shapes, rounded corners are usually easier to cut and less likely to create sharp lifting points.

Step 8: Peel and Apply

When you are ready to use the sticker, peel the completed piece away from the wax or parchment backing.

Apply it to a clean, dry, smooth surface.

Press from the center outward and hold the sticker down firmly for several seconds.

The result should be a thin, transparent, glossy, homemade sticker.

What Results Can You Expect?

A properly made packing-tape sticker can have several useful characteristics:

FeatureTypical DIY Result
AppearanceGlossy and transparent
ThicknessThin to medium
Water resistanceGood on the tape-covered surface
AdhesionModerate and dependent on tape
ShapeFully customizable
PrintingDepends on printer/paper
Production speedGood for small batches
DurabilitySuitable for light-duty use
Professional appearanceModerate
Large-scale productionNot practical

The most noticeable advantage is the glossy protective surface. The clear tape effectively acts as a protective layer over the artwork.

Some DIY methods describe the finished tape construction as waterproof or water-resistant. However, this should not be interpreted as equivalent to a professionally engineered waterproof label. Performance depends on the tape, paper, sealing quality, edges, and application surface.

How to Make Stickers Without Sticker Paper and Without a Printer

You can also make stickers completely by hand.

Draw the design using markers, colored pencils, or pens on ordinary paper.

Then follow the same tape method:

  1. Draw the design.
  2. Cut it out.
  3. Put packing tape on release paper.
  4. Place the design onto the tape.
  5. Cover it with another tape layer.
  6. Smooth the surface.
  7. Cut around the design.
  8. Peel the backing.
  9. Apply the sticker.

This method is particularly useful for children’s crafts, journaling, handmade cards, classroom activities, and personalized gifts.

How to Make Waterproof-Style Stickers Without Sticker Paper

The packing-tape method can provide a water-resistant outer surface because clear tape covers the paper.

However, the weakest points are usually the edges and adhesive layer.

If water reaches the paper through an unsealed edge, the paper can absorb moisture. Therefore, make sure the tape layers overlap around the entire artwork.

For a water bottle, outdoor equipment, automotive surface, or product packaging, DIY tape stickers should be treated as a temporary craft solution rather than a guaranteed outdoor label.

For products exposed to UV light, rain, chemicals, abrasion, or frequent washing, professionally manufactured synthetic or vinyl labels are generally a better choice.

How Much Do DIY Stickers Cost?

DIY stickers can be very inexpensive, especially when the materials are already available.

For example, suppose you already have paper and scissors and only need packing tape and release paper. A small batch may cost only a few dollars in consumables.

The real cost is labor.

Imagine making 50 stickers and spending an average of 2 minutes per sticker:

50 × 2 minutes = 100 minutes

That is approximately 1 hour and 40 minutes of manual work.

For 100 stickers at the same rate:

100 × 2 minutes = 200 minutes

That is more than 3 hours.

These are practical time estimates rather than fixed production standards. Actual time depends heavily on sticker size, artwork complexity, cutting method, and experience.

This is why DIY becomes less attractive as quantities increase.

DIY Stickers vs. Sticker Paper

The biggest difference is the adhesive system.

Sticker paper is manufactured with an integrated adhesive layer and release liner. The user prints directly onto the printable surface, cuts the design, and peels it from the backing.

The DIY tape method creates the sticker through an additional construction process.

FactorDIY Without Sticker PaperSticker Paper
Initial material costVery lowHigher
PreparationMore manualSimple
Adhesive consistencyVariableMore consistent
Surface finishUsually glossyMatte, gloss, clear, textured options
Waterproof optionsLimitedMany professional options
CuttingManual or machineManual or machine
Small DIY projectsExcellentExcellent
100+ piecesLabor intensiveMore efficient
Commercial packagingUsually unsuitableSuitable with correct specification
BrandingBasicProfessional
Repeat productionDifficultEasier
Industrial applicationsNot recommendedAvailable

Sticker paper is designed specifically for label production, while the tape method is essentially a clever craft workaround.

When Should You Use DIY Stickers?

DIY stickers are ideal when you need:

  • 1–20 stickers
  • Personal artwork
  • Journal decoration
  • School projects
  • Children’s crafts
  • Temporary decoration
  • Handmade gifts
  • Design testing
  • Prototype samples

They are particularly useful when you want to test a design before investing in professional printing.

For example, a small business could create 5–10 handmade prototypes, apply them to the intended packaging, and evaluate the size and appearance before ordering hundreds or thousands of finished labels.

When Is Sticker Paper the Better Choice?

Use sticker paper when you need:

  • Professional packaging
  • Consistent adhesive performance
  • Large quantities
  • Clean die-cutting
  • Repeat orders
  • Barcode or QR-code labels
  • Product identification
  • Retail packaging
  • Premium branding
  • More predictable durability

For commercial products, the label should be selected according to the actual environment.

A refrigerated food package, for example, may require a different adhesive and face material from a dry indoor product. Similarly, automotive labels, outdoor labels, cosmetic packaging, and electronic product labels may require completely different constructions.

How Professional Custom Sticker Manufacturing Works

For businesses that need hundreds, thousands, or millions of stickers, a professional manufacturer can engineer the label around the application.

The process generally includes:

1. Artwork Preparation

The manufacturer checks dimensions, colors, bleed, fonts, and cutting lines.

2. Material Selection

The label face material, adhesive, and release liner are selected according to the application.

3. Printing

The artwork is printed using an appropriate commercial printing process.

4. Finishing

Depending on the product, options can include:

  • Matte coating
  • Gloss coating
  • Lamination
  • Hot stamping
  • Embossing
  • Metallic effects
  • Transparent effects

5. Die Cutting

The stickers are cut into the required shape while keeping the release liner intact.

6. Quality Inspection

Professional production can check color consistency, dimensions, printing quality, cutting accuracy, adhesive performance, and packaging.

This approach is much more scalable than manually constructing every sticker from tape.

Can DIY Stickers Replace Commercial Sticker Paper?

For crafts: yes.

For prototypes: yes.

For personal decoration: yes.

For professional product labels: usually no.

The key difference is not simply appearance. It is repeatability and performance.

A handmade sticker may look excellent on a notebook but behave differently when exposed to refrigeration, humidity, abrasion, sunlight, chemicals, or repeated handling.

Commercial sticker materials allow manufacturers to select the face stock and adhesive according to those conditions.

Final Verdict: Which Method Should You Choose?

If you need a few creative stickers immediately and do not have sticker paper, ordinary paper + clear packing tape + wax/parchment release paper is one of the easiest solutions.

The process is simple:

Design → Print or Draw → Cut → Tape → Seal → Cut → Peel → Apply

The finished sticker can be glossy, flexible, visually attractive, and reasonably resistant to light moisture.

But if your goal is to sell products, label packaging, build a brand, or manufacture hundreds or thousands of stickers, dedicated sticker paper or professionally engineered label materials are the better choice.

The DIY method solves the problem of “I need a sticker right now.”

Professional sticker manufacturing solves the much bigger problem of “I need thousands of stickers that look and perform the same every time.”

That distinction is important. A clever kitchen-table hack can be perfect for Saturday afternoon crafts—but it probably should not be responsible for Monday morning’s entire product shipment.